gas-saf-register logo

No Hot Water: What Do I Do?

Plumber while repairing an hot-water heater

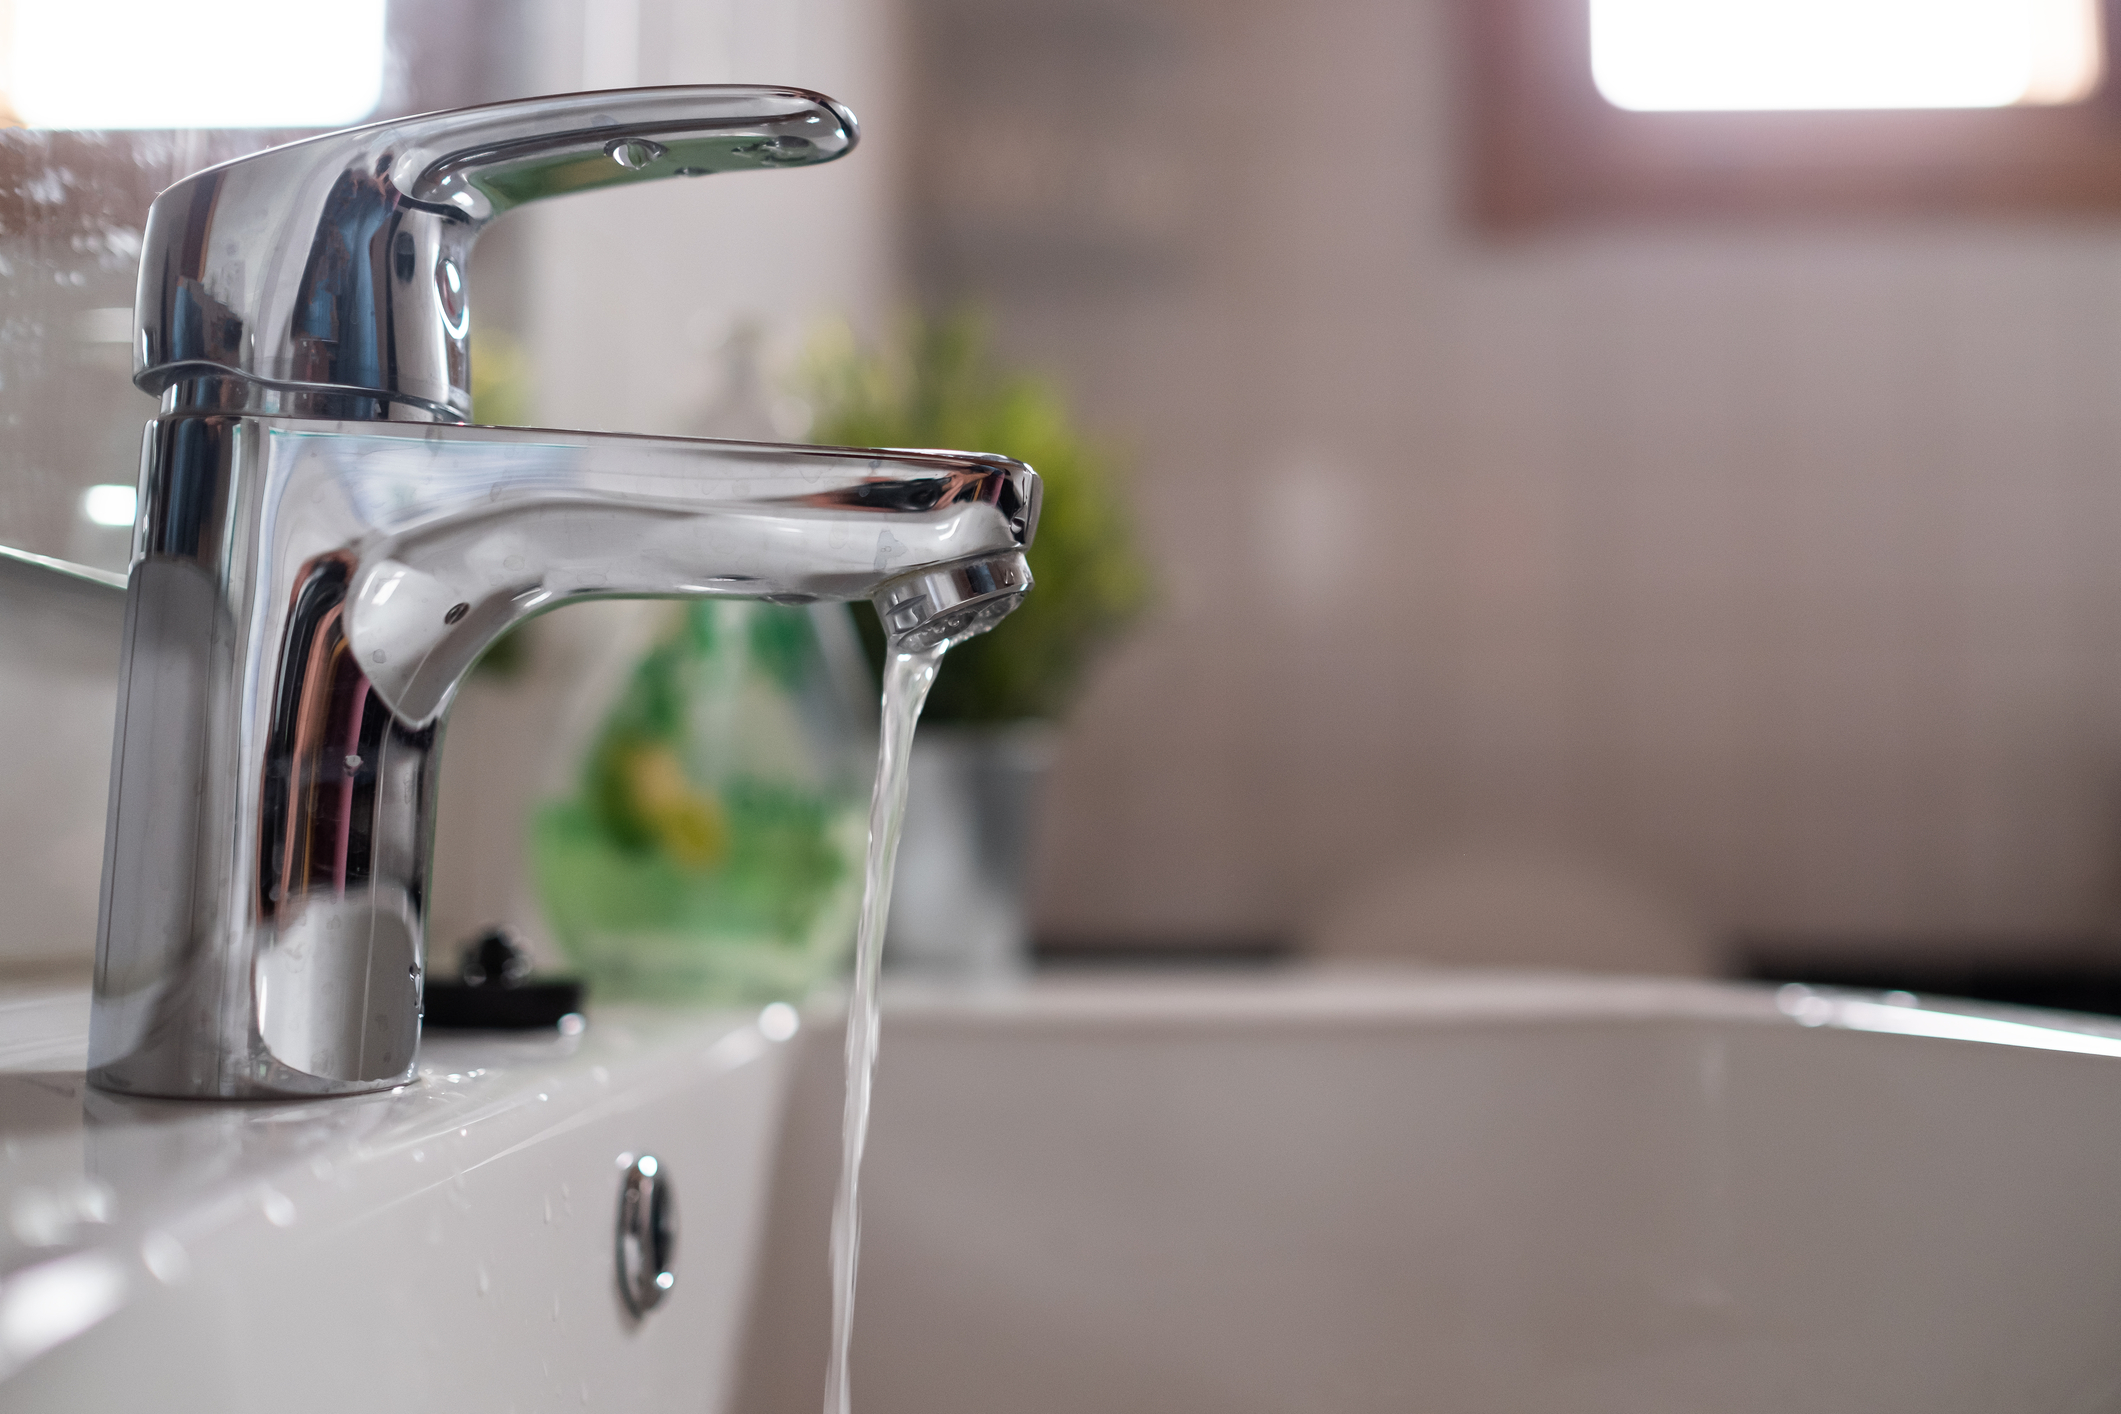
You are getting ready to go to work early in the morning, and you want to wash your face. You turn on the tap and wait for a minute or two for it to heat up, but all you get is cold water. It isn’t exactly the best way to start your day. No hot water problems can continue throughout the day, and you have to deal with it when you come home. 

Not using hot water can be a lifestyle choice, and yes, there are people in the UK who don’t mind the cold. However, when you want it and it isn’t there, it can be one of the worst things. The lack of consistent hot water can significantly affect how you go about your day. Let’s take away the helpless feeling you get from these types of plumbing and heating problems. Here are common questions for your no hot water problems and things you can do about it: 

Why Don’t I Have Hot Water?

Your central heating and plumbing system is a complicated network. Any of the pieces could be faulty, and the domino-effect follows. One after the other, different parts of the system will follow. The best way to detect the source of your no hot water issues is to break down your system and inspect them yourself. You could have a boiler, pipe, diverter, or water problems.

How Do You Get Your Hot Water?

Before you can inspect your set up, know your setup better. You get your cold water from the main supply pipe just outside your house. It enters your home through the main house shut off valve. From there, it goes to your boiler for heating hot water. Some of the heated water goes through your pipes and into the radiators around your house. That hot water cycles through your home, creating your heating system. 

The rest of the heated water enters your hot water cylinder. It stays there until you need to use it. From this cylinder in the basement or attic, it goes to the hot water taps around the house. 

Find the best local plumbers in the UK!

This process is how most people in the UK get their hot water supply. There is only one exception to that, and it is for those who use a combination (combi) boiler instead of a system boiler. Combi boilers use electricity instead of gas or fuel. This means that they do not have a hot water cylinder. Its compact body makes it a popular choice for smaller flats. You get your hot water with your combi just by turning on your tap. It heats as you go. 

Is It A Central Heating Problem?

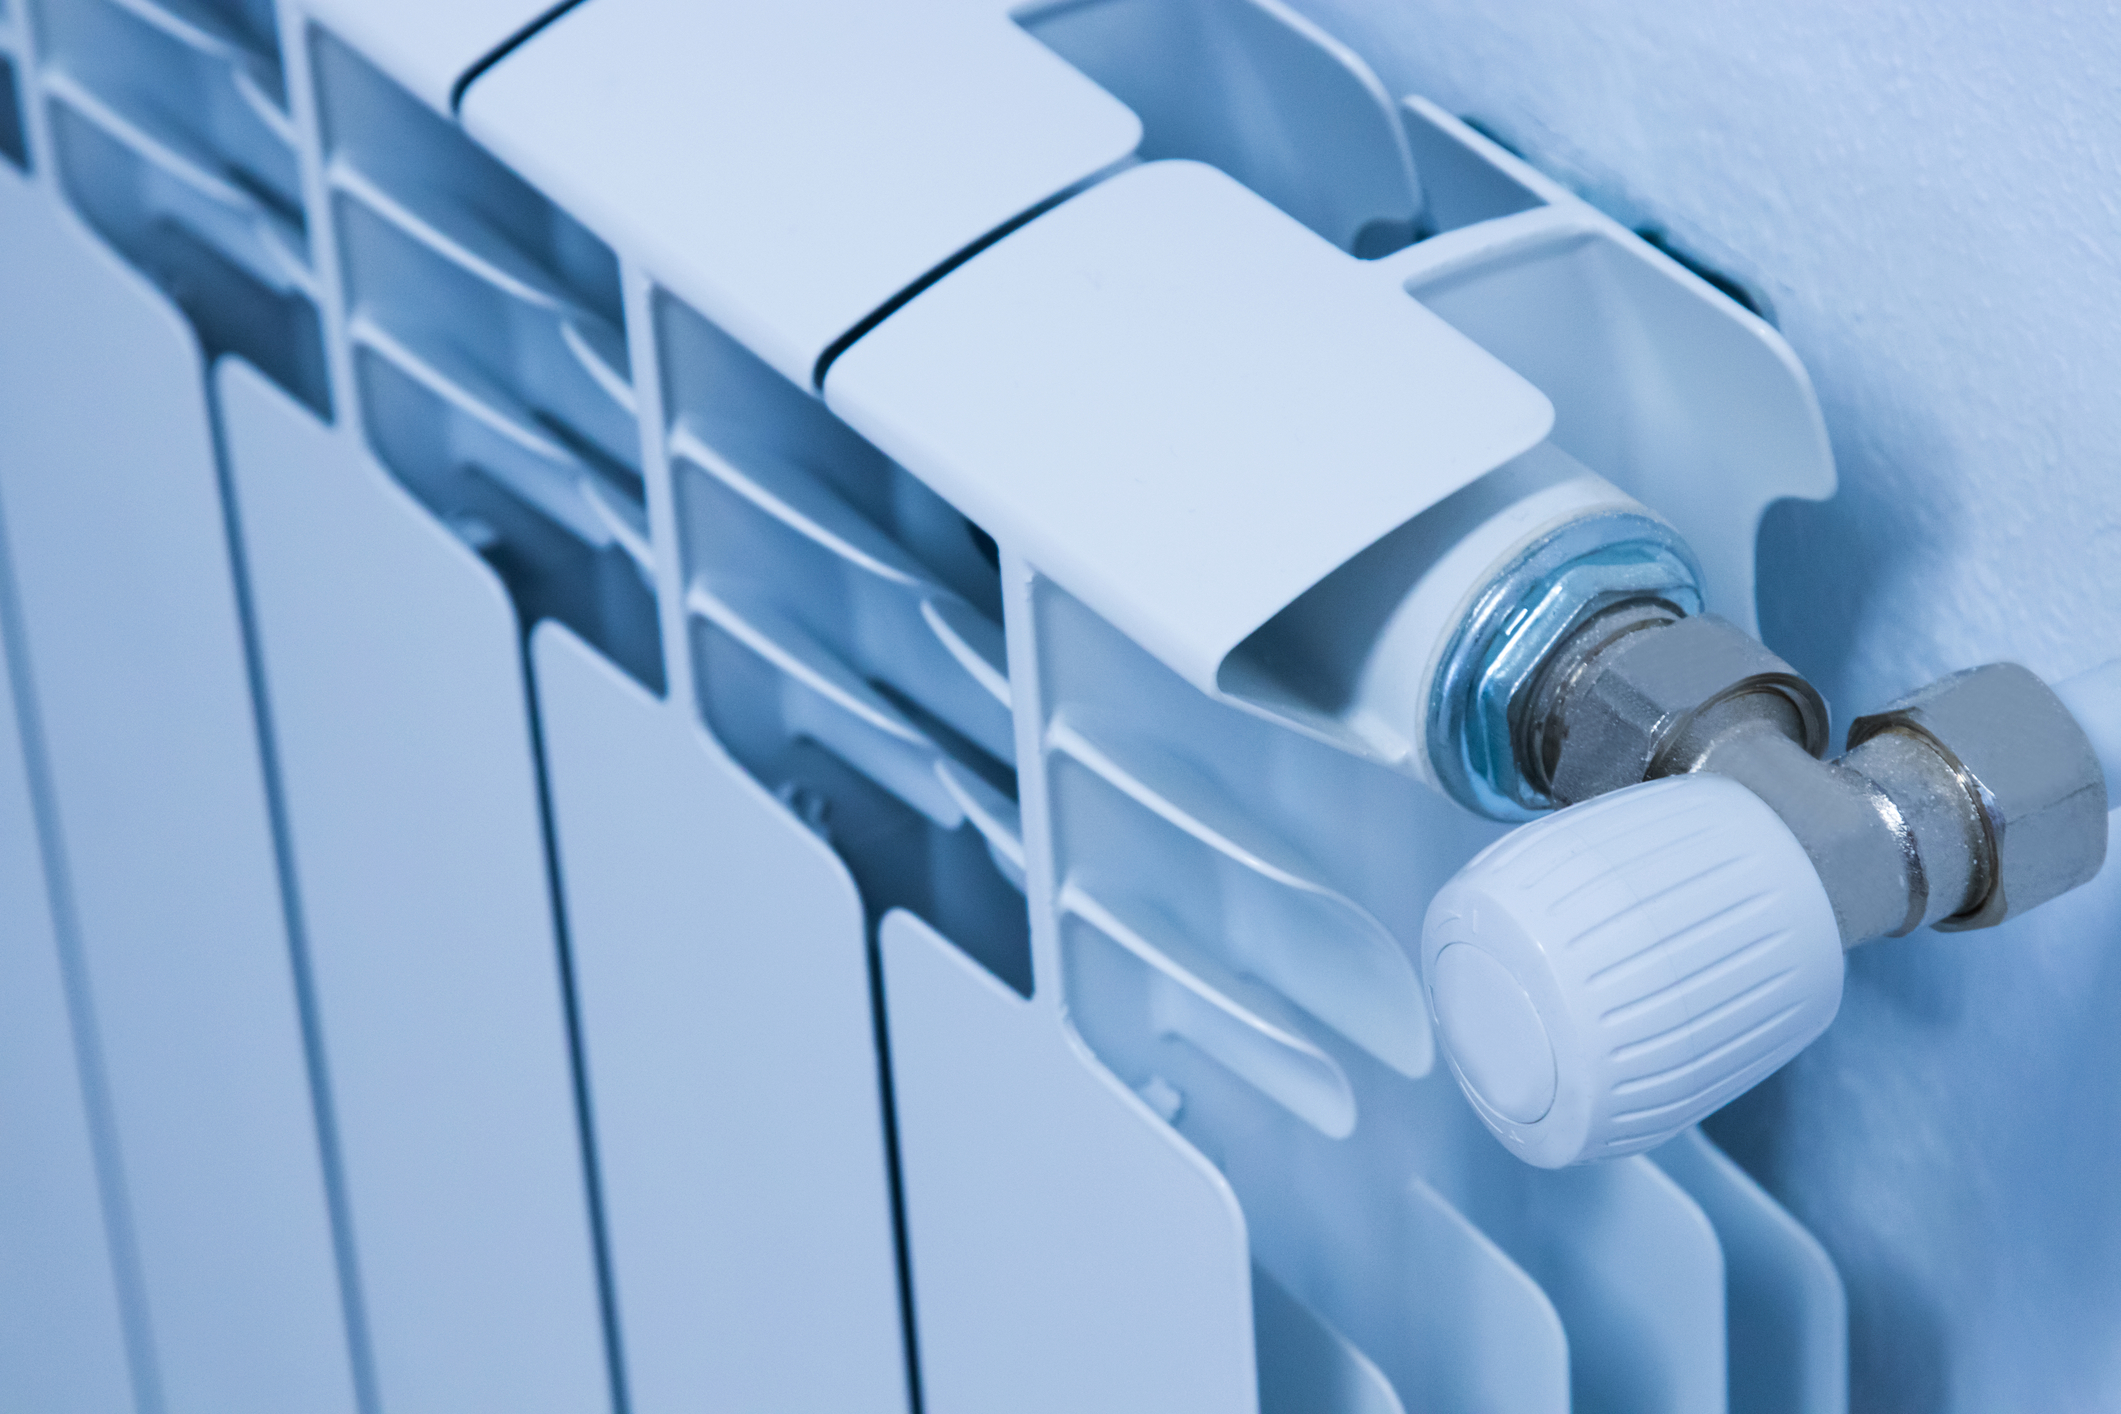
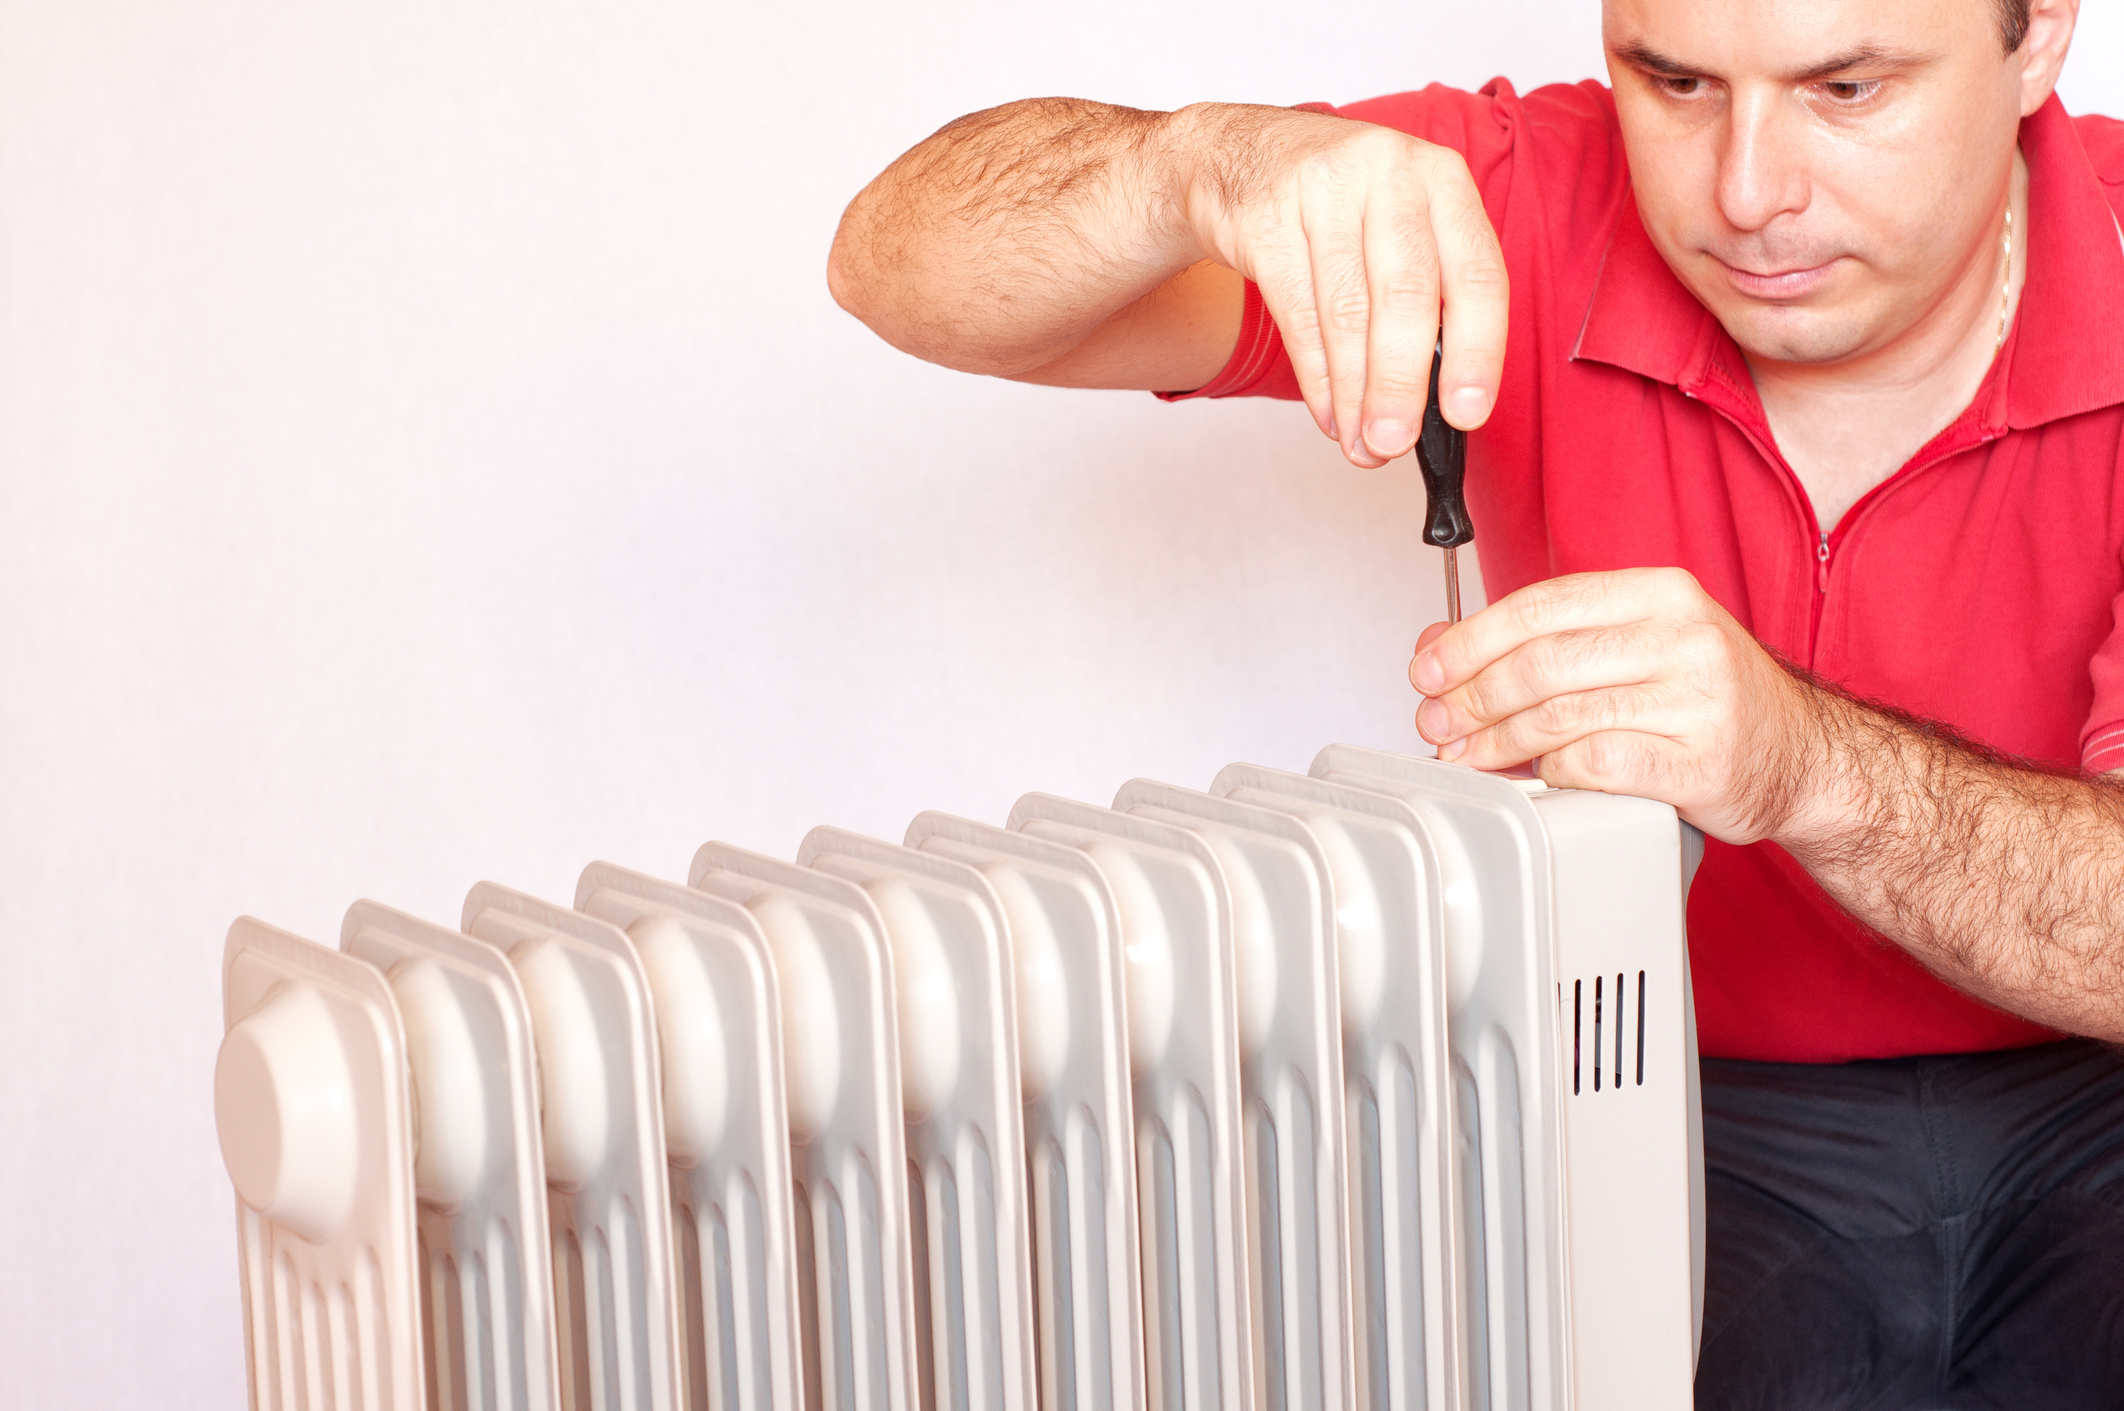
Now that you know the process of how you get your hot water, where did it all go wrong? If it is a central heating problem, pay close attention to your boiler and hot water pressure. See if your boiler is turned on, for gas and oil boilers there should be a steady pilot light. To check if your boiler is working go to your radiators and see if they are warm. If you haven’t balanced your radiators in a while, your radiators might not heat evenly. It is best to check all the radiators around your home. 

My Boiler Is Not Working

Broken boilers are not the only things you should fix. A weak boiler’s hot water isn’t ideal either. It takes too much and might not cool faster. The boiler for hot water must be able to handle different jobs around your home. Don’t wait for no hot water problems to come before you make the changes. If it doesn’t work for you, try to replace or replace it. There are three obvious problems for a faulty boiler: 

  1. It isn’t on
  2. It’s emergency lockout activates
  3. There are faulty parts

While many things can go wrong, the problem might be a simple one. Did you turn on your heating? Did the power cut off recently? Repairs and renovations might require turning off your heat. Check if they did anything to your thermostat or boiler. 

When the issue is with the boiler, it has an emergency lockout feature. The boiler turns itself off to inform you that there is something wrong. The reason for the shut-down varies. The common causes are in your manufacturer’s handbook. If you don’t want to go through the list, call a professional heating engineer to take a look. 

For faulty parts, it could be the diaphragm, airlock, valves, or thermostat connection. Poor maintenance leads to these issues, and there is no DIY friendly way to go about it. The worst-case scenario means you need a new boiler. Please find a professional for all your major boiler repairs and new boiler installations. They must be Gas Safe engineers. You can check their ID numbers through the Gas Safe Register website

There Is No Pilot Light

A significant gas /oil burning boiler problem that leads to no hot water is the pilot light. It should be an intense blue flame. No pilot light equals no hot water from the boiler. If it is out, try to restart your system boiler. It might come back, but rebooting is not a permanent solution. It might last long enough to get your house in order before you call a heating engineer to take a look. Again, do not do gas-related work. It is dangerous and illegal to attempt on your own. 

The Pressure Is Wrong

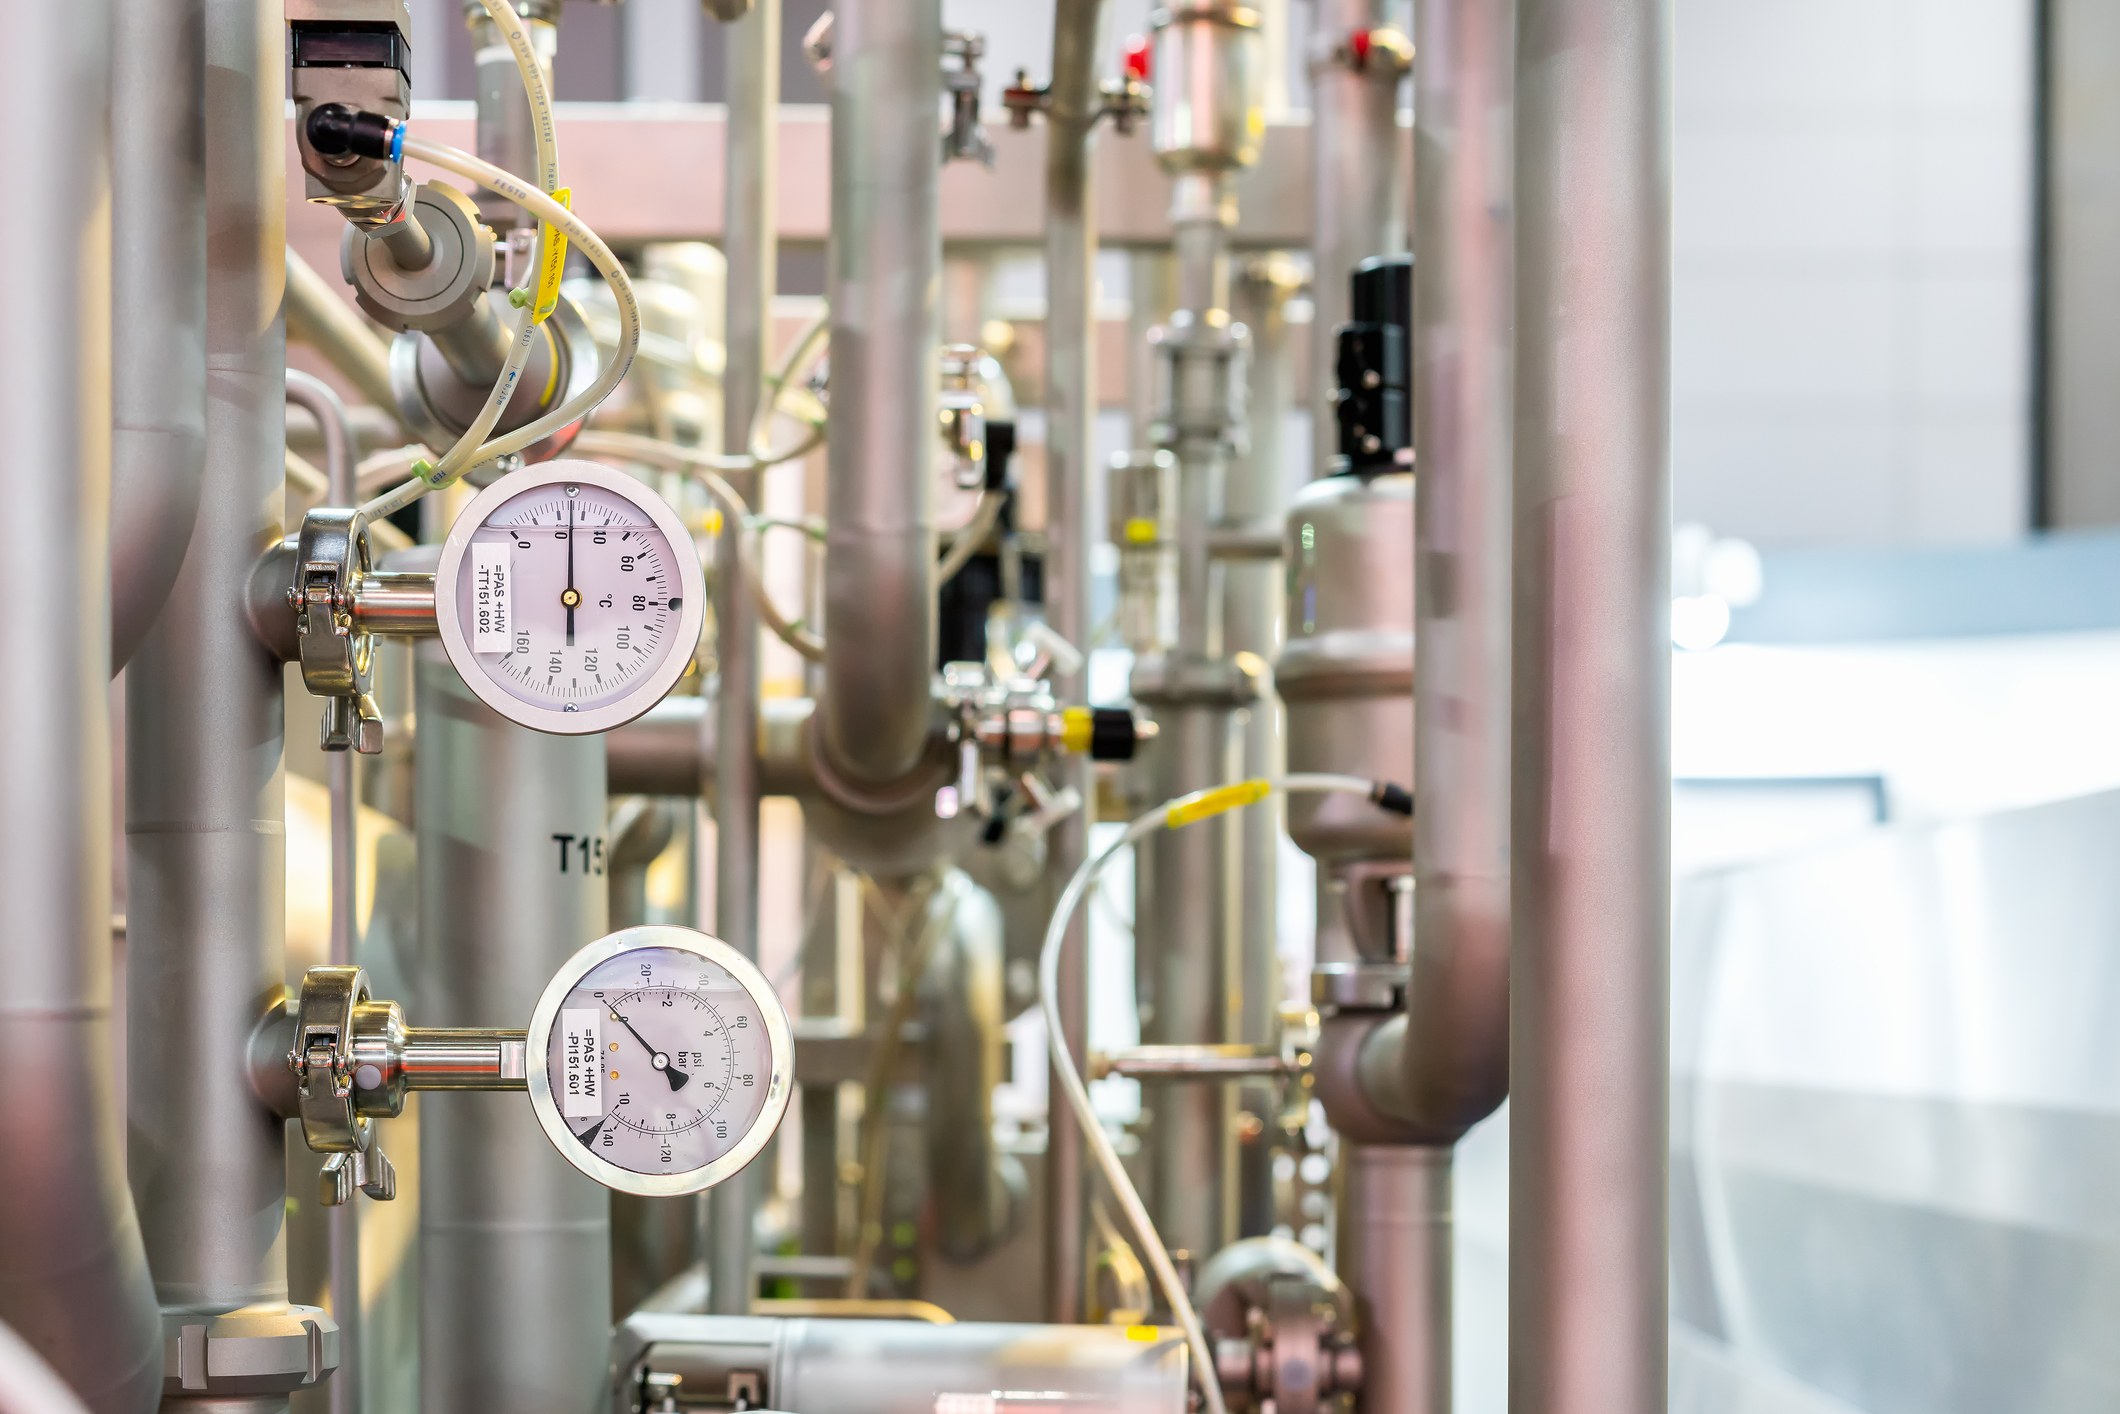
Now, even with your boiler working, you can still struggle to get hot water. Your boiler pressure might be too high or too low. Anything too extreme means your boiler will shut down as a safety measure. 

Fixing your boiler pressure isn’t hard. You can do this yourself by bleeding your radiators if the pressure is too high. When the pressure is too low, you add more water in the system with the filling loop. The pressure gauge varies from boiler model. Whether it uses dials or levels, you can always check the manual for more details.  

The Timer Is Not Working

Every boiler has a timer or program to help manage your heating schedule. Modern models no longer run 24/7. There are different settings you can customise to create your ideal heating and hot water set up. 

A recent power cut could affect your timer. It can reset to default settings. So check the timer and see if that is the case. Your timer could also change time automatically. Check your timer and set it to the right time. When the schedule is off, you get no hot water. If the timer is not working after that, the problem might be more serious. It needs professional help.

Is It A Pipe Problem? 

When your boiler is in the clear, and there are no apparent problems, move to the pipes. While you do not see your pipes, they play a vital part in ensuring the water and heat distributes evenly throughout the house. Two common pipe problems lead to no hot water: frozen pipes and pipes with leaks. 

Frozen Pipes

Frozen pipes are a common problem as you approach winter. If you lose your hot water and heating during this season, this is your prime suspect. Besides the main pipe entering your house, your condensate pipe can also freeze. The condensate pipe is to properly ventilate your home. The water vapour from your heating travels through these flues. It can collect and block off your pipe. 

Frozen pipes are easy to spot. Your taps might give weak, uneven, or no water at all. If the pipes are visible, you can see a bit of frost around it. When the problem is severe, your walls can be a bit damp from the condensation. 

Try to clear the blockage the best way you can and slowly thaw your pipe. You can heat water on your hob or electric kettle to pour over your pipe. You can also try purchasing defrosting kits from the hardware store. 

Water Leaks 

Leaks in your pipes or other facilities could reduce the pressure in your system. When that happens, you get pressure problems. Follow the steps in the previous section to get hot water again. You can read more about dealing with leaks here

While you can adjust the pressure, it is not a long-term solution for your pipe. Tying it off with rubber or tape is not an ideal solution either. For every kind of pipe repair, even leaks, contact a professional. You can get your hot water back and save money in water bills. No matter how big or small your leaks are, they are too expensive to leave on their own. 

Connect with the best local plumbers and boiler engineers near you

Is It Neither?

Hot water supply will always boil down to your heating or water system. When the methods above do not work, it is probably a mechanism that we don’t always notice. It could also be a response to changes in your environment. Here are common scenarios where it may seem like it is not the boiler or pipes: 

No Central Heating, But I Have Hot Water

When you lose heating in your home, but still have water, there are two possibilities. The first is that your boiler went out, but you still have a full hot water cylinder. When you still have hot water running through your pipes, it means the breakdown is pretty recent. Go through the common boiler problems and the steps you can take to repair them here. 

No central heating, but you have hot water could be a radiator or flue problem. When your radiators are not bleed and balanced, there are cold spots in your house. You can read more about radiator problems here

No Hot Water, But I Have Heating

If it is the opposite scenario and you have no hot water, but have proper heating check your timer. Maybe the boiler did not heat the water because of the faulty schedule. Another issue could lie with the diverter valve. The diverter valve controls the hot water flow in your home. You can get a plumber to replace it and have it good as new. 

When you replace the diverter valve, but the replacement doesn’t work, don’t be quick to judge! Issues persist when it is stuck on the central heating system. It could be minor issues with installation. A plumber can tweak it, no need for a replacement.  

The Hot Water Only Works When There Is Heating

This scenario is common among combi boiler users. However, for those with a hot water cylinder, it might be a bit odd. In this case, you may need to get a bigger hot water cylinder. Ask the other members of your family about their hot water habits. Your experience might not be the same as the others. If no one else has a problem, then you mostly get the tail end of your hot water supply. 

If the size is good enough for your family, but only get hot water with heating, your cylinder might not be insulated. Hot water tanks stay in cold parts of your home with inadequate heating and insulation. You can get an insulated jacket from the hardware store. 

Hot Water In Some Parts of The House

When you get hot water, but it limits to different parts of your house it could be the mixing or anti-scalding valve. It might be stuck in one setting or destroyed. You may need a plumber to repair this. 

How Do I Prevent This From Happening Again?

The winter can be cruel, and no hot water makes it even more unbearable. You can actively combat this by maintaining your plumbing and heating system. Preventive measures you can do on your own is to lag your pipes before winter comes. You can buy DIY kits in stores near you. Don’tDon’t forget the insulated jacket for your hot water tank. 

You can try to maintain your system the best you can by keeping the pressure within the best range possible and taking away clutter surrounding your boiler. You can also clear out the things blocking your flues. 

Annual check-ups can make a significant difference for your boiler, radiators, and pipes. Besides dealing with your no water problem, it can also keep your system working efficiently. So no more high gas or fuel bills! Plumbingforce provides regular service for all your plumbing and heating needs. You can check our other gas and plumbing-related services like our same-day service. If you need a quick fix, we try to respond within the day.

Everything You Need To Know About A Megaflow Cylinder

megaflow cylinder

More and more people in the UK are installing Megaflow heating systems in their homes. This, in turn, begets the question, “What exactly are Megaflow heating systems and what’s so special about them?” 

If you, too, are wondering why exactly what a Megaflow heating system is, then you’ve come to the right place! 

In order to help you understand further why many households are going with the trend and installing their own Megaflow heating systems, we’ve come up with a comprehensive guide which lists everything you would want or need to know about Megaflow.

What Is A Megaflow Unvented Cylinder and How Does It Work?

Megaflow (or Megaflo if you want to be completely accurate) is a hot water storage cylinder made of stainless steel. The Megaflow system was produced by Hetarae Sadia, an expert in the manufacturing of reliable hot water cylinders and storage water heaters among other products. 

As part of a home’s central heating system, the Megaflow efficiently stores hot water and provides its users with an abundance of the said hot water, whenever and wherever they need it.

Moreover, being an unvented system, the Megaflow mimics the pressure of the water mains, thus helping households get a steady stream of hot water, anywhere within your home. This means you wouldn’t have to worry about poor water pressure even when there is more than one outlet (shower or tap) running!

Such unvented cylinders are further classified into two. The direct unvented cylinder and the indirect unvented cylinder.

A direct unvented cylinder takes its supply of cold water from the household’s water mains. True to its name, it makes use of direct heating or an immersion heater inside the cylinder to make hot water. Naturally, once the water in the cylinder has been used up, the direct unvented cylinder tops up on cold water straight from the water mains before heating it up. 

Meanwhile, an indirect unvented cylinder makes use of hot water supplied by an external source such as a traditional home boiler. In such cases, a coil within the cylinder maintains the temperature of the hot water so that it stays at the temperature set by the cylinder’s thermostat. As the hot water from the unvented indirect Megaflo is used, the boiler will start refilling the cylinder with hot water.  

Find the best local plumbers in the UK!

What Are The Pros and Cons of A Megaflow Cylinder?

If you are considering investing in a Megaflo cylinder for your home, it would be ideal for you to weigh the pros and cons of owning one. Here are some factors you may want to consider in your decision making

The Pros of A Megaflow Cylinder

Because you are using an unvented system, you won’t be using a cold water tank. The lack of a cold water tank, in turn, is beneficial for the following reasons:

You don’t need to make room for a sizable tank in addition to a cylinder.

Because water won’t be sitting in a cold water storage tank, the risk of contamination and the collection of sludge and dirt can be minimized.

You can install your Megaflow cylinder almost anywhere within your home.

The water pressure in your system will remain consistent, even when it is being used in multiple places within the house.

A Megaflow cylinder is easy to install, replace and maintain.

Such cylinders have 60mm of insulation.

A Megaflow comes with several safety features such as powering off upon reaching the desired temperature, and the Temperature/Pressure Relief Valve (TPRV) which would drain water out of the cylinder to reduce the pressure inside it. 

The Cons of A Megaflow Cylinder

Because you’ll be using the main water supply for your system, you wouldn’t have backup storage of cold water. 

The system needs water pressure from your main water supply pushing through it to ensure it delivers hot water. If your main water supply is low in pressure, the flow rate of the water reaching your showers and taps will also be weak.

Not all homes have pipework that can withstand the high pressure from the Megaflow. In such cases, replacing the pipework could cost a lot of money.

The high velocity of water flowing within the pipes can be noisy.

How Do You Power Up A Megaflow Cylinder?

Megaflow cylinders use electricity as its power source. As for the heat source, most also use electricity. However, as most Megaflow hot water tanks are also compatible with solar thermal energy, you could easily use solar panels as a power or heat source for your Megaflow direct unvented cylinder as well.

Alternatively, because Megaflow cylinders work with renewable energy, you may easily be able to provide a backup heat source in the event that something goes wrong with your boiler.

Meanwhile, if you are using an indirect unvented cylinder, your boiler may also be using electricity or a gas supply line as its power and heat source. 

Connect with the best local plumbers and boiler engineers near you

Just How Powerful Is A Megaflow Cylinder?

If you live in a large household where people tend to use hot water all at the same time, or if you’re simply wondering about how powerful a Megaflow cylinder is, then you’d be glad to know that the Megaflow is suitable for large households with multiple bathrooms. 

That means one unit will be able to provide for your hot water needs with no problem! And the best part? You can expect a constant and steady stream of water pressure. 

Yes, you read that right. Unlike with traditional or combi boilers alone, you will not experience an overall drop in water pressure with a Megaflow cylinder.

Will I Be Able To Use The Megaflow For A Long Time?

The truth is, it depends. There are varying levels of water hardness in the UK, which means it will depend on where you are located exactly because some regions have soft water, while some have hard water. That means depending on which of these you have in your area, you may be prone to issues like mineral or limescale deposits on your kettle and your pipes. 

However, you wouldn’t have to worry much about such issues with a Megaflow hot water cylinder, as each unit is made of high-quality stainless steel, plus it comes with a 25-year warranty!

Do I Need To Call A Professional To Install and Maintain My Megaflow Cylinder?

Without a doubt, yes. As most central heating systems are connected to a gas supply line one way or the other, it is best to employ the help of a qualified heating engineer to help you with your Megaflow cylinder. Call us now to set an appointment with one of our partner heating engineers!

Common Causes of Low Water Pressure And How To Fix Them

low water pressure

Nothing can beat the feeling of a nice refreshing shower after a long day. The best showers have decent water pressure and a comfortable temperature along with your favourite scent. But can you imagine what it would be like to deal with a weak trickle of water for your shower? It’s sad and honestly quite frustrating.

Low water pressure does not just affect showers. It can happen to any part of your house from your kitchen tap to your flushing toilet. While you can learn about these things before moving in, there are ways you can lose strength over time. Let’s tackle the common causes of low water pressure and see how you can troubleshoot it in your home. 

Why Do I Suddenly Have Low Water Pressure?

If you don’t typically experience low water pressure, there are several possible reasons. Ask yourself the following questions: 

  1. Was there water work recently done around my neighbourhood or my city?
  2. Did I get repair work recently done? Did it affect my water? 
  3. What kind of water do I have in my area? Is there white limescale around my shower and faucet?
  4. Is there any climate-related news that might affect my water?
  5. Am I competing with other people for my water supply?

These 5 questions cover the most common reasons for water pressure suddenly decreasing. Let’s go through each one and learn how these things can affect you. Since water pressure in homes ties closely to supply, any changes in your outside environment like droughts, multiple tenants, and “peak” hours for water usage can also decrease your pressure. 

Your home maintenance can also affect your pressure. Moving the water valves, corrosion in the pipes or scale build-up can all contribute to weak pressure. The first dictates how much water enters you home and the last two are blockages that prevent the water from reaching you. 

These things happen, and fortunately for you, this problem does not have to be permanent. With a bit of effort on your or your plumber’s part, you can go back to enjoying strong showers and can fill up your pots and kettle in no time. 

Find the best local plumbers in the UK!

Common Causes For Low Water Pressure

The common causes of low water pressure are the lack of water supply, poor pumping facilities, plumbing problems, and small water mains. Sometimes even with proper maintenance, you have to adjust to changes in your surroundings. You may have to reroute your water system or something similar, but these changes rarely happen. 

How Do I Know If I Have Low Water Pressure?

The most obvious way to know is if you feel a shift in how you go about your home. Is the shower weak? Does it take longer to fill up your kettle? Pay attention to these small things. 

If you are new to a neighbourhood or home and the pressure is weaker than what you are used to, you need to test it. Pressure varies on location and water system in the house. You can buy a water pressure gauge from the hardware store and test the strength inside your home. 

If you do not want to use a water pressure gauge, try filling up a bucket. Turn the water on fully and time how long it takes. If it goes way beyond 30 seconds, you have low pressure. Water flow is a strong indicator of the pressure in your home. 

What if your hot water is weak, but your cold water is strong? The pressure problem is internal. It lies in your heating system. Cold water usually comes from the water main, while the hot water comes from the cylinder you have at home. You can fix this by adjusting your boiler settings or cycling the water through your system. You can read more how to check the pressure of your boiler here

How Do I Fix Low Water Pressure In My House?

These common causes of these problems are not impossible to handle. You can take care of them yourself with a little bit of know-how. However, whenever you are in doubt, do not hesitate to call a professional. PlumbingForce can help you with plumbing-related blockages or major pipework. Here are steps you can take to inspect the reason for your pressure problem and how you can deal with it: 

Check The News

Look for water-related incidents online and see if they affect you. Any kind of water line repair, pipe replacement, or maintenance could make the water supply weak in your area. If your problem is because of this, there is little to nothing you can do until they finish. 

If you still experience pressure issues after their repair, contact your local water company and ask if the low pressure is a long-term problem. When they tell you it is, you can invest in a better pump for your system.

Check Your Water Valves

There are two valves you should keep an eye on, the main water meter valve and the main house shutoff valve. Both of these valves should be fully open. The water meter valve is the water company’s responsibility. People rarely touch them because this is how the water from the supply pipe enters your home. The supply pipe is usually outside of your house. Go out and see if they are fully open. 

How do you know if it is fully open? Check the handle. If it is open properly, the handle should be parallel to the water pipe. When it is not in the right position, you can get a plumber to do it or use an adjustable spanner and adjust it. 

No problems with your water meter valve? Try the main house shutoff valve. It should be completely open as well. You can find this around the basement. Unlike the water meter valve, this could change more often. If you need to cut off your main water supply for repairs around the house, this is where it happens. Check to make sure it is fully open. If it isn’t, adjust it accordingly.

Check Your Pressure Regulator/ Pressure Reducing Valve

The pressure reducing valve (PRV) should solve water pressure problems, but can also be a source of them. PRV is for areas that have high pressure in water. If the force is too strong, it can damage your pipes and central heating system. When the PRV does not work, it can prevent your water flow. Contact your local plumbers at Plumbingforce and replace your PRV to go back to business as usual. 

Connect with the best local plumbers and boiler engineers near you

Check For Blockages

Now, when you only experience issues in some regions of your house, it might not be a pressure problem at all. Try to check all sources of water. Is it slower in the kitchen tap versus the faucet in the guest bedroom? If the answer is yes, you have scale build-up. 

Limescale is common in hard water. The type of water you receive depends on your location. You can ask your water company about the kind of water or test it yourself. Hard water is not necessarily bad, but they come with their challenges. Scale build-up can happen to any item or appliance that uses water regularly. You can install a scale inhibitor as it enters your home. They add small doses to reduce the limescale in your system.

Blockages are not limited to scale. If every faucet has the same problem, it could be the corrosion of your pipes. Old homes tend to have untreated pipes, and rust can develop. By the time you notice this problem, it is probably too late. You need to redo the plumbing inside your home. If you see rusty valves in your radiator, you can try to add a magnetic filter, but that cannot take back the existing damage. 

Check For Leaks And Similar Plumbing Damage

Go around your house and see if there are leaks or plumbing problems. There could be water damage behind large furniture or boxes. A pipe leak can happen anywhere. So how does a leak affect the water in your faucet? A leak means less water, therefore weaker pressure. 

Pipes are one of the things you cannot correctly repair leaks on your own. Cut off the water flow by turning the main house shutoff valves. Make sure to get a professional plumber to inspect and repair the busted pipe or pipes. If the problem comes from the water main, call your water company instead. Learn more about preventing water leaks here

What Can You Do To Prevent Low Pressure?

You do not have to experience low pressure to create a system that prevents it. You can avoid water pressure by adequately maintaining your system. Annual maintenance can go a long way with your pipes. You can also include the limescale remover and magnetic filter just to be sure. When your pipes are clean, and the pressure is adjusted correctly, you should have no problems with low water pressure. 

Is Low Water Pressure Dangerous?

Low water pressure is nowhere near as dangerous as high water pressure. The effects might not be as visible either. However, that does not mean low water pressure is not harmful. Both water pressure, low and high, settings are bad. However, low pressure is harder to live with. Your daily routine can take longer than necessary. It prevents you from doing other things.

If you leave it alone, you can increase the damages in your system. It could also destroy the household appliances like dishwashers, washing machines, and even your heating system. As much as possible, try to create a proper workaround for it. 

Hopefully, this list can help you tackle low water pressure problems. Since every home is different, there is a bit of trial and error before you figure out what is really wrong. When you do not have the time to go through all the possibilities, our plumbers are here to help. We have same-service for emergency problems, get rid of low pressure in your home today!

What To Do When You Smell A Gas Leak?

testing enquipment

We are far from the old days of manually lighting fires and carefully tending the flame. Do you feel a bit chilly? Turn up the heat of your boiler. Do you want to cook a meal? Switch on the hob. Safety is almost a guarantee because of how we have advanced as a race. While death by fire is not as common as before, there is a new danger in town: gas leaks. 

Gas can be colourless and odourless. In other words, you don’t know when it would strike. The vigilance against it begins with proper boiler service and gas maintenance. Without the right amount of care and caution, these small problems can slip past your nose. 

What Are The Dangers Of Gas Leaks In Your Home?

There are around 60 deaths per year from carbon monoxide poisoning. Out of those who recover, 10%-15% of them suffer from long-term health complications. The dangers of gas leaks in your home is CO poisoning, gas explosions, and, of course, house fires. When you smell gas, you can never know which of the three will affect you.

One out of six homes has unsafe gas appliances. It means that one house could cause a slew of problems. It does not just affect the owners, but their neighbours as well. One thing left unchecked can affect many people. When there is a gas leak in your home, you have to address it as soon as possible to minimise the harm. 

The many awareness campaigns and safety warnings are there to protect you. Gas leaks can always lead to more significant consequences. Please don’t wait for it to escalate, always contact the national gas emergency service.

Find the best local plumbers in the UK!

Are Small Leaks Dangerous?

The size of the gas leak does not determine the level of harm. While the chances for fires depend on how massive the leak is, smaller ones can be dangerous as well. Lack of detection means that they continue for a longer period, and the longer it runs, the more you put you and your family at risk. Do not underestimate its size. It can still kill.

What Are The Signs Of A Gas Leak In Your Home?

While the gas itself can go undetected, there are usually signs that accompany gas problems. It is a matter of spotting, and addressing them before the worst can happen. There are two ways you can spot the leak:

Based on your physical symptoms 

Based on your gas appliances

Using the information from both ways to spot leaks can create a complete assessment. It becomes less of a guess and more for a sure thing. Always get help from gas emergency hotlines as soon as you suspect a leak.

The Physical Symptoms Of CO Poisoning

If you feel unwell, but do not have any kind of fever or aches, it could be because of leaking gas. There are 6 significant symptoms of carbon monoxide poisoning: 

Headaches/migraines 

Dizziness

Nausea

Breathing problems/ Breathlessness

Fainting spells

Loss of consciousness

These 6 symptoms can come with fatigue and irritation in the eyes and throat. They may be common issues for some people, but it is all about the context. Do you only feel this way when you are at home? Do the symptoms disappear when you get fresh air? Do other people experience the same thing? Pay close attention to the children, the elderly, and even your pets. They may experience the symptoms first. 

Call the gas emergency service and go to the nearest hospital or clinic to check if you need treatment for CO poisoning.

The State Of Your Gas Appliances

If no one feels unwell, you can still check for leak gas through your appliances. Boilers, hobs, and other gas appliances tend to act out first. Here are some of the signs you should pay attention to:

Inefficient burn- When the flame of the boiler or your gas hob is yellow or orange, it means there are impurities in the burning process. Those impurities create carbon monoxide. Make sure your flame is always a nice steady blue. 

Soot stains- Any kind of dark powder or soot around gas appliances means there is a bit of smoke. Similar to the first sign, it means there are impurities, and your appliances are not efficiently working. 

Pilot lights frequently blow out- Majority of the UK use condensing and combi boilers. In those cases, pilot lights are a thing of the past. However, for homes that still use gas/oil-burning boilers, the pilot light can help you diagnose boiler problems. If they frequently go out, it points to improper burning. Avoid using your boiler when it acts like this until it gets serviced.

Increasing condensation- If you notice more condensation indoors, it means there is poor ventilation in your home. The water vapour from the heating is not escaping the house properly. On its own, it is harmless. However, when this happens with the other signs above, it could be a sign for carbon monoxide leak. 

When all the signs point to CO leak, you have to act quickly. Contact the national gas helpline for further instructions and contact your local Gas Safe engineer in Plumbingforce for inspection. Or you can check Gas Safe for a registered engineer in your area for inspection. Enter your postcode and browse the registrar for help. If you had similar problems before, the website use cookies to save important information which streamlines the process for the future. While waiting for the plumber to arrive, there are also emergency steps you can take. 

Connect with the best local plumbers and boiler engineers near you

What Do I Do If I Smell Gas?

Gas usually has no smell. The scent that you smell? That was added by manufacturers for safety reasons. Without the scent, the numbers for gas-related deaths would be a lot higher as you wouldn’t be able to detect them. Now, the gases with scents are LPG and propane. You cannot smell gas for carbon monoxide. So there are some gas leaks you can notice immediately, and there is one that needs other signs. 

When you smell gas or notice the other signs above, contact your plumber first. They need to properly inspect your home for the leaks you do not see. Then you do the following steps: 

Ventilate your space

Try to get fresh air in your home ASAP. Open your doors and windows, turn on your exhaust fans, do anything that can help ventilate your area. Keep your doors and windows open and don’t close them until your place is in the clear.

Turn off all your gas appliances

Go through your entire house and disconnect or turn off your gas appliances. Avoid turning your lights on and off as well. Try not to turn on your electricity. Emergency methods are about avoiding sparks.

Turn off the main gas supply

The main gas supply is usually in the basement near the meter. Turn the handle to cut off the gas. If you live in a building contact your landlord or maintenance crew about your concerns. 

Leave your house

Immediately go outside to avoid CO poisoning. If you have neighbours nearby, you may want to inform them as well to make sure everyone is okay.

Visit the doctor

Your local clinics or hospitals have tests to see if you need treatment for CO poisoning. It is a 50-50 chance, but it is best to err on the side of caution. There’s no way of knowing just how long you have been exposed to the gas.

If the matter is pressing, call the gas emergency helpline. The national gas emergency helpline is 0800 111 999. For emergency electricity issues, you can contact the national power cut helpline at 105. Both helplines are open 24/7.

Ignore the embarrassment that comes with a false alarm, that feeling never lasts. The health problems and the safety hazard from a real gas leak, on the other hand, can create a lasting impression. It is simple math, human life and safety over doubts and feelings all the time. 

What Are The Other Preventive Measures I Can Take?

While the danger is real, we can always take a more active role in preventing gas leaks. You can get a CO detector and install it in your home. They are easy to find and relatively inexpensive. Get one that catches your attention so you can quickly respond to the emergency. Remember to replace the batteries every year. 

Properly maintain your boiler. Annual boiler service means less debris in your system which means no impurities. Annual boiler service also includes cleaning your flues and making sure there are no leaks.

These two simple habits can make a world of difference. Gas and fire are not new inventions. Whether you smell gas or not, we should continuously work against safety hazards that come with poor maintenance. There is no lack of information online. 

With the right effort, we can bring down the statistics further and make CO poisoning a thing of the past. Proper maintenance 

For any kind of boiler service or help, you can contact Plumbingforce’s engineers.

What Is A MagnaClean And Should You Have One?

central heating maintenance

Central heating maintenance does not start and stop with annual check-ups. There are a lot of things that can affect your setup. Think about it – the age of your home, location, water type, and habits all contribute to your central heating system’s wear and tear. Proper maintenance always includes a system that addresses those variables.

One of the few things that your boiler, radiator, and pipes have in common is the water. Hard water can create limescale/scale build-up and clog up your system, but another more tricky problem to deal with is the metallic sludge. The air that seeps into your system bit by bit mixes with the water and metal pipes. Next thing you know it, your radiator needs a power flush from all the rust. Adey’s MagnaClean is a system that addresses this. 

What Is It?

It is a filter by Adey whose creator is a former apprentice for British Gas. The MagnaClean filter is something he created for other installers. They place the filter in the pipes before the water enters the heating system with magnetic filtration. It is just like the old science school project with magnets and sand. It attracts the bits of metal and separates it from the rest. 

What Is The Product Range?

The Adey MagnaClean is not just one product. It is a whole range of products. At the moment they have the following filters: 

  1. MagnaClean Pro 3 Sense (22mm) at £148.36
  2. MagnaClean Pro 2 (28mm) at £232.85
  3. MagnaClean Atom at (22mm) £84.00*
  4. MagnaClean Micro2 at £136.66
  5. MagnaClean Professional 2XP (28mm) at £232.85
  6. MagnaClean TwinTech at £151.96
  7. MagnaCleanse at £564.60

Please note that all the prices above come from Wolseley’s website. It does not include VAT, and some of them have additional parts. To get an accurate price, don’t forget the 20% VAT. Promotions are available for most of these products. Keep an eye out for deals and bundles. These prices are subject to change, and it is best to ask about the price before purchasing. The prices here should give you an idea of the new front-runners of MagnaClean’s filters. 

Each product has its own specialisation, but the tech behind them is pretty similar. Among the 7 models, the UK’s favourite seems to be the MagnaClean Pro 2, a new revamp of the MagnaClean Pro 1. For this 5 stars product, statistics on their website shows that it saves 6% of the annual heating bills by keeping the system efficient. It can extend the lifespan of your central heating system while reducing carbon emissions. The product has a 10-year warranty available as well. 

You can find Adey products from the units to the solutions in stores like City Plumbing Supplies, Graham, Plumbing Trade Supplies (PTS), Plumbase, Travis Perkins, and Wolseley. These filters tend to be a little expensive. Do your research and make sure you are getting the real deal. 

Find the best local plumbers in the UK!

What Does A MagnaClean Filter Do?

The Adey MagnaClean Professional series does an all-around job. The top and bottom of the canisters take out non-magnetic debris like scale, a common problem in hard water areas. The middle section has magnetic rods that take out the magnetite. Once the magnetite attaches to the rod, it will not move until you clean out the filter. There are no moving parts for the filter. It is just the water going around the magnet. 

Is It Necessary?

Whether your home needs one or not is up to you. Other methods for filtering water before it enters the central heating system are not very efficient. Solutions like fine mesh strainers or cloth filters need frequent replacements. They do not get every kind of debris, and they can also clog up your system.

The filter, on the other hand, is pretty low-maintenance. It requires minimal cleaning and receives better results. There is no harm in getting one as a precautionary step.

Is It A Good Investment?

It depends. It is very understandable if you are hesitating. It is an expensive investment. If you are the type to only purchase if you need it, here are questions you can use to see if it will be a worthwhile investment for your home:

  1. How old is your house/building? Is it from the 1960s?
  2. Do you live in an area with hard water?
  3. Do you have to bleed your radiators often?
  4. Do your boiler and radiators have rusty valves?
  5. How often do you have to power flush your radiators?

If you answer “yes” or “very often” to these questions, then an Adey MagnaClean can be an excellent investment. Houses from the 1960s have untreated pipes that make it easy to rust. Radiators that do not heat evenly have too much sludge and debris inside, and they need a power flush from a professional plumber. The magnetic filter addresses all these problems with little to no effort. 

How Often Should I Clean It?

You should clean your filter once a year. The Adey recommends that you have it done along with other boiler service and radiator maintenance. There is no harm in making a day out of it. 

Connect with the best local plumbers and boiler engineers near you

How Do I Clean My MagnaClean?

You can opt to clean your filter yourself, but that comes with the risk of leaks. You can have your plumber do it when they visit during your boiler service. However, if you are a bit handy here are the instructions for cleaning the filter.

  1. Close the valves connecting to your magnetic filter
  2. Use a big spanner to ease the lid, then open it completely
  3. Lift the cap along with the plastic sheath and magnet, and transfer it to a container 
  4. Wash the individual parts (the plastic sheath, the magnet, the lid, the rubber seal, etc.) separately in the sink under running water
  5. Wipe it down and reassemble the filter and return it to the rest of the unit
  6. Seal properly and turn the valves on again
  7. Check for leaks

You can also add a bit of silicone lubricant with the rubber seal to make sure it stays tight. If the rubber is a bit stiff or hard, you may want to get another replacement. 

When Do You Replace Your Filter?

You do not ever need to replace the magnetic filter. The MagnaClean has no disposable parts. They should last as long as your boiler. All you have to do is clean it out once in a while for it to work efficiently. The only things that need replacement or top-ups are the scale reducers and other solutions if you use them. For these solutions, please use the recommended dosage. 

How Do You Remove MagnaClean?

If you are removing it to wash, follow the instructions above. Turn off the isolation valves and use the lid spanner that comes with the filter and unscrew the lid. They are notoriously hard to open when the cover is not clean. So make sure you do that step properly and add a bit of silicone grease/lubricant every time you open it. Also, avoid over-tightening it or else suffer at a later date.

However, if you are planning on removing the filter completely, you need to get a professional plumber. To install it, you have cut the pipe and redirect it to the unit. If you are planning on removing the unit, you need to connect those two pipes again. Do not attempt to do this on your own. Pipework should only be done by plumber or else face the consequences of a faulty central heating system. 

Heating systems are a temperamental bunch. However, when you have the system in place, it pretty much does its job without bothering you. Annual maintenance here and there can make a world of difference in your heating bills and carbon emissions. Is the MagnaClean something you need in your home? Plumbingforce can help you with the installation and removal process.

How to Remove a Radiator in 6 Easy Steps

central heating system radiator

Since your radiator is an integral part of your central heating system, they are rarely moved. Aside from the maintenance checks and minor repairs, radiators are pretty much left alone

In any case, removing your radiator is left for the most drastic of situations. Some of the reasons include: replace radiator, repair back wall, change pipes, etc. Regardless of why you want your radiator gone, did you know that you can DIY it?

While removing a radiator can be done by an untrained individual such as yourself, know that any installations and pipework must still be done by the professionals.

Just remember to leave any installation and pipework to the professionals. It is illegal for people to do work that requires a certified plumber. With that out of the way, let’s tackle common questions about radiator removal! 

When Can I Remove My Radiator?

Before you take out your tools and get to work, think about the best time for home maintenance or renovation. The average temperature in the UK is around 10ºC. However, in winter, temperatures can go down to freezing temperatures of 0ºC-5ºC. It would not be to your best interest if you take out your central heating system during the winter.

Plan your replacements or renovations well. Do them during the summer when you won’t miss the warmth of your radiator. 

Find the best local plumbers in the UK!

What Do I Need To Remove A Radiator?

If you regularly do maintenance checks yourself around your home, then you’re in luck! There is a high chance that you have all the tools necessary to remove your radiator. If you don’t have a tool kit, hit the store first before attempting the rest of the steps. You can’t just finesse your way to taking the unit out without any tools. It is not effective or safe. Here is a list of things that you will need. Don’t worry. They’re quite common tools that you probably already have inside your house. 

  1. Radiator bleed key/ flat-top screwdriver
  2. Adjustable spanner/wrench
  3. Towels and sponge
  4. Bucket/ Small container/ paint trays

If you are planning on removing a radiator completely, leave the capping radiator valve and other pipework to the professionals. You might end up creating “dead legs” in the pipework. For temporary removals to clean your old radiator you might also want to also get these items, for cleaning as you go: 

  1. Replacement valves (Thermostatic radiator valve or Lockshield valve – depending on the damage)
  2. Old tights
  3. WD 40 or other metal lubricants 
  4. Rag

Regardless of what you’re doing for your home renovation, you should prepare a good amount of newspapers and old rags to protect your furniture and floor from dirt and debris. Radiator maintenance can be quite messy so it’s best to bring some failsafe.

Do You Need To Turn The Water Off To Remove A Radiator?

Water damage can get pretty serious, especially with hardwood floors. When working to replace your radiator, keep your place as dry as possible. You do not need to turn off your connection to the main water line to take out the radiator. 

Radiators have valves that can separate them from the central heating system. Close the valves and empty the water in the unit. You can opt to switch off the water if you have other concerns, but it is not an absolute requirement. 

Note: While your water can stay on, remember to turn off the heating! Stay safe and only work when your radiator is completely cold. 

How To Remove Radiator Without Draining The System?

In a home with multiple radiators, draining the entire system can take a lot of time. If you are only removing a couple of radiators though, you don’t have to! Just bleed the radiators you plan on removing and then proceed. 

Draining your central heating system is not a bad idea. It has to happen once and a while to clean out the system. While you are removing your radiator, you can take on two tasks at once. Other times you have to drain the system are for pipe cleaning, major pipe repairs, and leaks. 

If you decide to drain your central heating system while removing your radiator, you have to turn off your main water line. Draining your system shouldn’t take too long, it is around 20 mins to 2 hours depending on your set up. 

Steps For Removing Your Radiator

If your heater is big, bulky, or very old and extra pair of helping hands can get the job done safely. Do not overestimate your strength. Radiators can get heavy. 

Even professional plumbers need a helping hand with vertical radiators. If you are struggling with how to remove a radiator in your home, contact a professional. Plumbers can come in and take care of this work. 

However, if you still want to DIY, then read on. Gather your tools and prep your space, because here we will go through the steps for removing a radiator

Turn Off Your Heating And Wait For The Room To Cool

Before you get to work, there should be no heating. Once you’ve turned your thermostat off, wait for a bit and make sure the radiator is cool to the touch. You don’t want to accidentally burn yourself while removing your radiator. Do this during warmer months of the year. Dealing with cold water in the middle of winter with no heat is not a pleasant experience.

Close All The Valves

Now that you have done so, close the valves completely. Use an adjustable spanner for your thermostatic radiator valves (TRV) if you have them. Avoid using pliers because they can damage your pipes. While you are turning it off, take note of how many turns it takes to close for future reference.

Closing the valves means you isolate the unit from the water supply. As long as those valves are tightly closed, you can go to the next step. You can also choose to drain your system here. Since everyone’s home is different, look for other instructions for emptying the whole system. 

Bleed/Drain The Radiator

With your radiator separated, you can bleed your radiator. Use your radiator bleed key. First, a bit of air will release, then comes the water. Get a container ready to catch the leak. A painter’s tray or a shallow container that can fit under the radiator is ideal. For more thorough instructions for bleeding radiators, you can check out this post. 

Remove The Union Nuts And Wall Brackets

First, loosen one union nut and tip the radiator a bit to get the water at the bottom. If you do not do this step, it will leak when you lift the radiator. When there is no more water, unscrew both union nuts. Older radiators could have additional wall brackets or screws holding it in place. Take the time to make sure all of these pieces are gone.

Connect with the best local plumbers and boiler engineers near you

Remove The Radiator

With all those nuts and bolts out of the way, you can lift the radiator! Make sure that you keep all of the nuts and bolts in one place so that you don’t lose any. Find someone to help you here. Slowly lift the radiator and keep it in a vertical position when carrying it out.

Even when you properly bleed your radiator and take out the excess water, there is a good chance there is still some left. Covering your entire floor with newspaper and old clothes can help with the mess as you take out your radiator. 

Here you can use your cleaning supplies and clean your radiator. Use the old tights to polish the metal, and spray a bit of metal lubricant to help. After you get all the nooks, you can wipe it one last time with a rag. 

Temporarily Cap Your Pipes

You should be able to leave everything as is, but capping your radiator valve is a good safety measure. Now, you might be able to get away with temporarily capping it off if you plan on putting your radiator back. However, for any permanent pipework, get a professional plumber to do it. It is illegal and dangerous to DIY your pipework, especially with your central heating system. Contact your local plumber from Plumbingforce to take care of this for you. 

Common Removal Questions For Radiators

Everyone’s central heating system is a bit different. There might be questions that we didn’t get to cover in the general portion. Here are the common questions:

What Is The Difference Between Temporary or Permanent?

The main difference between the two is with the last step. Temporarily removing a radiator means you will install the same unit again. There are no changes in the pipework. As long as no one bothers that area, you can connect the union bolts and wall brackets again. Take away the temporary capping and proceed as usual and install your radiator back.

With permanently removing your radiator it implies you have other plans for your space. A new electric fireplace perhaps? Or maybe you are taking down the wall completely? Shoddy work can affect the heating of your home and resale value. You may need to get a plumber in to connect the two pipes with a pipe nipple or have them microbore or solder a cap permanently. 

How To Remove A Radiator With A Thermostatic Valve?

If your radiator has a thermostatic radiator valve (TRV) close it completely. There are two types of TRVs, the manual and the automatic. Twist the manual TRV clockwise to isolate the unit or set the automatic TRV to its lowest mark.

These valves are mostly automatic, so they adjust to different temperatures. After the first step, make sure it is not in the frost position. The drop in temperature will open the valve, and you get a leak on your hands. You may also want to cap your TRV when you take out your rad.

For those who want to make sure water damage is not a problem, you can switch off your water. It is an extreme step, but if you aren’t living in the home or flat yet, might as well be cautious.

How To Remove Your Radiator From A Combi System?

A radiator with a combi boiler or any kind of pressurised system follows the same steps. You do not need to drain the system either, just close the valves both the lockshield and thermostatic valve and proceed. You can repressurise your system with no problem. 

Your combi boiler should be within the ½-1 ½ bar, or you could follow your manufacturer’s recommendation. Use your bleed valve to release the pressure. When you try to adjust the pressure in your system, match the original number, and you are good to go. 

Repressuring your system varies depending on your model. Do you have a filling loop or repressure key? Follow the steps in your boiler manual. 

If your TRV does not fully close, try to release the pressure from time to time. Areas with hard water can build-up scale in the system which affects all the pipes and valves. You can get an inhibitor for it, but don’t use too much. 

How To Remove An Old Radiator?

All the steps for removing an old boiler are the same, but there are more things to pay attention to because of its age. The main unique feature of an old boiler is the many brackets and extra fixtures. Carefully take them out with a screwdriver and adjustable spanner. 

Another problem common in old radiators is poor maintenance. Rust, sharp edges, and sludge that can be as disgusting as canal water are common problems. Protect yourself with a good set of gloves and avoid being cut by rusty pieces of metal. Make sure that you have your radiator maintenance checked annually.

If you plan on keeping your vintage radiator, get a professional clean. Removing dirty water is just the first step. A certified plumber can better address these issues. 

Removing your radiator can be a scary task at first, especially when it is your first time. But never fear! As long as you carefully follow the steps, you can safely replace your radiator. Just keep in mind the type of work your plumber should handle. Capping, power flush, leaks, and major pipework are not DIY friendly, contact your local plumber at Plumbingforce for those jobs. 

Heating Conundrums: How to Balance Radiators

home water radiators

Only 5% of homes in the UK do not use central heating. For the 95% of the population, you more or less know the moving parts that keep your house nice and toasty. Your boiler, radiator, and hot water collection work together to make the colder months more bearable. Every part of your central heating system needs to properly work for you to enjoy the benefits of a warm home.

Your boiler takes care of the heating, through gas, fossil fuels, or electricity. They heat the water that enters your home. It splits into two categories, most of that goes into your shower, dishes, and hot tea. The rest of it goes through your radiator and becomes a vital part of keeping you warm.

Heating problems can significantly affect your quality of life, so it is best to get to work. You can choose to DIY some of these problems like balancing your radiator. But when in doubt, always contact a professional

Find the best local plumbers in the UK!

What Are Radiators?

They are an important part of your central heating. Hot water runs through the series of bent pipes in the radiator. The twists and turns slow down the journey of your water and create a spot where you can feel the concentrated heat. So, when you stand by a radiator, you can feel that heat transfer. The longer it runs, the warmer the room will be. 

After the hot water cycles through the house, it goes back to the boiler to reheat. While traditional hot water radiators do not need plugs like other appliances, you can still save energy with proper use, by properly maintaining them throughout the year and turning them off when not in use. With proper use and maintenance, you can extend the life of your central heating system. 

When your radiator works properly, you don’t have to increase the heat of your boiler. By changing the set temperature, you can save on electricity and money.

Why Do I Need To Balance My Radiator?

In flats with multiple rooms or large houses, you need to have numerous radiators for your central heating. When radiators run warmer in one place more than another, there is an imbalance with the distribution of hot water. 

For example, you find it chilly in the bedroom, and you turn up the heat on your thermostat. You feel fine, but your roommate starts complaining about the temperature in the living room. You check it out and agree that it is significantly warmer than your bedroom. That means that your radiators are not balanced. 

When left like this, your boiler will have to work harder to keep your house at a decent temperature. If you don’t live alone, other members of your home may play around with the thermostat too much and destroy your boiler. The worst-case scenario is you get higher fuel bills, and you need to replace your rad and boiler. Just imagining the costs could give you a major headache.

When Do You Balance Your Radiator?

It shouldn’t be too hard to maintain your radiator correctly. Try to balance your radiator once a year or whenever necessary regularly. As soon as you notice one unit taking too much time to heat up, it’s a good sign you need to balance a radiator.

It is a time-consuming task that needs a bit of manual labour. Try to block off a good chunk of your day when you decide to get to work. The more radiators you have in your home, the more work you need to do. 

What Is The Difference Between Balancing And Bleeding Your Radiator?

Balancing is about the distribution of heat in your central heating system. Rad A is hot, but Rad C is cold, even with a 30 min wait. Bleeding your radiator is about even heating within the unit. The top part of Rad A is cool, but the bottom of Rad A is hot. Bleeding takes away the air inside the unit, which makes the top part cool.

You need to do both to maintain your radiator properly. When balancing your radiator, you need to bleed it first. However, you do not need to adjust your system every time you bleed your radiator. 

How Do You Balance Radiators?

Balancing your radiator is about cycling the water through your system until all your radiators heat up at the right time. The air, debris, or a faulty valve can affect the heating times of your radiators. Balancing it out takes care of most of it. 

With the right patience, these steps on how to balance radiator are beginner-friendly. If the DIY method does not work, your radiator might be in worse shape. You may need a professional plumber like Plumbingforce to come in and take care of that. Now, let’s get to it!

Materials and Tools

It is time to invest in a couple of tools so you can do this on the regular. For most radiators you will need the following things: 

Radiator bleed key or a screwdriver*

Digital thermometer or multimeter that can work as a thermometer

Lockshield valve adjuster or adjustable wrench 

Paper and pen

A helping hand

* If you do not have a radiator bleeding key, a flat-blade screwdriver can work, but it depends on your radiator. Radiator keys are easy to find in your local hardware store, so you may want to invest in one for your toolkit. 

DIY Steps To Balancing Radiators

When you do try DIY balancing radiators, do not rush the process. Work with a friend or family member and go through the following steps together.

Turn Off Your Heating System

Radiator balancing should happen when the weather is comfortable or warm because you will be turning your heating system on and off. Give yourself a clean slate and turn off your heating system. It is an essential step in bleeding your radiators. Even if you opt not to bleed, starting from ground zero can give you better numbers for balancing later. Wait for your radiators to cool before proceeding to the next step.

Bleed Your Radiators 

 Radiators tend to unevenly heat when there is air or debris. Bleeding your radiators first is an ideal step. Start by prepping your space for the leak with towels and a bucket. Use the radiator bleed key and release the air and water. You can read more about draining your radiator here

Go Through Your Radiator Valves

Open all your radiator valves. Each one has a lockshield valve (LSV) and a thermostatic radiator valve (TRV). Open the TRV manually, no tools necessary. Open the lockshield valve by removing the plastic cap and turning it with a lockshield valve adjuster or an adjustable spanner/wrench. Keep the plastic caps!

Connect with the best local plumbers and boiler engineers near you

Create A Basic Map Of Your Radiators

Take your paper and pen and draw out your radiators, name or number them, so they are easily identifiable. You will need this map to keep track of how the heat distributes in the system. 

Turn The Heating System On And Take Notes

After you turn the heating back, it’s a race against time. See the first radiator to heat up, then identify the heating order of your radiators. If you live in a large house, it can be challenging to do it alone. Recruit help and signal each other when other radiators heat up. This step could take a while, but you must get the order right. 

Turn It Off Again And Wait Until It Is Cold

Once you have your list, turn the system off again. The radiator balancing starts after this. Make sure that all of the units are cold. You can step out for a while. 

Turn The Heating Back

Turn the heating back to a random temperature and go to the first unit on your list.

Adjust The Valves On The First Radiator

Close your lockshield valves completely and slowly open it by a quarter turn as your unit’s temperature reading reaches 12 degrees. Use your thermometer or multimeter here. You can also take note of how long it takes for it to reach 12 degrees for future reference. 

Check The Temperature Of The Radiator

Use your digital thermometer to check if the temperature is 12 degrees. 

Check The Temperature Of The Pipes

After the unit reaches 12 degrees, move your digital thermometer and take the temperature of the nearby pipe. Take the temperature reading and wait until it reaches 12 degrees as well. Take note of the time between your heater and the neighbouring pipes to heat up. It can help you spot damaged units. 

Repeat Until You Finish All The Radiators

Then move to the next radiator on your list. Follow the order of radiators heating up and do steps 8-11 until you finish all the radiators in your home. It shouldn’t take too long for a small flat, but a large house might take a while. 

Note

When your radiators are not heating the way they should even after bleeding, check if the valves have signs of corrosion. The air, water, and metal could create debris in the system that could damage your radiator. 

You can call a professional plumber for a power flush if the valves are in good condition. It takes 6-10 hours. If the valves are not ok, you can replace them. DIY the replacement or ask a professional. 

Do You Need To Balance Radiators With Thermostatic Valves?

Thermostatic radiator valves are slowly phasing out in the era of smart homes. However, that does not mean you don’t have one in your place. The TRV is there to help regulate the heat of your radiator. Without them, the water can be scaldingly hot and be a safety hazard. 

There is at least one radiator with a TRV. Since it gets cold water, do they still need balancing? Yes, it does since it is a part of a greater system. 

How Long Does It Take To Balance Radiators?

There is no clear answer to how long it takes to get the job done. There are too many variables:

How many radiators do you have?

Are your radiators well-maintained?

How efficient is your boiler?

Did you recently power flush and bleed your radiators?

What model do you have? 

How large is your home?

A conservative estimate for how long it takes to finish the job in a small flat is 2-3 hours. A home with multiple floors and many rooms can take up to half a day, maybe more if you don’t have help. 

What Is The Quickest Way To Balance Radiators?

There is no quick way to do this. You can streamline the process by having a map, and previous notes ready so you don’t have to watch the clock closely. Doing it right means taking the take to balance each radiator.

However, if you just want to “loosely” correct it, you can open the lockshield valves in the beginning. The rooms that need to heat up quickly should have their LSV’s open fully. Places that don’t get the same traffic should partially open their LSV. This method does not fix your system, but it can do well in a pinch. 

When Do You Need Professionals For Radiators?

Always call professional plumbers when in doubt. If there is uneven heating even after bleeding, signs of corrosion, or leaks in the pipework – do not attempt to do it by yourself. These are not DIY friendly. Contact your local plumbers from Plumbingforce for these extreme cases. 

You can also opt to get the professionals in when you don’t have the time to go through balancing your radiators. When you have a place that can take half a day they can do it better, save your time for other tasks. 

All homeowners should be able to have a little heating-know-how. Learn to do basic maintenance steps yourself so you can troubleshoot radiators in your home. However, it is also essential to identify what you can and cannot do. A well-functioning home is a balance of DIY and professional work. 

Best Smart Thermostat to Use: Hive Vs. Nest

thermostat
Since their first introduction in the 1830s, thermostats are an industrial invention that made its way into our homes. They do more than regulate the heat. They are a tool that makes homes across the UK eco-friendly without too much compromise. So we cut down on electricity and fuel bills while living in a warm and comfortable space.  How does a small panel manage to achieve all of that? Besides heavy-duty appliances like refrigerators, the top expense for home energy consumption is our central heating system and hot water collection. These systems run like clockwork, and in the cold and wet UK weather, it is a necessity. The proper regulation of our heating system saves energy, budget, and repair costs. When you upgrade to a smart thermostat, you can have better control over these things and move towards a smart, sustainable home.

Smart Thermostats Vs Traditional Thermostats

Now, what is the difference between a regular thermostat and a smart thermostat? A smart thermostat follows the trend of creating smarter homes. Smart homes are all about control. You can control how much energy you use and plan ahead without too much effort. The main feature of a smart thermostat is that it can connect to other devices like your mobile phone or tablets. Say good-bye to small errors like forgetting to turn off your boiler while you are away. Cold showers or long waits when you run out of hot water will be a thing of the past.  You cannot compare smart thermostats against their traditional counterparts. It isn’t a fair fight. It is easy to sink into the new habit of checking your phone instead of walking to your thermostat. They can work with most modern homes and can pay for themselves. Smart thermostats are a convenience that is here to stay. With so many features, it is quite obvious that a smart thermostat is the way to go. There are two stand-out brands for thermostats with smart tech: Hive and Nest. Let’s go into the nitty-gritty details and see which one between the two is the best.

Find the best local plumbers in the UK!

 Nest Vs Hive

Both companies have the same goals. They hope to improve your home experience by giving you more control by managing your heating schedule. From there you can use the saved money in other projects and focus on living your best life. As you read the Hive vs Nest comparison, think about your heating system and your home to see how they can fit. 

What Is Hive?

The Hive is a company that now creates smart appliances. Their first model is a riff of the British Gas remote heating control. Their current model is the Hive Active Heating 2

The Hive Active Heating 2 can control up to 3 zones of heating in your home. From your mobile phone, you can manage the schedule of your heat. Maintaining your heating schedule means that while you are away on holiday, you can keep your home warm enough for things without blasting the heat. 

There is also a frost protection feature for your pipes in the winter. Besides your pipes, your Hive thermostat can also control your floor heating. You can get into detail about their features on their website. 

In your everyday life, it can turn off the heat while you are at work, and warm up as you brave traffic on your way home. There is also a geolocation feature that reminds you to turn off your heating if you left it on. When your hands are full, you can voice activate this thermometer. Smart houses are all about the hands-off experience. 

The Hive Active Heating 2 is compatible with the majority of the boilers available in the market. You will have no problem with combi boilers. They can work with oil and electric boilers if they have a thermostat or programmer. It is a bit tricky with gas and LPG models, it’s okay for the majority, but some models are not compatible. There are so many boiler models out there. There is a chance it won’t work, so it is best to ask first. 

Design Features

The sleek version of Hive 2, both wired and wireless, is a small box with a colourful frame. You can select from 12 different colours and purchase them separately at £19.99 per piece. It has a mid-century modern vibe with its strong geometric shapes and bold colours. 

It has a dial that you can use to control the temperature. There are three buttons for your main controls. You can also opt to use the thermostat stand and keep it in the room you use it most for your convenience.

The Hive app covers all its bases. However, in the Hive app vs Nest, Nest has a more user-friendly design. Though finger-crossed that this changes in the future. Hive is steadily improving their design to catch up with the competition. First, it was their device. Maybe the app could be next? Who knows. 

What Is Unique To The Hive Thermostat?

The model is quite easy to install. You don’t necessarily need professional help since it uses batteries. The A4 batteries can last you 2 years without replacement. It is portable and there’s no messy wiring here! The Hive hub and Hive receiver that comes with your active heating purchase take care of that for you. Talk about convenient.

How Much Is Hive? 

The Hive Active Heating 2 cost £179.00. The box includes the Hive Hub and Hive Receiver. Every purchase has a 1-year hardware warranty. Right now, there is a promotion for a free Amazon Echo Dot (3rd Gen) for every Hive active heating purchase. This price does not include installation since you can do that yourself. If you are a British Gas customer, you can get a discount with the Hive active heating packages. We, at PlumbingForce, would be more than happy to install your Hive system for you so you don’t have to do it yourself.

Hive also has a monthly subscription service for their smart house packages. The subscription aims to bridge the gap between smart houses and renters. The monthly payments make the expensive price tag that usually comes with these devices affordable. You can cancel your contract any time, but you may have to pay the remaining balance. 

The prices online for the Active Heating subscription tend to vary. It should be around £12-£27.99 depending on your setup. 

Hive In Your Home

The best way to check if a smart thermometer works for you is to see how well it fits into your smart home ecosystem. Your Hive thermostat is compatible with both Amazon and Google assistants. You should have no problem connecting it to your current setup. 

What Is Nest?

Google and Nest are now one entity since the merge in 2014, as Google Nest. It is all about taking the Nest products and pairing it with Google Assistant and Home to create the whole smart house experience. Despite its rocky start, the focus right now is to be a competitive presence that can rival Amazon. 

For the most part, their Nest Learning Thermostat accomplishes most of that. Their smart thermostat is the first to get an Energy Star certification. Surveys show that homes with Nest thermostat can save 10%-12% off of your heating bills. 

The thermostat can heat up to 20 different zones in your home. You can manage them all from an app on your phone. You can remotely control the heating and cooling inside your house while you are away. 

You can manually set your heating schedule, but it defeats the purpose. The thermostat smart, compact, and convenient – learns from your habits. It tracks how you use your boiler and adjusts. Even without pre-setting anything, it only takes a matter of months for Nest to create a customised plan for you.

Similar to other smart thermostats on the market, Nest has a geofence feature. When you get past a specific area, it will remind you about your boiler, and you can remotely adjust. Nest also controls the heating for your pipes and your floors. 

They also are compatible with 95% of the heating and cooling systems on the market. Old boiler models and certain oil boilers might not work with it, but combi boilers and condensing systems should be fine. 

Besides being a feature that adjusts so you can live an energy-efficient life, it also tries to make it a learning experience. A leaf symbol appears every time you change the temperature to save energy. The balance depends on the home and climate, so the leaf’s appearance is customised as well. 

The Nest app can show your energy history. They have daily, monthly, and yearly reports. The report is an excellent reference if you want to change your boiler and hot water habits. 

Design Features

The early models of their thermostat like the Nest Thermostat E have the same circular shape. But while they tried to blend in, the new model is here to stand-out. It now has a high-res colour display, a significant difference from the old frosted glass. You can also customise the ring/frame with 7 neutral colours. For the app interface Nest vs Hive, Nest has a sleeker, user-friendly interface. 

Connect with the best local plumbers and boiler engineers near you

What Is Unique To The Nest Thermostat?

Stand out features for the Nest thermostat is its ability to learn. No worries about the data leaking though! Since it is a part of Google, they have a strict privacy setting for your home data. The way it keeps track of your energy-saving habits is also unique to the Nest.

How Much Is Nest?

You can purchase the Nest Learning Thermostat (3rd Gen) in the Google Store for £219 with free shipping. This price does not include installation fees. You can opt to do it yourself or just call the professionals to avoid unnecessary hassle.

Google Nest does not provide installation services, but they can link you to recommended services. Or you can look for Gas Safe engineers in your area to help with your installation. Companies like Plumbingforce are based around the country and can help you with your thermostat and boiler needs. 

Your Nest thermostat comes with a 2-year limited warranty. Read the terms and conditions to know more. Always consult your sales representative if you have more questions. 

Nest In Your Home

Nest has a bunch of other smart home appliances that have a similar design to the Nest Learning Thermostat. Besides them working seamlessly together, they have a consistent look. There are no clashing styles here. 

Despite being a Google sub-company, Nest also works with Amazon or Google assistant. It can blend in your current home from the home assistant to the other smart appliances. There is no problem. 

Which Is Better, Hive Or Nest?

So, which one between the two is the best? The Nest vs Hive question is difficult because they do the same things. It isn’t a battle between the one with the unique features, but between which product does the job better. No matter the outcome of Nest vs Hive, always purchase according to the needs of your home. 


Hive Active Heating 2

Nest Learning Thermostat (3rd Gen)

Price

£179.00 or with a monthly subscription
Installation not included

£219

Installation not included

Connection

Wifi

Wifi

Geolocation

Available

Available

Design Customisation 

12 different colours 

7 neutral colours 

Mounting

Wall Mount or Stand

Wall Mount or Stand

Multizone 

3

20

Heating Schedule

Manually set

Self-learning

Warranty 

1 year

2 years limited

Heating Package

Available

Available

Voice Control Compatibility 

Amazon Echo and Google Home

Amazon Echo and Google Home

A couple of years ago, Nest would have blown Hive out of the water, but the steady changes and updates by Hive have put them on an even playing field. However, even with the upgrades, Nest Learning Thermostat is still the best on the market. The extra £40 is worth its self-learning abilities.

However, Hive Active Heating 2 is still a great option, especially for those who like the monthly subscription. There is always a little manual input, but it is more convenient than traditional thermostats. 

Can Nest And Hive Work Together?

Nest and Hive smart thermostats do the same thing. So there is no need to have both in the same home. However, if you are considering mixing and matching your other smart home appliances, then yes, you can make it work. 

Hive’s smart light bulbs with Nest’s wifi? No problem. Nest’s smart thermostat with Hive’s sensors or plugs? It’s okay too. You cannot, however, control Nest products through Hive and vice versa. It is best to buy the things in the same range so you can better control them.

No matter what you decide, homes that are always on the go can rest easy with Nest and Hive thermostats in their home. The smart home might still be a distant possibility for most families, but the tech is here. It will only advance more in time. 

Besides Hive vs Nest thermostats, you should also consider the other bare bones of the house. These systems cannot work well if you have a faulty boiler or damaged pipes. For any central heating and hot water needs, just contact us here at Plumbingforce and work towards building an energy-efficient home. 

Fixing Radiator Leaks: A Guide

radiator leaks

Conducting some DIY plumbing repairs within your home is a milestone every homeowner has to face. Whether it be unclogging a drain, fixing a dripping tap, or repairing a radiator leak, there will come a time in your life that you will have to get your hands dirty yourself. However, none of these tasks is easy enough to do without some kind of guidance. 

Fixing radiator leak, in particular, will require you to thoroughly read, watch, and understand numerous guides for you to be able to pull it off smoothly and without a hitch. To save you the trouble of having to go back and forth between numerous sites, we’ve prepared a short guide on what you can and should do when your radiator is leaking. 

So, You Think Radiator Is Leaking?

Is there a puddle near your radiator or a wet patch on the carpet beneath it? If so, then it’s probably leaking.  You don’t have to worry, though. Leaking radiators are a pretty normal occurrence. No need to panic and call for a radiator repair or boiler repair service immediately. Chances are, this is something you can resolve all on your own. 

To be able to stop a radiator leak from occurring, the first thing you need to do is identify where the leak is coming from. You may do this by first patting the radiator dry using an old rag or a traditional towel. Once you have patted it dry, run a kitchen towel or paper napkin all over the radiator and if you encounter moisture in any area around the radiator, then that is probably where the leak is. Remember, if the radiator is hot, make sure to keep your hands and arms protected while conducting this step. 

Is A Leaky Radiator Dangerous?

A leaky radiator is not dangerous all on its own. However, leaving it unchecked for long periods of time can lead to water damage on your furniture, flooring and eventually, the structural integrity of your home. Water damage may also cause moulds to form, which in turn, will pose many health risks for you and your family. 

Moreover, leaking radiators may also cause your central heating systems to stop working due to loss of boiler pressure. While this shouldn’t be a huge problem, heat could be a matter of life and death during winter. 

Find the best local plumbers in the UK!

What Can Cause A Radiator Leak?

There are many possible reasons as to what could be the source of the leak and why your radiator could be leaking. Here are some of the most common reasons:

A Leaky Radiator Valve

Out of the three things on this list, this is the most common culprit to leaky radiators. This is usually due to the wear and tear of your radiator’s internal workings. As the valve loosens, it will start to become less watertight, thus leading to a water leak. 

Half-open radiator valves may also cause this leak If this is the case, all you have to do is tighten the valve or turn the valve to the off position.

A Loose or Damaged Spindle 

Radiator spindles are joints that connect the radiator valve to the main body of the radiator. When it is loose or damaged, water will naturally leak out. 

Rust and Corrosion

You may also be having a radiator leak due to corrosion and rust. Over time, the insides of your radiator will develop corrosion due to its constant contact water and sometimes the lack of chemical inhibitors, which is a liquid added to the water in your central heating system in order to prevent the development of rust and corrosion. 

When corrosion develops inside your radiator, chances are, small holes will form underneath your radiator. When this happens, you will start seeing brownish puddles of water on the floor beneath it.

How Do I Fix A Radiator Leak?

Now that you’ve identified the most common causes of a radiator leak, you may begin making the repairs on your radiator. This guide will be divided into three parts depending on the type of leak as mentioned above. Before you begin, make sure your radiator is turned off and that you have towels and buckets ready nearby to prevent and clean up any messes that may occur. 

Fixing A Radiator With A Leaky Radiator Valve

Step 1: Drain your radiator system to below the location of the leak. 

Step 2: Turn off the supply valve where the water enters from, and the lockshield valve (the plastic capped valve). Be sure to remember how many times you turned the lockshield valve. 

Step 3: Undo the union nut with an adjustable spanner. Be ready to catch water when water drips from your radiator. 

Step 4: Open the bleed valve and let your radiator bleed

Step 5: Wrap your valve tails with PTFE tape. 

Step 6: Replace the union nut. Turn on the lockshield and supply valves. Be sure to turn the lockshield valve as many times as you did when you turned it off. 

Step 7: Close the bleed valve and check if leaks still persist.

If the situation requires you to replace your radiator valve, make sure to know exactly what kind of valve you will be needing before purchasing one. The size and fit of the valve to the radiator are very crucial to prevent further leaks from occurring. 

Once you’ve found the right valve, drain all the water from your central heating system. Unscrew the nuts connected to the water pipe as well as the valve you intend on replacing. Clean the threads at the end of the radiator before installing a new valve.

Wrap the threads with PTFE tape before attaching the new valve. Once attached, bleed your radiator and then refill the system. 

Fixing A Radiator With Loose or Damaged Spindles

If your radiator is leaking from the spindle, you may easily remedy this by tightening the gland nuts. If the leaks persist, undo the nut, add some PTFE tape around the spindle before re-tightening the nut. This should prevent any more leaks occurring. 

If the leaks continue, you would need to either replace the valve or call on a plumber to assess the damage for you. 

Fixing A Radiator With Rust and Corrosion

There is no fix for a corroding radiator, as rust and corrosion are both irreversible. If there has been too much damage by corrosion and rust, the only thing you can do is replace your radiator. 

How Do I Prevent My Radiator For Leaking In Again In The Future?

There are quite a few ways to prevent your radiator from leaking again in the future. One would be conducting regular checks on your radiator. Also, be on the lookout for unexplainable moisture or puddles on and around your radiator before the problem gets worse. 

You may also want to regularly drain your radiator to prevent the sludge from rusting away your radiator. Meanwhile, to avoid corrosion, use a chemical inhibitor, which is a liquid compound added into the water. 

If you don’t think you are confident in doing the repairs on your own, or if none of the methods above seems to work in fixing your radiator, it is best to call for the help of a professional plumber as soon as possible. 

Connect with the best local plumbers and boiler engineers near you