gas-saf-register logo

The Homeowner’s Guide to Boiler Installations

Leaking Boiler

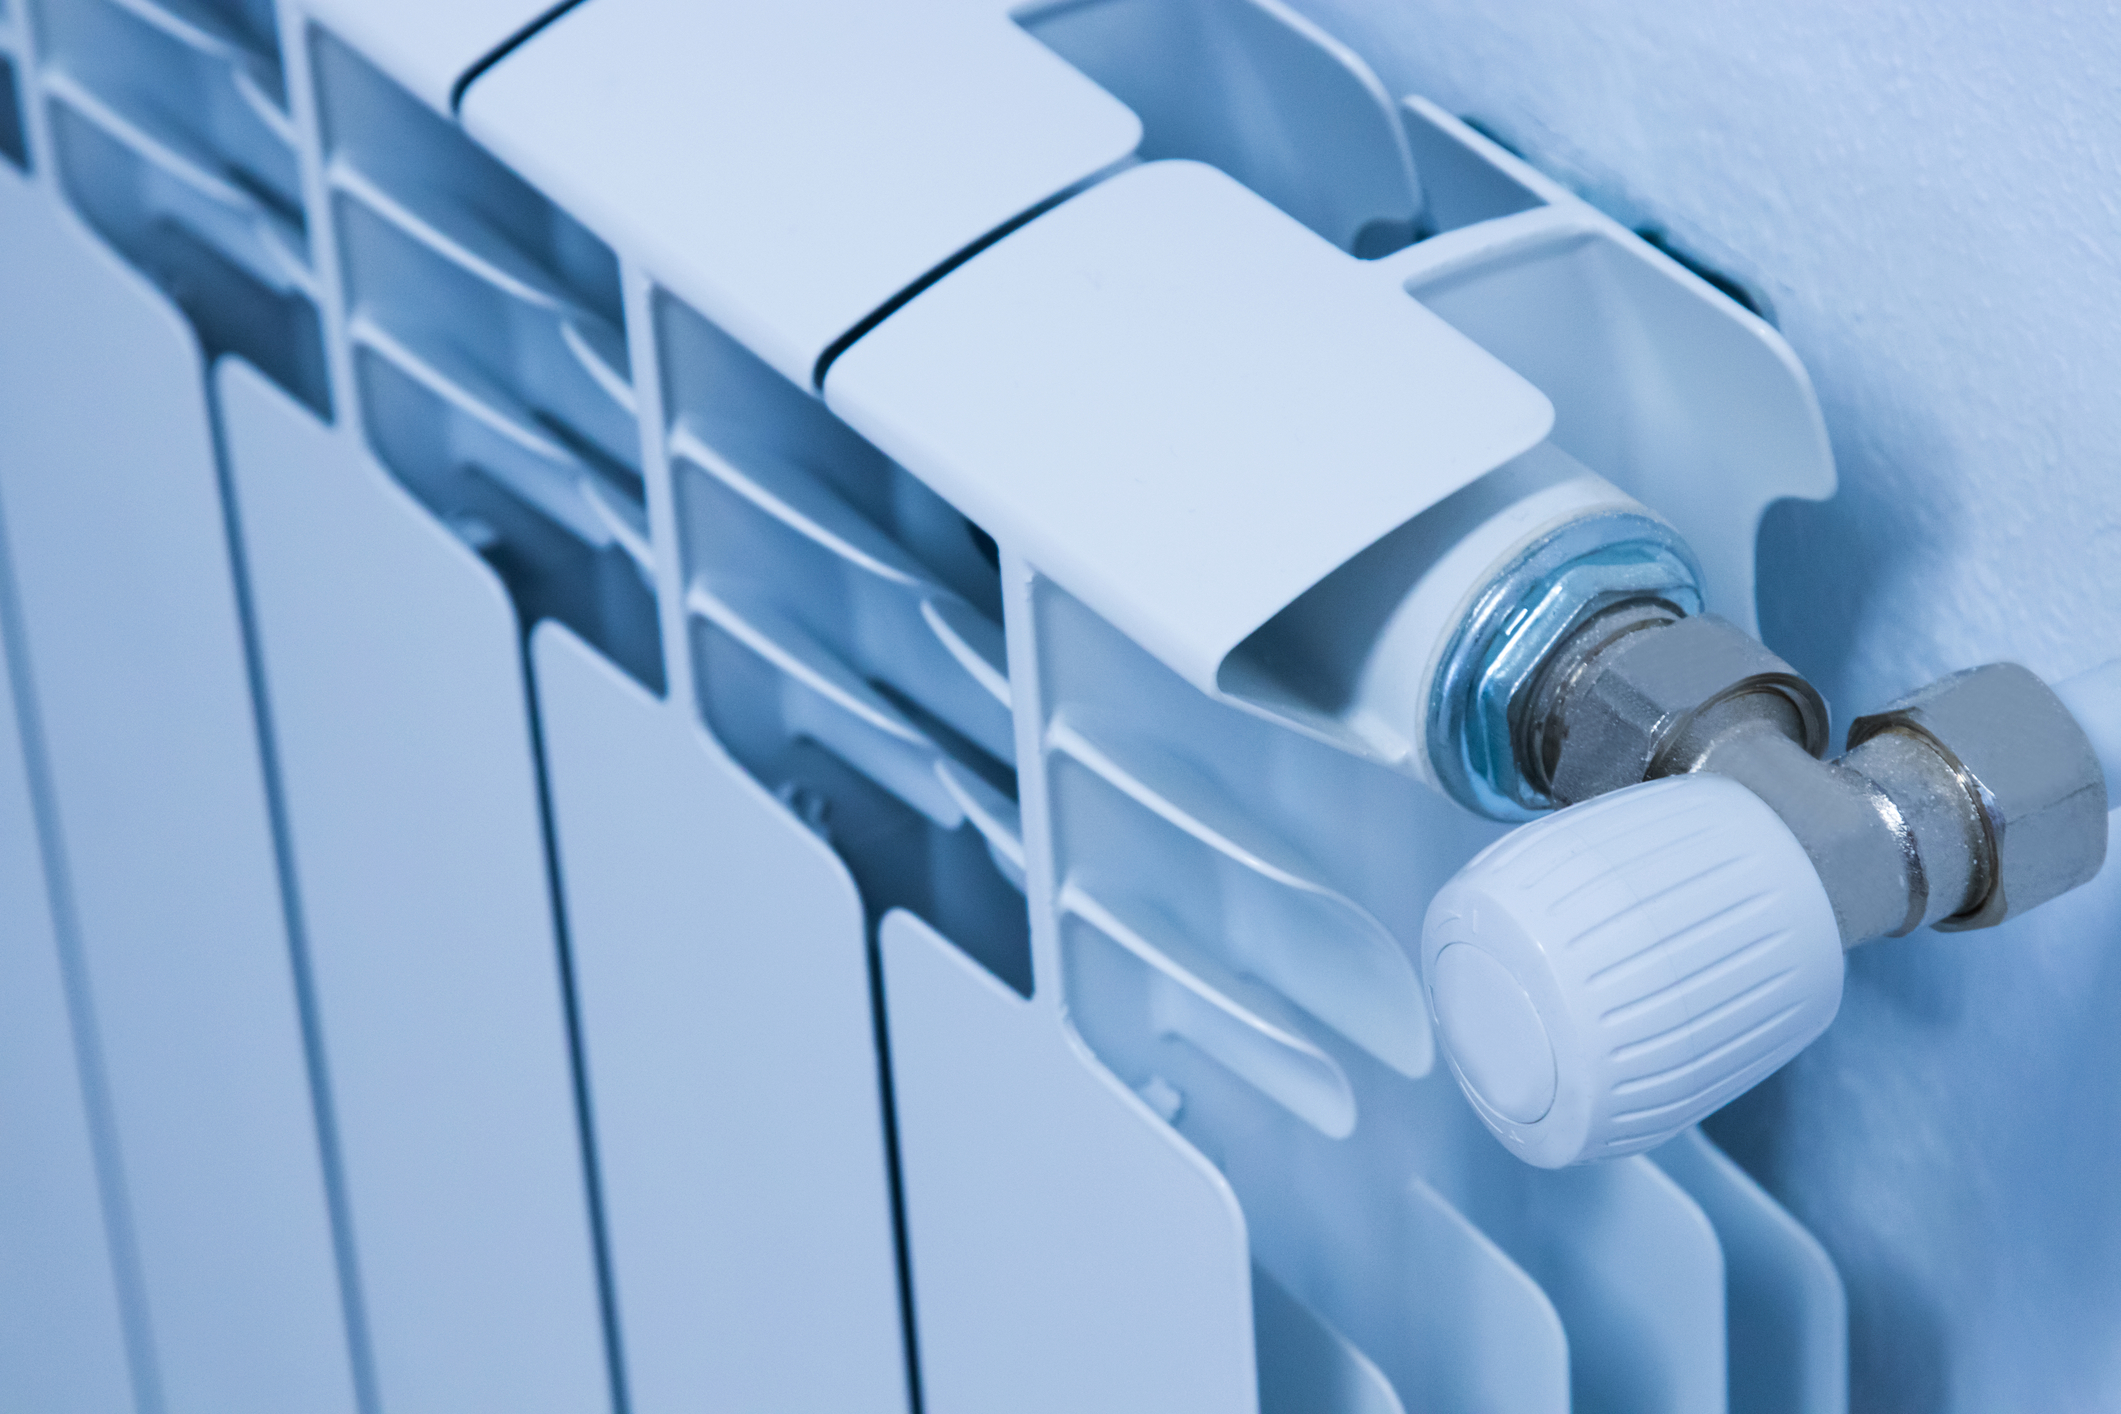
A boiler is one of the main fixtures of a house. Boilers are considered as the real heart of your home. Without a functioning boiler, you would have no hot water. That means cold morning showers and a greasy kitchen to boot. Moreover, you would not be able to come home to a toasty room because there’s no boiler to keep your house warm.

Living in a house with a broken boiler can be quite challenging. Have no hot water? Here’s a guide on what to do. Your gas boiler powers your central heating system. Without it, you wouldn’t have a warm house to come home to.

Here is Plumbingforce’s very own Homeowner’s Guide to Boiler Installations

Find the best local plumbers in the UK!

When Should I Replace My Boiler?

It’s essential to know when you should call a professional plumber for boiler maintenance and replacement. In the UK, over 18% of households experienced boiler breakdowns during the winter — definitely not the best time to have a broken boiler. 

According to boiler manufacturers, the average boiler lasts about 10years. This number depends heavily on the use and maintenance of the system. One common rookie mistake of first-time homeowners is not taking care of their boiler correctly. This decreases its lifespan and leads to huge costs. A properly maintained boiler can even last for over 20 years. Do the smart thing and invest in boiler maintenance. It’s better than having to pay thousands of pounds on a new boiler installation.

Read more details on when and where you should get your boilers serviced here.

How Long Does A Boiler Installation Take?

Are you installing a new boiler? It’s essential that you know just how long it takes to have a boiler installed. You want to schedule your week around it. When you have contractors inside your house coming in and out, it’s best to be at the premises to oversee the entire project. 

Boiler installations are quite complex, especially if your new boiler doesn’t fit into the old system. It can take from one to four days, depending on the complexity of the job and the experience of your chosen plumber.

A broken boiler in your home can be quite a hassle. If you want an extra fast, hassle-free boiler installation, call Plumbingforce now! We provide same-day boiler service so you can have a working boiler as soon as possible.

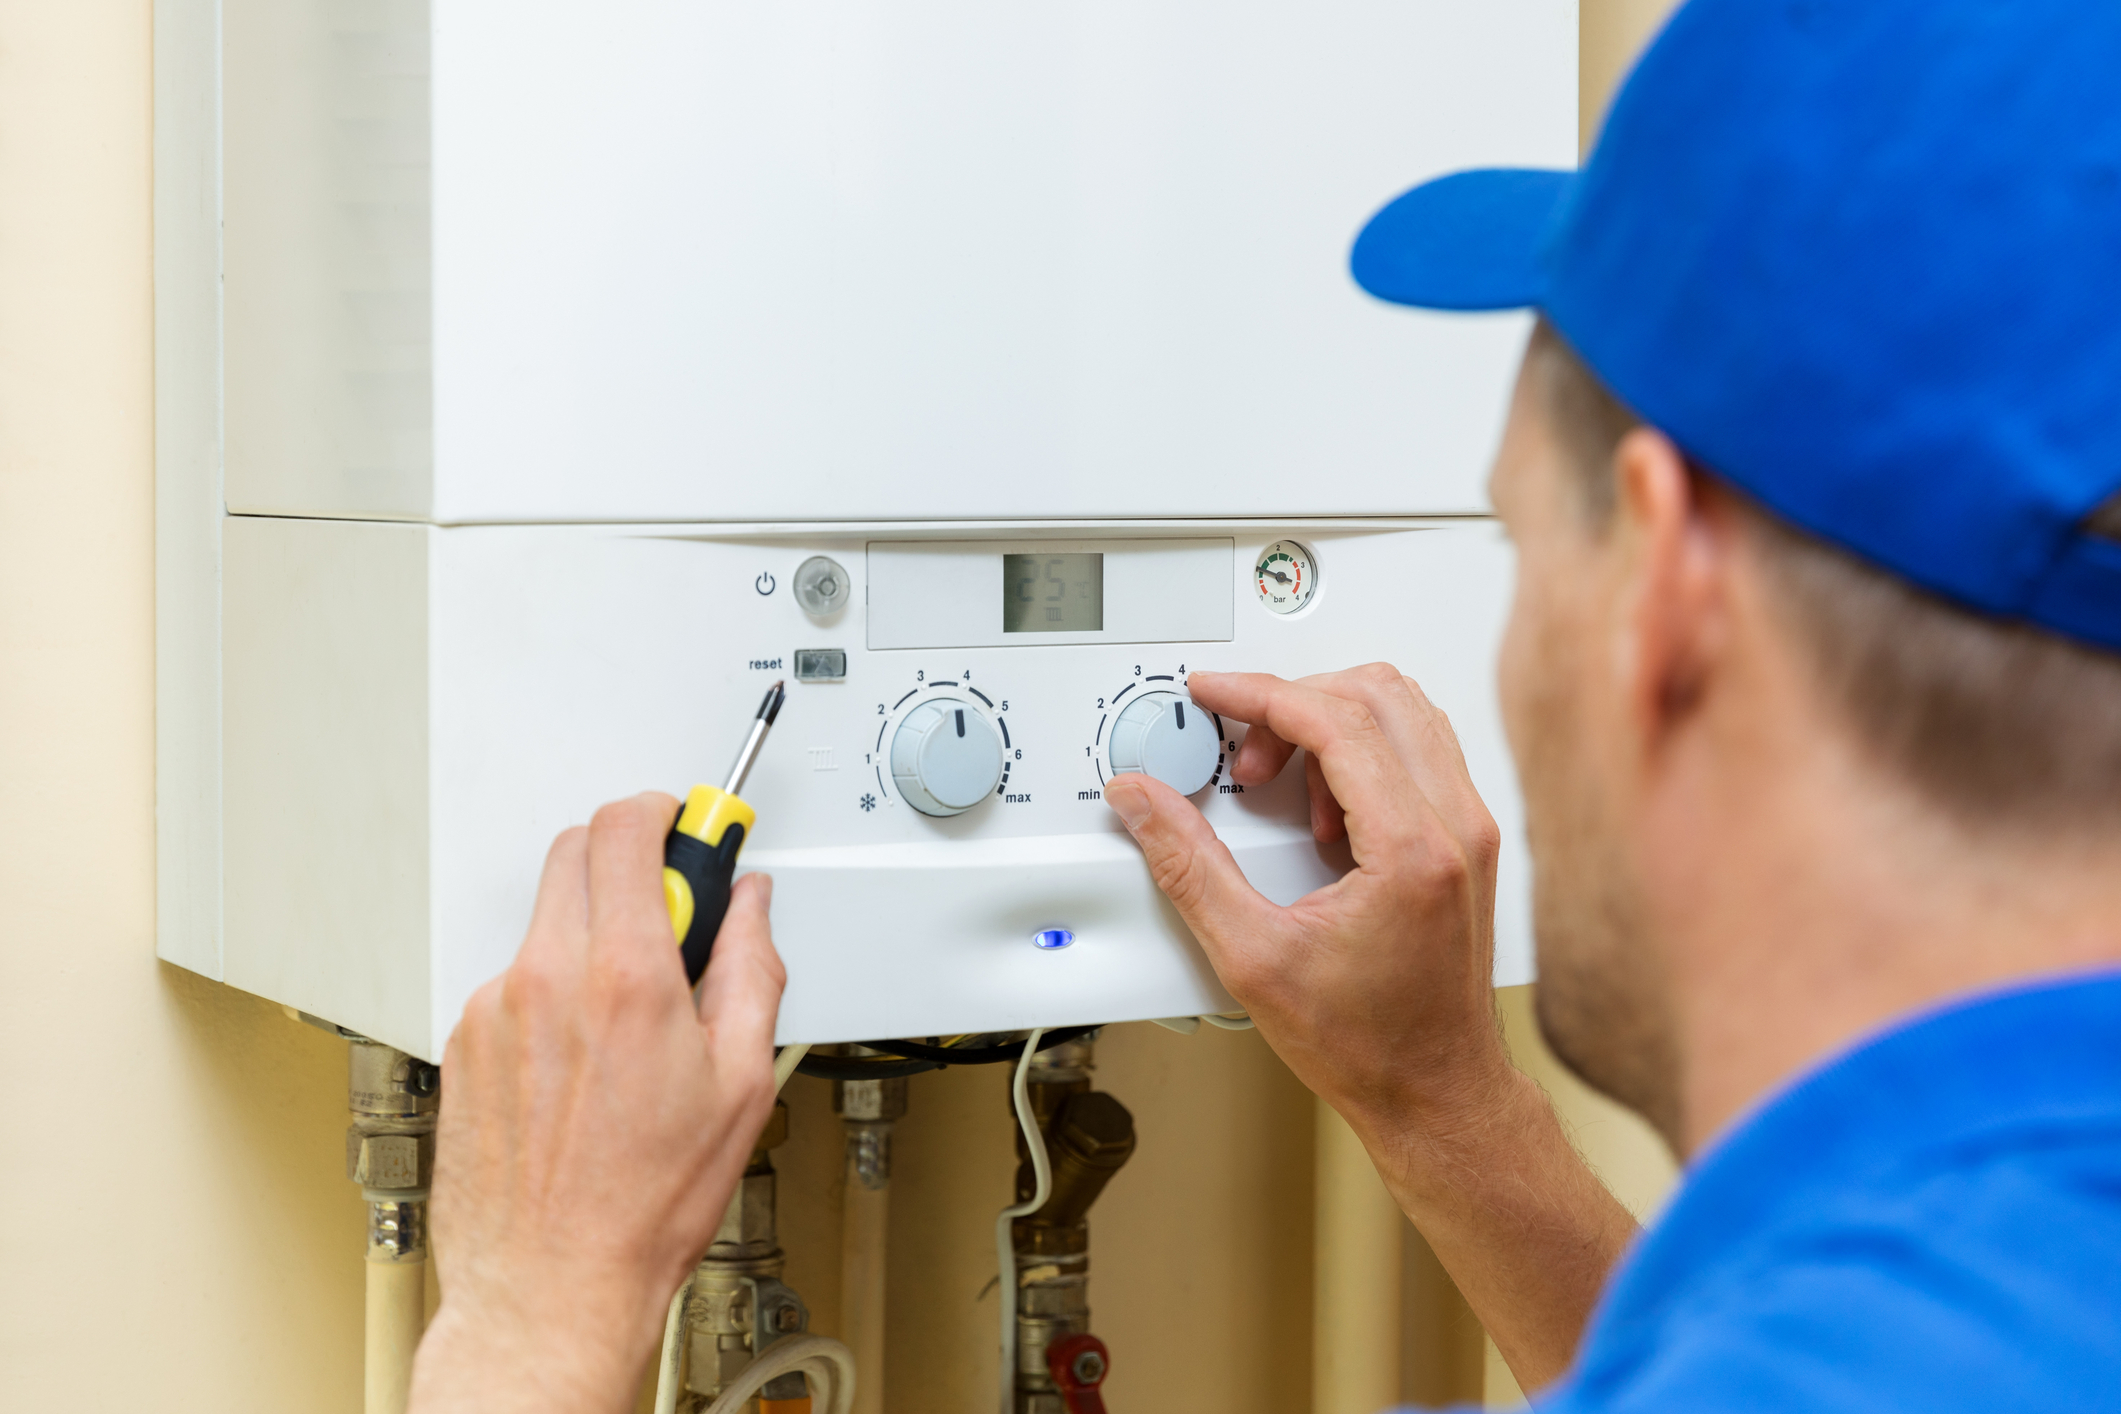
How Much Do I Have To Pay for Boiler Installation?

Boiler installations are costly. That is why experts recommend investing in boiler maintenance and repairs instead of having to buy a new boiler prematurely. It can cost thousands of pounds, excluding the installation fees. There are several factors that you have to consider, such as what type of boiler you should get: Condensing boilers, Combi boilers or System boilers all have their pros and cons. Read up on the three common types of boilers and their uses here

If you’re lost on what type would be the best boiler for your central heating system, talk to a Gas Safe registered engineer for their professional opinion.

The price of a new boiler depends on the type, model and manufacturer. You can get a boiler for as little as £400 or as expensive as £3500. Boiler installations can cost from £500 – £1200 depending on the type of boiler and the complexity of the job including distance, available space to work with, and the supplies they need to complete your boiler installation—more details on the cost of boiler replacements here.

Connect with the best local plumbers and boiler engineers near you

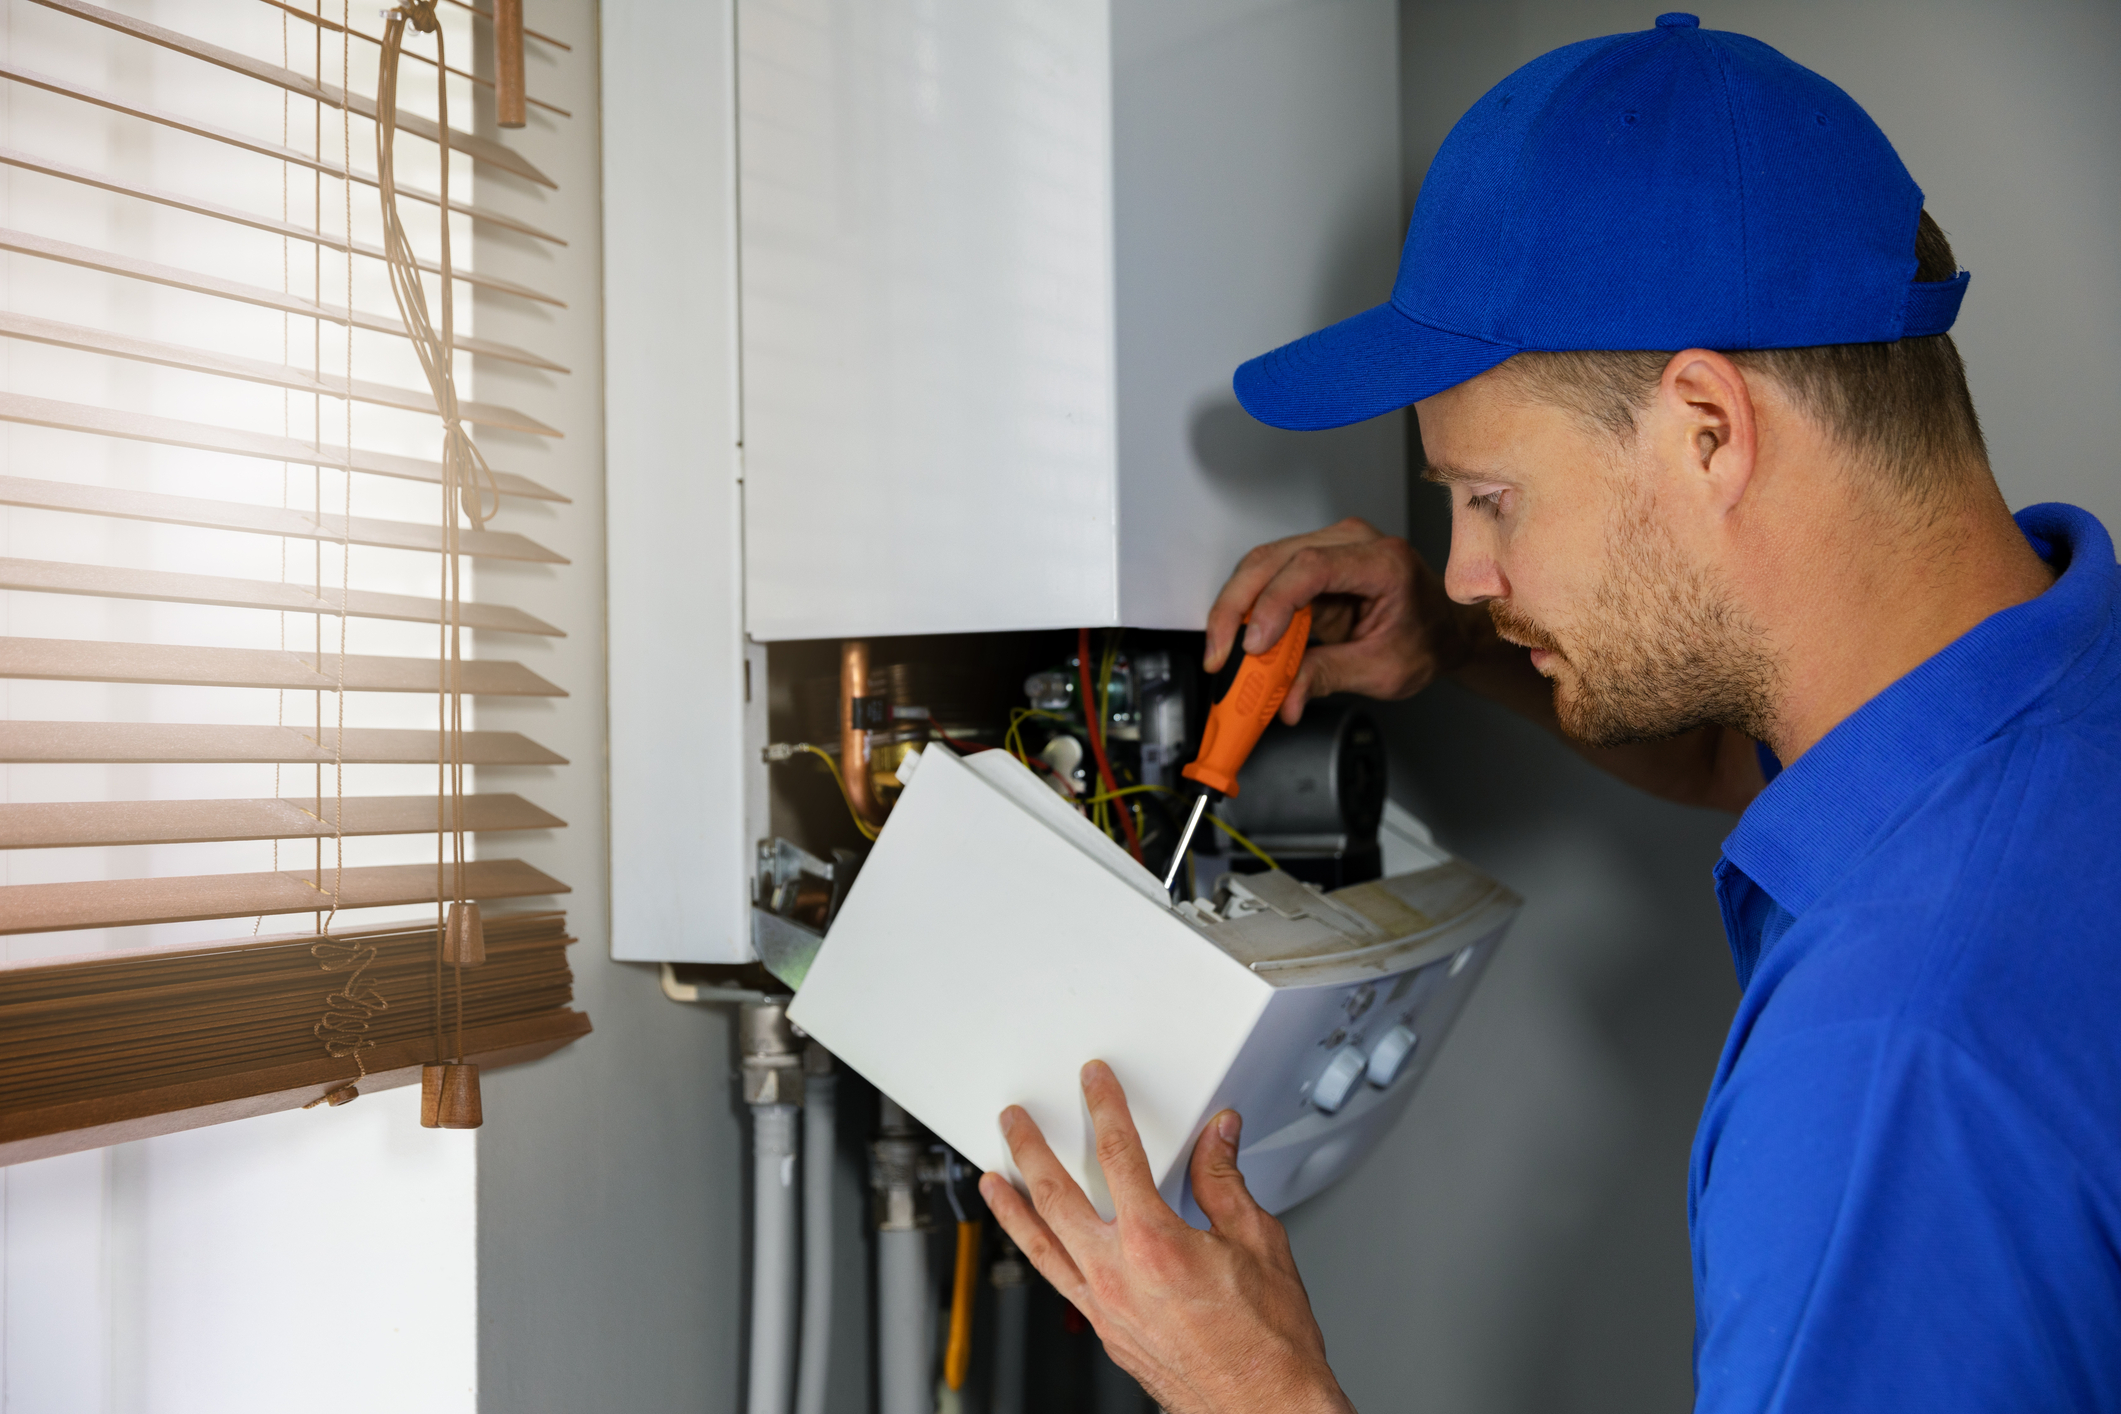
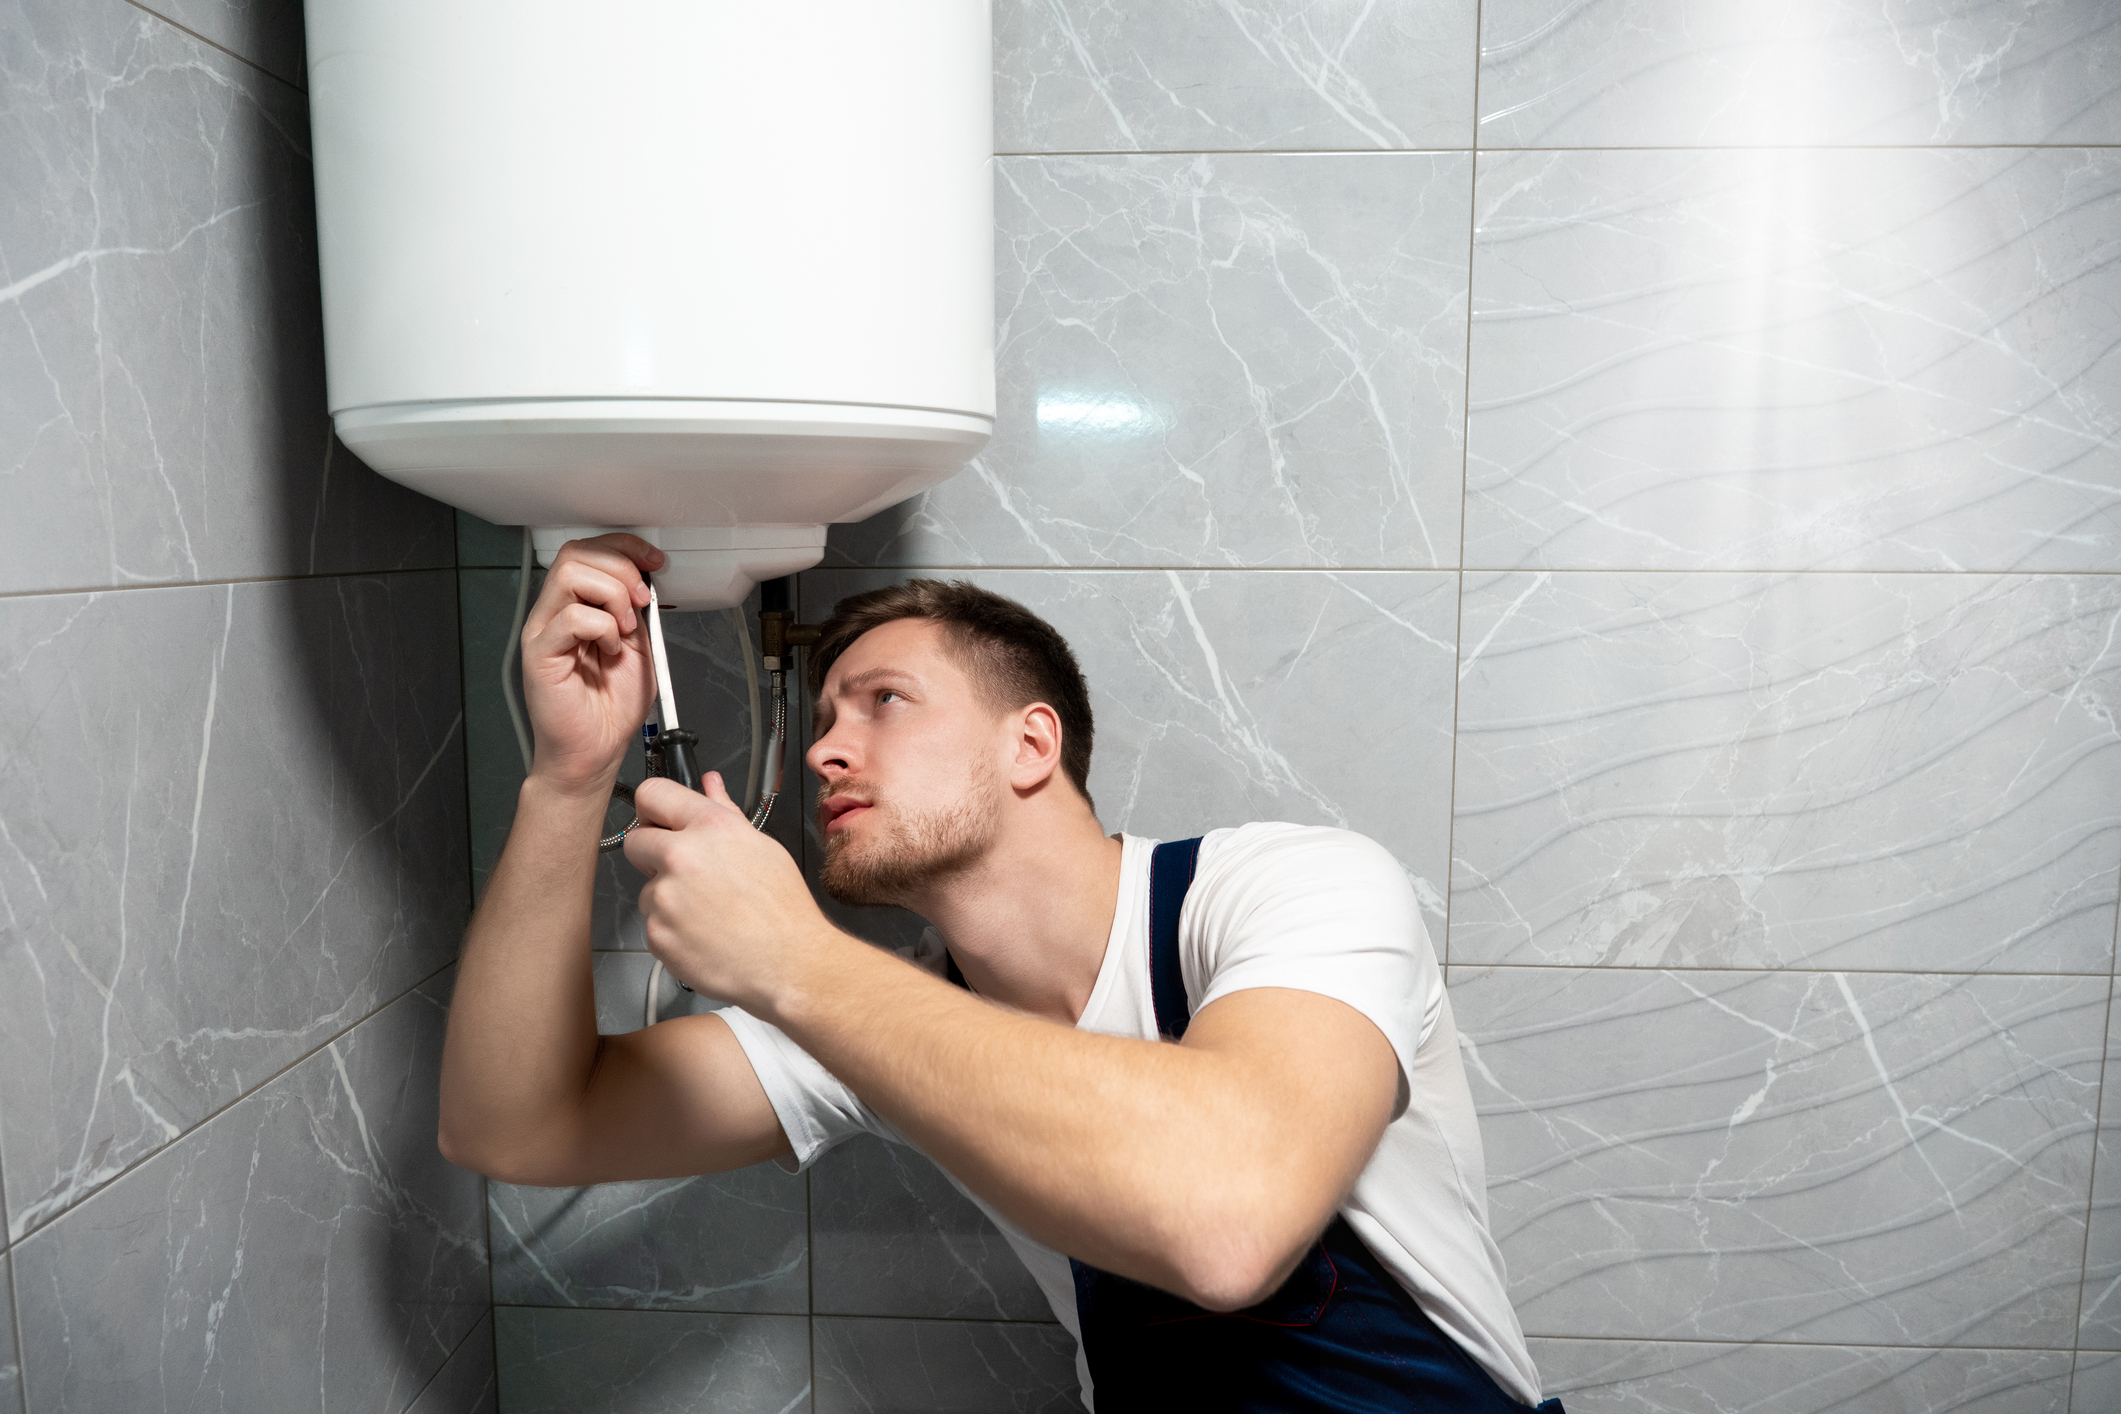
Who Can Install My Boiler?

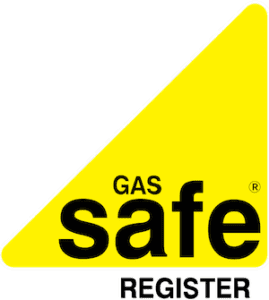
As per country regulations, all gas-related work and renovations can only be done by Gas Safe registered engineers. The Gas Safe Register is the official authorised and regulated list of gas engineers in the country. If you want to have any part of your central heating system fixed, replaced, or installed, you have to find a gas registered engineer to ensure your safety.

When your gas engineer comes to your doorstep, ask for a Gas Safe Register ID. This will contain important information such as their full name, license number, the business they work for, and which gas-related services they are qualified to carry out. 

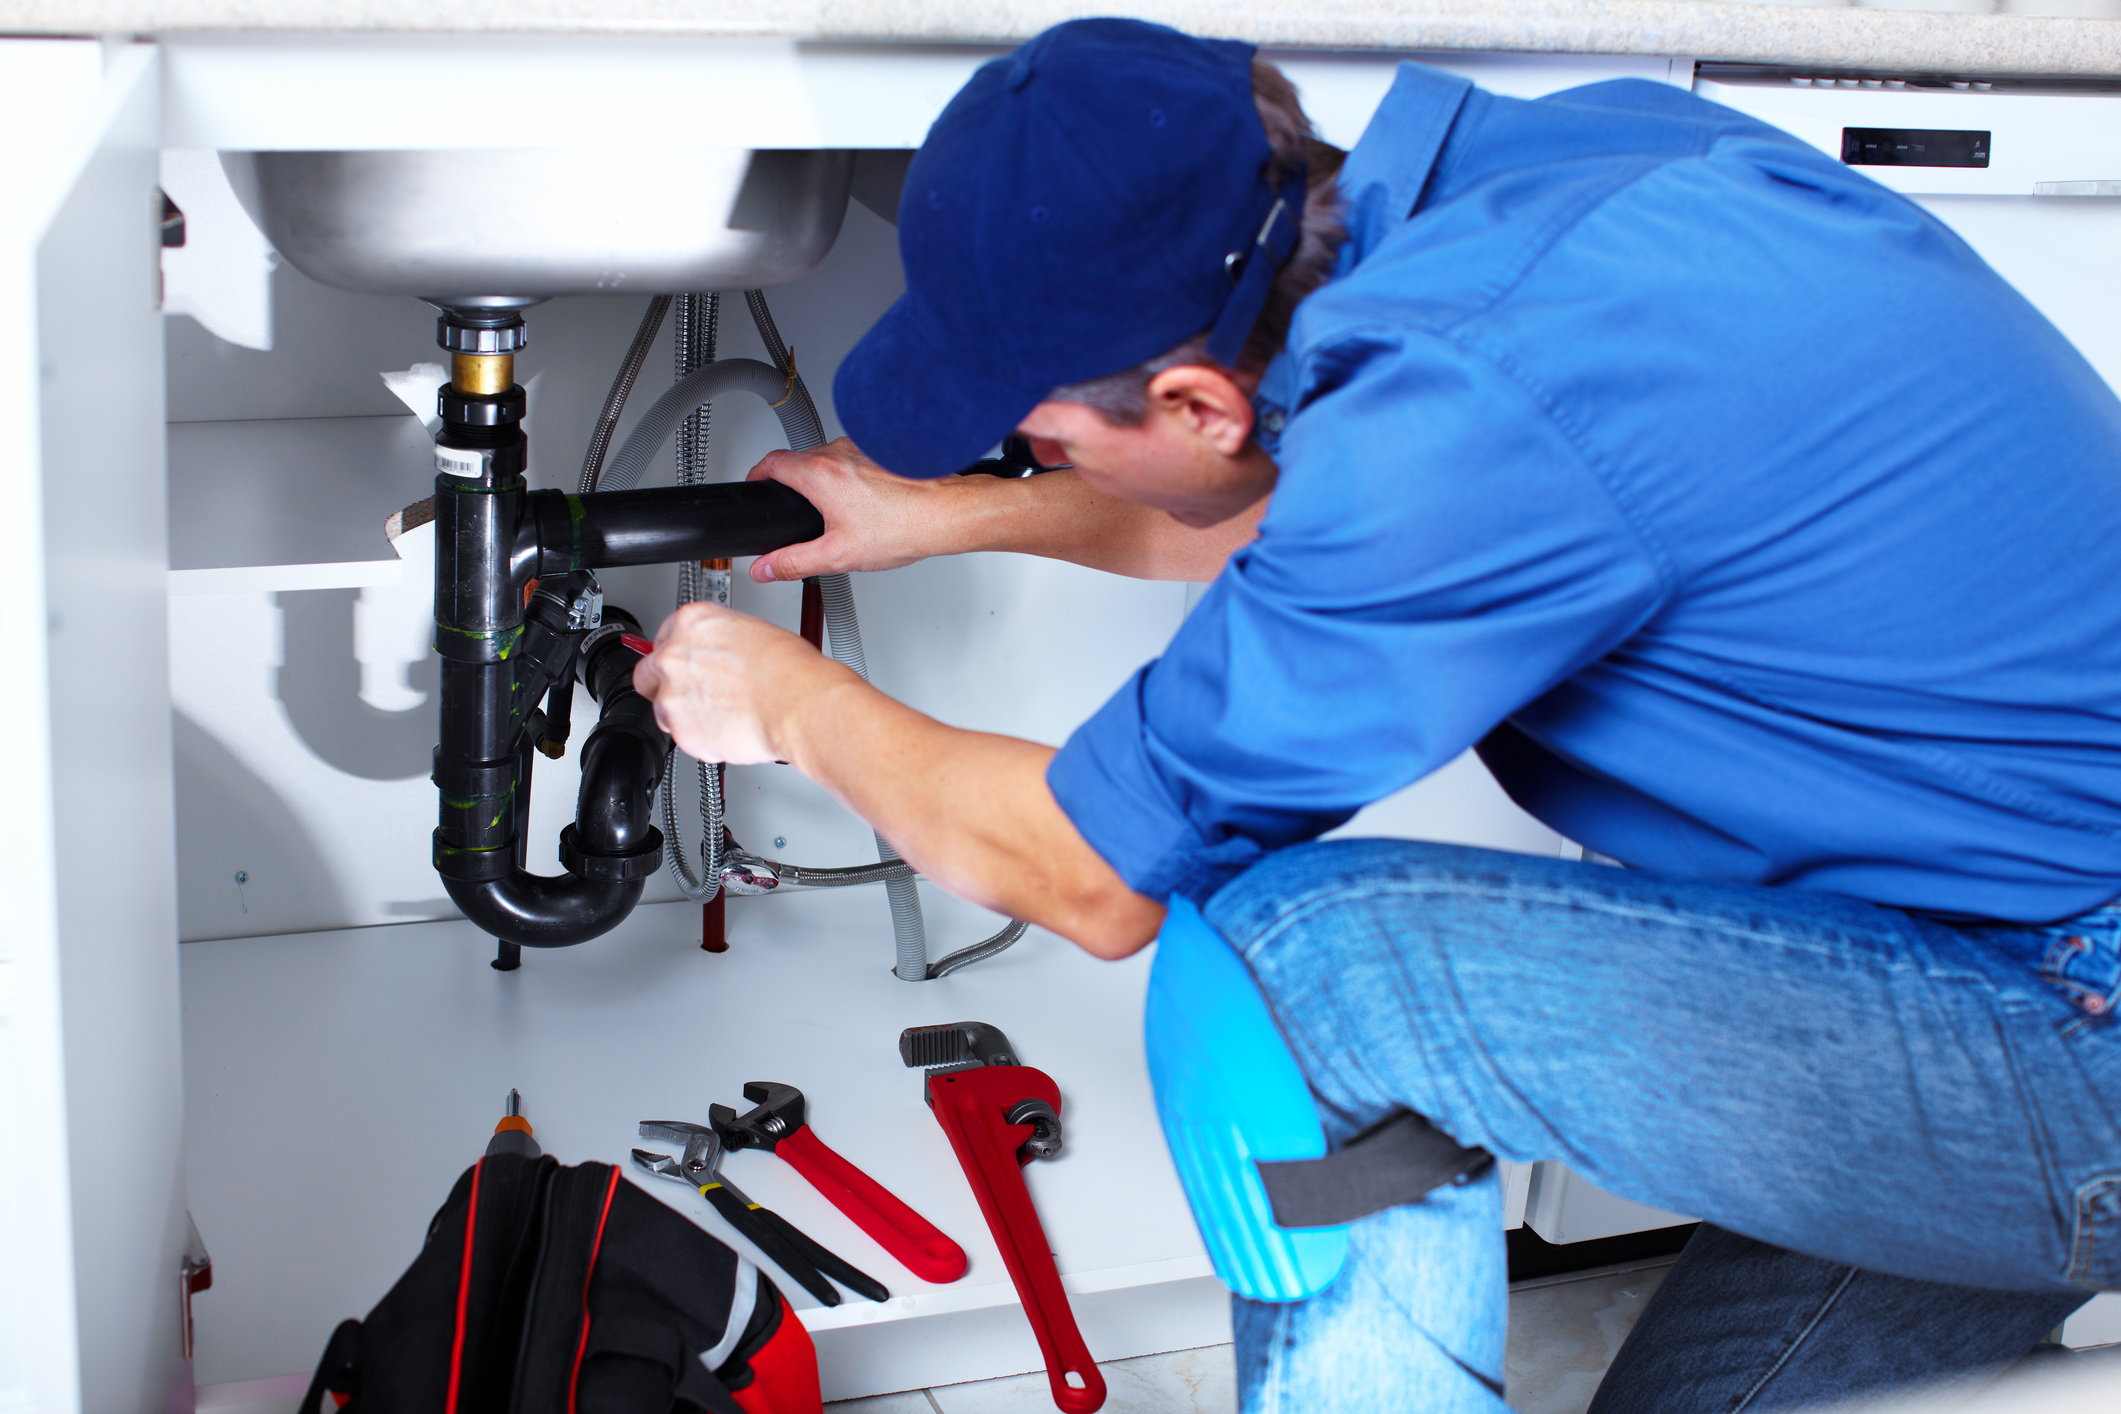
Why You Shouldn’t DIY Your Boiler Installation

Often, homeowners ask, “Why should I call a professional engineer for my boiler installation?” The thought process usually goes like this: I already paid too much for the new boiler. I want to save money by pulling a DIY boiler installation instead of losing another couple hundred pounds on a gas engineer.

If you’re already thinking along this line, STOP. According to UK laws and regulations, only gas safe registered engineers can carry out any gas work services. By DIY-ing your boiler installation, you are putting yourself, your family, your home, and your neighbourhood at risk. The price for a professional installation service is low compared to the damages you may unintentionally cause. 

As boilers are connected straight to your gas line, the risks are way too high. Make sure that you call a professional gas engineer to do your boiler installation. Your gas engineer will have firsthand knowledge of how to complete your installation. Whether you’re replacing an old boiler or fitting in a combi boiler, they already know what to do and how to manoeuvre around certain blockades. Their experience will help them finish the installation faster. This way, you get heating more quickly. You don’t want your boiler installation to go the same route as your other DIY projects, half-finished and forgotten in the basement.

 They will also have the right tools and supplies needed to complete an installation. Going to the shop and buying screwdrivers, wrenches, and other tools may cost you as much as your gas engineer. 

Lastly, your gas engineer has better odds of finishing your boiler installation without a hiccup. When you DIY, you run the risk of damaging your new boiler to the point of no return. Instead of saving £ 500 on a gas engineer, you have to spend another £ 1500 on a new boiler.

How To Find a Gas Safe Registered Engineer For Boiler Installation?

Look no further! Plumbingforce has local gas engineers registered in England that can install a new boiler on the same day as your call. Moreover, Plumbingforce will give a fixed price quote. You won’t have to worry about hidden charges to fix your heating.

Give us a call at 0330 173 2923 for more details on our boiler installations or book online now!

One-Off Boiler Services: A guide

boiler breakdowns

Many people in London avail the services of licensed boiler engineers at least once a year. A lot of boiler manufacturers offer annual boiler service to their customers. These boiler engineers check the condition of the customers’ boiler at least once a year. If they don’t offer annual boiler services, you will need to independently hire yourself a boiler engineer. Similarly, if you need help for a boiler repair and boiler emergency, you are going to need to avail a one-off boiler service. In this case, you should first know the things to note in availing a one-off boiler service. Keep reading to get the information you need in getting a one-off boiler service and other boiler services!

Find the best local plumbers in the UK!

Why is One-off Boiler Service Important?

Keeping your central heating system and gas boiler working correctly is essential not for your convenience but also to ensure your safety. Many people avail annual boiler service to regularly check if their boiler is working properly. However, there will be times where you have to call a boiler engineer ASAP when you think something is off with your boiler. Definitely, you can’t wait for your annual boiler service schedule just to fix your boiler and central heating. Availing a one-off boiler service is just as important especially in times of emergency.

One-off boiler service cost is also important if you want to fix or if you want to replace an old boiler with a new boiler. If you spot corrosion or leaks, these should be fixed ASAP to prevent any fire or carbon monoxide accidents. If you simply need peace of mind for your home, then you can have your boiler serviced. You can also include any other related services such as repairs for your gas appliances to get a better quote and price.

Can I Service My Boiler on My Own?

Some people are tempted to service or repair their boiler on their own so they can save money. Doing so may actually lead you to pay a higher cost of boiler services. Boiler service and any other gas-related work are complicated. It requires years of expertise and training to do correctly. Even if you miraculously fix your boiler on your own, there’s no telling if you did some damages that would show up later on.

These kinds of work need to be done precisely. Any careless mistake could compromise the safety of your home. Thus, all gas-related work is best done by a Gas Safe Registered engineer. After all, messing around with your boiler cover and other appliances may cause you to damage them further. 

What Are Gas Safe Registered Engineers?

Letting the professionals do the boiler service and repairs is not just a mere piece of advice. It is actually a law in the UK that only gas safe registered engineers can do gas work to ensure gas safety and monitor gas pressure. 

When you’re availing any kind of boiler service, make sure to check first if the engineer is gas safe registered in England. You can go to the Gas Safe Register website to check. Their Gas Safe Register ID should also indicate the kind of gas work and appliance they are licensed to work on.

Connect with the best local plumbers and boiler engineers near you

What is the Average Cost of a One-Off Boiler Service?

There is really no fixed price for a one-off boiler service as it depends on many factors. The average cost for a simple one-off boiler service is around £70. The range can go as low as £50 and as high as £100 or more, depending on the condition of your boiler and the complexity of the job.  If your boiler needs a thorough boiler service, you will definitely need to pay a higher price. The costs of the boiler service will also be affected by the materials and parts needed to repair your boiler. The fee for the boiler service may also depend on your location in the country. Take note also of the costs of the parts and labour to have a good estimate of the price.

When to Get a One-Off Boiler Service and When to Get a Boiler Cover Plan?

If you have a new boiler, paying for a one-off boiler service makes better financial sense. A new boiler most likely means that it will be working properly for a long time and rarely will it need to be fixed. However, if your boiler is old, it may need regular checking and repairs to keep it working and make your boiler last longer. If you need monthly or annual service, then it is best to avail a boiler cover plan. On average, the monthly fee for a boiler cover plan is £9 to £13. These prices may vary on the company you will book and on the possible quotes you may get.

When to Get Your Boiler Serviced?

Avoid having your boiler serviced around wintertime. This is usually the time when most boilers are breaking down. With demand high, you may have to pay a premium price for a one-off boiler service. The best time to give your boiler a thorough maintenance check is before winter. Make sure that you spring for boiler service before the cold sets in. This way, you can avoid having teeth-chattering nights because your boiler stopped working in the middle of winter and there are no available plumbers around.

Find and Book a Boiler Service Today

Your boiler is the heart of your home. Without it, things can easily go sideways. With Aerialforce, you can be sure that we’ll provide the best service in the market for the best price possible. Contact us now at 0330 173 2901 or book online now!

A Buyer’s Complete Guide to Immersion Heaters

immersion heating pipe work

When you think about a central heating system’s different elements, an immersion heater might not even make it on the list. The reality is that most homes in the UK depend on their boiler for hot water. Whether they have a hot water cylinder or not, boilers always do the trick – until they don’t.

When the boiler breaks, it can be a real headache to fix. UK residents who need a steady source of hot water, or those who have unreliable boilers, look to immersion heaters. If this is your first time purchasing or using an immersion heater, Plumbingforce outlines everything you need to know. These are the things we will discuss in this blog post: 

  1. What Is An Immersion Heater?
  2. How Does An Immersion Heater Work?
  3. Different Types of Immersion Heaters
    • Over-The-Side
    • Flanged
    • Screw Plug
  4. How Do You Install An Immersion Heater?
  5. How To Replace Your Immersion Heater
  6. How Do You Use An Immersion Heater?
    • How Do I Turn My Immersion Heater On?
    • How Long Does It Take To Heat Water?
    • Ideal Temperature For Your Immersion Heating
  7. Benefits of Having Immersion Heating

Find the best local plumbers in the UK!

What Is An Immersion Heater? 

An immersion heater takes the same principles of how an electric kettle heats water – just on a different scale. Instead of boiling enough water for a cuppa or two, it heats the hot water cylinder and provides you with hot water that can last for a couple of hours. 

Besides using it for day to day needs, there are times where it really shines—for example, having the immersion heater during the cold season. With out-of-town guests and increased hot water usage during the holidays, your boiler might not be able to heat the water fast enough. Using an immersion heater can be a great way to have a steady source of hot water.

How Does An Immersion Heater Work?

An immersion heater has an attachment that gets submerged in the hot water cylinder. A strong current runs through the metal coils, and it heats the surrounding water. Unlike your radiators that depend on your boiler, your immersion heater is hooked up separately. It has its own power supply and can be switched on and off independently without affecting your central heating. 

An immersion heater is relatively flexible. You can use it with a vented or unvented cylinder. If you want to learn more about unvented cylinders, also known as megaflo, you can read more about it in our dedicated blog post: Everything You Need To Know About A Megaflo Cylinder.

Different Types of Immersion Heaters

No matter what type of immersion heater you get, the principals are the same. It is just a matter of finding the most suitable one for the job. There are 3 different types of immersion heaters available:

Over-The-Side

Over-the-side immersion heaters are meant to be installed from the top, but the heating happens along the side or bottom of the tank. It is shaped like a wand or a whisk extension of your mixer. This model is mostly used for industrial applications, and it isn’t commonly found in residential homes. 

Flanged

Unlike the over-the-side immersion heaters which have the metal coils at the end, the flanged immersion heater has metal coils all the way, from top to bottom. The tubes are attached to a flange and are shaped like a circle. This model is something you are more likely to find in your house. 

Screw Plug

A screw plug immersion heater might not look too different from a flanged one. Both models are both great for circular tanks, and the metal coil runs from top to bottom. The main difference is how they are installed. The top part of a screw plug is well, a screw. You can see the thread up near the top of the heater. Again, this is something you are likely to find in your house.

Besides the different types, you can also pick between an on-peak and off-peak immersion heater. They generally look and work the same way, but the main difference is your energy bills. On-peak immersion heaters run during the day when the electricity is expensive. 

In contrast, the off-peak immersion heaters run during the night. The low energy demands mean cheaper electricity and lower energy bills. An off-peak heater is an “out of sight, out of mind” option whose only con is that you would have to wait before your next top-up. It can be an excellent choice for people who aren’t at home all day or use hot water sparingly. 

How Do You Install An Immersion Heater?

If you are looking to install an immersion heater for your new hot water tank, it is possible to do it on your own. However, with your plumber and heating engineers fixing up the other parts of the house, why don’t you let them take over this one? 

The hot water tank has a very thin copper wall to help with the heating. Being too rough with the installation can damage this wall and introduce wear and tear to your brand new water tank. Not so ideal, isn’t it?

Plumbingforce can get a heating engineer and plumber on site within the same day as your call to help you install your electric immersion heater. 

Here are the steps you need to take to install a new immersion heater:

  1. Make sure that everything is disconnected, especially electricity.
  2. Wind up your immersion heater on top of the water tank.
  3. Before you fully flush the immersion heater in its slot, remember to add the fibre seal. Use jointing paste to ensure a tight seal. 
  4. Wire your immersion heater. You can opt to connect it to your ring main or hook it up to a radial circuit. Follow the wire placements on the product manual and make sure all the electrical connections are tight. 
  5. Set your desired temperature. 

Connect with the best local plumbers and boiler engineers near you

How To Replace Your Immersion Heater

The steps for installing and replacing your immersion heater is very similar. However, the key difference is working with a new vs used immersion water tank. A new installation is very straightforward since the tank is empty and it isn’t fully connected. However, replacing means working around your existing system. There are more added steps. 

Here is how you can replace your immersion heater.

  1. Make sure your immersion heater is not plugged. Remove all electrical connections. 
  2. Turn off the cold water supply. You can check the diagram of your hot water cylinder so you can identify the cold water feed. Follow the pipe and turn off the valve. If you have a faulty valve, you may need to disconnect the mains and drain your system.
  3. Open all the hot water taps, or use it generously, so the immersion tank is not full. It can take 10-15 mins, depending on how many taps you have open.
    1. Make sure it doesn’t drip. If there is a bit of water, you may have a faulty valve – again disconnect it at the mains.
  4. Connect the drain point with a hose and drain the tank. 
  5. Unwind your immersion heater gently. Again, you do not want to damage the copper walls.
  6. Insert the new immersion heater to the tank and seal it. Make sure it is tight, but not so much that you go past the thread on the screw plug. 
  7. Refill your tank, remember to close off all drain points, which also includes your taps. 
  8. Wire your new immersion heater, and make sure it is set at your desired temperature. 

There is a lot more back and forth between your hot water tank storage and the rest of your house. If you want to do away with the hassle, Plumbingforce has local plumbers who can help you get it done in no-time. 

How Do You Use An Immersion Heater?

With your immersion heating in place, it’s time to put it to work. Here are common questions people have about their immersion heaters.

How Do I Turn My Immersion Heater On?

Your immersion heater is usually installed with a thermostat, timer, and switch. Switch your immersion heater on 2 hours before you need to use your hot water, and turn it off later. The switch doesn’t have to be in the loft or basement with your hot water tank. It can be wired near your other central heating controls in the main living area. 

Now, you don’t always have to turn your immersion heater on manually. If you have an off-peak immersion heater, which is the more eco-friendly option, you can keep it running. An off-peak immersion heater will use cheaper electricity overnight to heat your water. When you have an on-peak immersion heater, you have to be conscious about when you need your hot water, and how much you have. 

How Long Does It Take To Heat Water?

The answer varies from the brand, model, and age of your immersion heater to your holding tank’s size. A safe estimate would be 2 hours to heat water for your whole tank. 

Ideal Temperature For Your Immersion Heating

When it comes to setting the temperature for your immersion heating, it is up to personal preference. If we were to give a number, 55°C is a good place to start. It is between the ideal temperature between hard water and soft water. 

However, if you want to follow the recommendation for your water type, hard water areas should have the temperature set at 50°C while soft water areas can go up to 60°C. Still, you can try different temperature settings on your heater until you find the one you like best. 

Benefits of Having Immersion Heating

Using an immersion heater means you can have hot water readily available. It is a great addition for homes with old and unreliable boilers. In between your many boiler repairs, you don’t have to say good-bye to the comforts of your home. It can also be really helpful in homes that have fuel-burning central heating systems. When you are running on empty, you can still have hot water. 

Immersion heaters are also getting more traction with the Green Homes grants. The UK government is pushing for it more so that more homes can have reliable heating and hot water without increasing the carbon footprint. Like other eco appliances in the market, an immersion heater can run off solar so if you live in the sunnier-side of the UK, your immersion heater and work with your solar panels.

Besides being suitable with sustainable energy sources, it can be energy-efficient as well. Heating water with an off-peak immersion heater can give you the same convenience without any additional work or hassle. 

Plumbingforce can help you set this up. All you have to do is call us at 0330 173 7900 or book us online! Besides installing immersion heaters, we also take care of blockages, boiler repairs, boiler maintenance, and emergency call-outs for all your plumbing

Your Handy Guide To Boiler Filling Loops

central heating

Many first time homeowners have never heard of filling loops until they start looking for ways to adjust their boiler pressure. And that is a part of the process, as you learn more about maintaining your central heating – you get to know every obscure part and their role in the system. 

Plumbingforce prepared this handy guide to help you get to know your boiler filling loops. Here we cover the following points:

  1. What Is A Boiler Filling Loop?
  2. Different Types of Boiler Filling Loops
    • External
    • Internal
  3. Where Can You Buy A Filling Loop?
  4. Where Is Your Filling Loop Located?
  5. How Do You Install A Filling Loop?
    • Inspect Your Filling Loop
    • What Goes Where
    • Secure Your Connection
    • You Are Ready To Go!
  6. How Do You Use A Filling Loop?
    • Using An Internal Filling Loop
    • Using An External Filling Loop

Find the best local plumbers in the UK!

What Is A Boiler Filling Loop?

A boiler filling loop is a hose that can temporarily connect your boiler to your main water supply. It is used to  repressurise your boiler and top up the water when you drain or bleed your system. They usually come as an additional attachment with the boiler. When they aren’t, you can easily buy it separately.  

Different Types of Boiler Filling Loops

There are 2 types available: 

External Filling Loop

An external filling loop hose is braided with compression fittings on each end. There are also two valves: one to control the water flow (stop valve) and the other to ensure the boiler water doesn’t go back to the mains (double check valve). A part of the external fitting loop connects to your main water line, and the other connects to your boiler. You need to make sure you have the right end on its designated terminal. 

You can easily find an external filling loop in local hardware stores and online retailers. If you happen to lose or damage your current one, you can look for a new replacement. It shouldn’t be too hard to find.

Internal Filling Loop

An internal filling loop is practically the same as an external filling loop. You can typically find internal filling loops in combi boilers. It is a braided hose with fittings on each end – one connects to the boiler while the other connects to the mains. However, there are several standout differences.

Since it is internal, it is fully integrated into the boiler system. The connections are close to one another, so most internal filling loops are shorter than external ones. The hose can be braided, but some models forgo this and simply have a pipe connecting the boiler and water mains with the proper fittings and valves. 

Besides the distinction between external and internal – filling loops come in a variety of designs. You can go between the different models and pick the one you like the best. At the heart of it all, it does the same job. As long as it is high quality, you shouldn’t have a problem with it. 

Where Can You Buy A Boiler Filling Loop?

You can easily find a filling loop in your local hardware stores. If you are having a tough time finding a filling loop, you can try to target plumbing and heating speciality stores. Ones that cater to professional plumbers and heating engineers are bound to have stock ready. 

If you are looking to buy online, you can find excellent options at these retail websites: 

  1. Amazon.co.uk
  2. Ebay.co.uk
  3. Screwfix.com
  4. Wickes.co.uk
  5. Directheatingsupplies.co.uk
  6. Thehardwarestores.co.uk

With these websites, you are sure to find a filling loop for your boiler. 

Connect with the best local plumbers and boiler engineers near you

Where Is My Filling Loop Located?

Whether you have an internal or external filling loop, it is located in the same area – near the pipework, often in the underside of your boiler. Some brands and models might have a different placement. Suppose you want to have a better idea of where your filling loop is located. In that case, you can try to check out the central heating filling loop diagram or combi boiler filling loop diagram online. With a proper illustration, you don’t have to fumble your way to the isolation valve. 

How Do You Install A Filling Loop?

When it comes to the installation of your filling loop, it depends on what kind you have. An internal one is very different from an external one. However, it shouldn’t be too difficult to identify. For the most part, you can tell by what type of boiler you have. For example, combi boilers usually have internal filling loops, so there is no installation necessary. Your plumber or heating engineer should have that taken care of for you.  On the other hand, if you have a fuel burning boiler or a systems boiler you have to install your external filling loop manually. Unlike the internal one that usually stays inside the boiler indefinitely, an external one should only be connected when used. When it isn’t –  it should be turned off and disconnected until the next time you repressurise your boiler.  Why? Because of the boiler filling loop regulations. When your filling loop connects your boiler and mains there is always a chance for a backflow – it doesn’t matter whether your boiler filling loop is in on or off position. It doesn’t minimise the risk.  Plumbers, heating engineers, and maintenance codes tend to be very cautious when it comes to backflow because it can lead to water contamination in the main lines. And since the whole neighbourhood draws their water from the same source, this can lead to very serious and very expensive problems. Avoid the fines and only bring out your filling loop when necessary.  With the warning out of the way, here are step-by-step instructions for installing your filling loop: 

Inspect your filling loop.

See what kind you have on hand. While most models have 2 valves, some only come with one. Even the types of valves may vary. Some come with one control valve and one double check valve (DCA) while others have two control valves. Your manual can be a reference.

What goes where. 

Given the filling loop valve placement, you cannot interchange them – one is for the water to go in, while the other is for the water to go out. Fit the end with the stop valve near the main lines. 

Secure your connection.

Use an adjustable spanner to secure the connection between the filling loop, the boiler and the mains.

You are ready to go!

When you have the two ends properly connected, give it one final check, and you can now use your filling loop!

How Do You Use A Filling Loop?

Installing and using a filling loop is very DIY-friendly. In fact, it is one of the few things you can handle every couple of months. Instead of waiting for your local heating engineer to pop by, you can add this to your list along with other maintenance tasks. If the pressure is too low or keeps dropping, repressurising your boiler and central heating system is very easy. Here are helpful steps you can take:

Using An Internal Filling Loop

  1. Turn off your boiler or shut down the electricity.
  2. Bring out the key for your internal filling loop.
  3. Open the hatch/ flap and insert the key in its proper slot.
  4. Activate your system. This step may vary according to your boiler. For example, Worcester Bosch, you turn the key from the open to the closed padlock symbol, then turn the knob beside it counterclockwise to top up the water.
  5. Check the pressure gauge until it reaches the right range, usually 1-1.5 bar (keep it green). 
  6. Tighten the knob (clockwise) and turn the key to the open padlock position. 
  7. Remove the key. 

Using An External Filling Loop

  1. Turn off your boiler.
  2. Remove the cap of your isolation valve.
  3. Fit your external filling loop. This part may depend on your set up. Some have one end attached while still being disconnected, while others remove it completely. Use an adjustable spanner to tighten both ends. 
  4. Double-check the position of your valves so that there are no issues. You can consult the manual for this part.
  5. Turn the knob/lever of the filling loop slowly to let the water in the boiler. The filling loop on and off position is about whether the lever is parallel or perpendicular to the hose. If it lines up, then that is the filling loop on-position. If it creates a cross or “t” shape, it is the filling loop off-position. 
  6. Check the pressure gauge. Make sure it is in the 1-1.5 bar range (green) before turning the lever to close. If it goes past the ideal range, just bleed your radiator and go back to step no. 1. 
  7. Disconnect your external filling loop and clean up. 
No matter what type of boiler you have in your home, a filling loop is an easy way to fix your boiler’s pressure. By keeping the pressure at the proper range, you not only get an efficient boiler, but you also minimise the damage on your pipes. In fact, this is one of the main tasks of your boiler service! Repressurise your boiler! If you need a new boiler installation or additional help with your combi boiler’s filling loop you can contact Plumbingforce at 0330 173 9039 Alternatively, you can also book our services online! We have an excellent team of heating engineers and plumbers who are ready to help you get your central heating in tip-top shape. From brand new installation, regular maintenance and boiler repairs, to emergency call-outs – Plumbingforce can be your one-stop-shop!

All You Need To Know About Gas Safe Engineers

engineer with central heating

Looking for a gas safe registered engineer is critical for your safety. Gas work could be deadly if done by someone unqualified as it can lead to fire, carbon monoxide poisoning, gas leaks, and faulty installations. Here, we listed the things you show know about gas safety and how you can find registered engineers in your area.

  1. What are Gas Safe Registered Engineers?
  2. What are the Qualifications Needed to be a Gas Engineer?
  3. How Do I Know if an Engineer is Gas Safe?
  4. Where Can I Find Qualified Gas Engineers?

What are Gas Safe Registered Engineers?

An engineer or a plumber who is gas safe registered means that he is qualified and legally allowed to do gas work. This includes a variety of work including gas installation, working with gas LPG, and working with gas appliances such as a gas boiler. 

The terms plumbers and gas engineers are often used interchangeably, but there is actually a big difference. Plumbers, usually focused on repairing pipes and water supply, often do not undergo formal training and can qualify mostly by experience. On the other hand, gas-specialised engineers are required to hold formal qualifications to ensure gas safety.

What are the Qualifications Needed to be a Gas Engineer?

To ensure the safety of the public, gas engineers in the UK are required by law to be on the Gas Safe Register. To be on the list, they must show evidence of their competence and the relevant qualifications. They will also be required to undergo training to obtain the relevant qualifications before they can work. Thus, the gas industry is highly regulated in the country. 

How Do I Know if an Engineer is Gas Safe?

To ensure gas safety, it is important as a customer to make sure that the person you’re hiring is on the Gas Safe Register. To check, you can go to Gas Safe Register’s website and go to the “check an engineer” section.  Under the “check an engineer” section, there is a search bar where you can enter the licence number of an engineer. The licence number is a 7 digit number that can be found on an engineer’s ID card. 

Do not be afraid to ask for an engineer’s ID. Gas safe register renews their license every year, and you can see the validity of their membership and job below their registration number. You can also see at the back of their card the list of the things and appliances they are qualified to work on. Checking these details is crucial for your safety.

Where Can I Find Qualified Gas Engineers?

Aside from checking an engineer on a list, you can also find one in the website of Gas Safe Register by clicking the “Find By Location” section under the “Check the Register” drop-down menu. You can find Gas Safe registered businesses near your area by entering your postcode in the search box. You can also check whether a business is in the list of Gas Safe Register by clicking the “Check a Business” section.  You can either enter the business registration number of the name of the business to verify if they are certified for gas safety.

Hire a Gas Safe Engineer from Plumbingforce NOW!

While you’re at it, you can do a number of things on the website of Gas Safe Register. You can search for blogs, articles, or advice in the search box in the navigation menu. A registered engineer can sign in to the toggle navigation menu “Engineer Login please click the sign in button below to access the engineer portal” area of the website. 

If you have questions about the Gas Safe Register, you can call them using their number. You can click the “Contact Us” section or you can go to the bottom of the website and locate their contact details. The bottom area should look like this just below the area of key pages popular pages: consumer enquiries 0800 408 5500 2020 hse all rights reserved. You can also answer the engineer portal website evaluation survey.

Looking for a Gas Safe Registered Engineer? Contact Plumbingforce at 0330 162 1659 for more details.

A Buyer’s Complete Guide For Your Central Heating Thermostat

thermostat

No home in the UK would be complete without their central heating setup. Many daily tasks depend on your boiler, heating thermostat, and radiator to get the job done. Without them, you can lose your heating and hot water.  

Of all the moving parts of your central heating, let’s focus on your central heating thermostat. As the control hub of your heating, it is important to find the right one. Here are some of the topics we are going to cover to help you with your thermostat search:

  1. What Is A Thermostat?
  2. What Are The Different Types of Thermostats?
    • Line Voltage
    • Low Voltage
    • Analogue Thermostats
    • Digital Thermostats
    • Smart Thermostats
  3. How Does A Thermostat Work?
  4. How Do You Install A Central Heating Thermostat?
    • Prep Your Home
    • Find The Right Position For Your Thermostat
    • Install The Back Plate
    • Install The Thermostat
    • Test It
  5. How To Set The Digital Timer?
    • Open The Hatch
    • Set The Date And Time
    • Set The Timer
  6. How Do You Use A Central Heating Thermostat?

Find the best local plumbers in the UK!

What Is A Thermostat?

A thermostat is in charge of relaying your instructions to your boiler and radiator. There, you can find the central heating controls for the entire house. You can use it to select your desired temperature and then sit back and relax. 

What Are The Different Types of Thermostats?

There is a wide range of thermostats available in the market. However, before you look at the different types, first determine whether you want a line voltage or low voltage system. It might seem pretty technical, so let’s simplify things. It all comes down to the electrical wiring:

Line Voltage

A line voltage system uses a 120 volt to 240-volt circuit and wiring, which is pretty standard for most of your household appliances like your lights, ceiling fans, vacuums, etc. 

You can tell whether you have a line voltage thermostat by your installation. A line voltage thermostat comes with 2-4 thick wires, and it can be very simple to install. These are great for managing baseboard and wall heaters.  

Low Voltage

A low voltage system runs on circuits and wiring that are below 50 volts. Since it reduces energy consumption over time, it is very common in smart and eco-friendly tech.

Similar to the line voltage system, you can tell a low voltage device by the installation. Since a low voltage thermostat will need a transformer, it is trickier to install and also more expensive. The wires are a lot thinner than the ones in the line voltage system. They are commonly used for central heating systems.

Besides making the distinction between a line and low voltage system, you also have to pick between an analogue and digital thermostat. 

Analogue Thermostat

Analogue thermostats are fairly straightforward. They have a metal strip that is connected to a mercury thermometer. You set your ideal temperature, and it will adjust your heating or cooling accordingly. 

Most analogue thermostats come with a dial so you can adjust the heating. While it isn’t the most economical or high-tech type on the market, they are still popular in the homes of the elderly or in old flats. Usually, UK residents tend to keep these models if they come with the home and are functioning properly. However, when you are purchasing it new – it is best for those who prefer a simple and fool-proof device. 

Digital Thermostat

Digital thermostats may be very technical, but you have more control over your heating. These models use a thermistor to read and evaluate the temperature, and then it makes adjustments based on that information. Besides getting a more accurate reading, it can also factor in other variables like humidity and moisture levels. 

Most digital thermostats are programmable. You can set the temperature for different times of the day, as well as put your central heating mode to sleep when you are at work. You can also schedule when to heat your water, so you always have a steady supply. With all of these features, digital programmable thermostats are a popular choice in homes across the UK.

Despite general acceptance, digital thermostats can be tricky to use. If you are not tech-savvy, there is definitely a steep learning curve. You can have your heating engineer help you program it with your specifications in mind. 

Smart Thermostats

If we are going by textbook definitions, a smart thermostat is pretty close to a digital one. However, they offer a completely different experience. A smart thermostat not only has accurate temperature readings and a programmable schedule but also can be well-integrated into your lifestyle. They connect to the internet so you can control your central heating system while you are away. All you have to do is click the settings on your app, and you are good to go.

Smart thermostats don’t stop here. There are learning models out there that gather data and help you optimise your heating. You can get a comprehensive view of this on your app. Over the next few years, it will display your results and finetune the settings. Soon you don’t have to even think about adjusting your boiler and radiator like you would with a dial thermostat.

Another perk is how much money you end up saving. With reduced costs, you get to enjoy low energy bills and fuel bills. Your smart thermostat can be very intuitive and simple to install. No one should have a problem using it. If you are interested in a side by side comparison of the top brands, check out our blog post “Best Thermostat to Use: Hive vs Nest.” 

When it comes to selecting the right type, consider its role in your daily life. Ask yourself:

  • Are you after low-maintenance and no-fuss heating?
  • Are you after more control?
  • Is having low energy bills a priority? How low do you want them to be?
  • Are you trying to be more eco-friendly at home? 

These questions can help you figure out what type of thermostat you need. Here is a brief summary to help you find the most suitable central heating thermostat for you:

Type of ThermostatCostBrandsInstallationEnergy BillsIdeal For
Analogue 

Low to Mid

£8-£60

Honeywell, ESI, Toogoo, Salus, British Gas, Worcester Bosch, etc.EasyMid to HighPeople who want a straightforward system, particularly the elderly.
DigitalMid to High £25-£252Honeywell, Hive, Tado, Inkbird, Salus, Drayton,Danfoss, etc.ChallengingLow to MidPeople who want a bit more control, but have a limited budget. 
Smart

High 

£80-£260

Hive, Google Nest, Tado, Drayton, etc.EasyLow to MidPeople who are tech-savvy and who have smart appliances integrated in the home. Great for people who want to be eco-friendly. 

* Prices listed here were taken from online retailers and are subject to change. Always double-check these prices before making any purchases. 

Remember, when in doubt, always consult your local heating engineer. Plumbingforce can help you navigate the many brands and models available and install them in your home. 

How Does A Thermostat Work?

No matter what type of thermostat you get, it generally works the same way. They read the temperature of the room and control when the central heating system needs to be on or off. The main difference is their inner-workings. 

An analogue model uses a mercury thermometer, a bimetallic coil, and two wires to control the heating, while a digital model has a thermistor and a computer chip. Room thermostat, wall thermostat, or wired thermostat or wireless thermostat – there will always be a couple of changes when you shift between models. However, at the end of the day, they get the job done. 

Connect with the best local plumbers and boiler engineers near you

How Do You Install A Central Heating Thermostat?

When it comes to installation, it is best to work with a professional engineer from companies like Plumbingforce. With our help, you can get a well-fitted thermostat. Here, you don’t have to be bogged down by the manufacturer’s technical instructions and waste hours trying to figure it out. We can get your room thermostats up and running in no time. For an easy and hassle-free installation, call the professionals.

However, if you insist on installing it yourself, you can. Here are step by step instructions:

Prep Your Home

Get the tools listed in the manufacturer’s manual and always exercise caution. Turn off the electricity and the gas line to avoid any accidents.

Find The Right Position For Your Thermostat

Most homes in the UK have a wall plate reserved for the thermostat. Find that wall plate, and you should be good to go. If there is none, refer to your instruction manual. 

You should avoid installing your thermostat near areas that may affect its reading, so don’t keep it near the window because of direct sunlight or possible draft. You should also avoid installing it near the other sources of heat. A couple of examples of this is next to the refrigerator or electric fireplace. You should also ensure that there is decent airflow so that it can have the most accurate reading.

Install The Back Plate

Drill holes into the wall and make sure you have the anchors in place to hold the plate. Let the wires go through the hole in the middle of the plate. When you are finished, secure the plate by screwing it in place. 

Install The Thermostat

Cut a bit of the insulation off to expose the wire then attach them to the corresponding terminal. Your manual should outline this. Instructions vary depending on the model, so you have to work closely with your manual. When the wires are in the proper terminals, push the loose wires back into the wall and secure your new thermostat. 

Test It

You can turn the electricity back on to double-check if you properly fitted your thermostat. You can toggle the central heating controls to make sure everything is functioning properly. It shouldn’t be hard to see, after all, one wrong wire can affect everything else. 

Note

If you have a wireless thermostat, digital or smart, you need to install a receiver so that your thermostat can communicate with your boiler. Again the instructions may vary, so always consult the manual. 

How To Set The Digital Timer?

The timer feature is only available for digital and smart thermostats. Since smart thermostats can be controlled from an app on your phone, you can simply adjust the settings there. However, if you have a digital thermostat, you might need to toggle the controls. 

Open The Hatch

Open the cover for the central heating controls. Each company is a little bit different, but you should be able to see programs and time and date.

Set The Date And Time

Before you can create a timer, you need to make sure you are on the same page. Input your time and date. Make sure the section is blinking so you know you can edit it.

Set Your Timer

Edit the default dates. For some models, you need to press the program button and the set button at the same time. Then you can set the temperature for the time period. And you are good to go!

How Do You Use A Central Heating Thermostat?

Since your central heating thermostat controls everything, you just need to have a program in place and let the thermostat do the work. Set it to a temperature you are comfortable with and have a timer, and your thermostat will do the rest.

 Remember to program these things with your future schedule in mind. For example, if you leave work at 6 pm and arrive at home at 6:30 pm, you don’t want your home to start warming up at 7 pm. It would be too late.

Poor planning means you are more likely to take on bad thermostat habits. One example of this is increasing the temperature so that the room will heat up faster. In reality, you don’t get to control how fast the boiler heats your home. When you change the temperature, all you are really doing is just pushing your central heating system into an early grave. 

If you want to avoid this from happening, you can check out our blog post, “Boiler Maintenance Tips.” 

Finding the ideal thermostat can be difficult, but ultimately worth it. If you are having trouble deciding, installing, or repairing your thermostat, Plumbingforce has experienced central heating engineers. With our help, you can have your system running smoothly. We also have other services such as emergency call-outs, boiler installation, boiler servicing, and boiler repairs, among many other things. Call us at 0333 060 3531 or book our services online!

What Is A Macerator Pump?

macerator pump

When it comes to taking care of your home, you must make sure that all of your appliances are functioning correctly. If you are new to home maintenance, it’s best to be familiar with your plumbing and heating supplies in your home. So, to give you a head start, we offer you an introduction to one of the most critical parts of your bathroom, the macerator!

  1. What is a macerator pump, and what does it do?
  2. How does macerators work?
  3. The difference of compact macerator toilets and macerator pumps
  4. What is the trusted brand for macerator pumps?
  5. What are the benefits of having a macerator pump?
  6. What are the drawbacks of having a macerator pump?
  7. What can harm your macerator?
  8. Is your macerator broken? Plumbingforce is here to save the day!

WHAT IS A MACERATOR PUMP, AND WHAT DOES IT DO?

When it comes to plumbing, there is a lot of equipment involved to have uninterrupted circulation in the sewage system. Notably, we have the macerator pump that is a significant component installed to your toilet.

A macerator functions by breaking down the solid waste and foul water for it to be pumped out with great force. Primarily, a macerator is used with a toilet, but it can also work in the kitchen and other parts in the bathroom.

Find the best local plumbers in the UK!

HOW DOES MACERATORS WORK?

Once you flush the waste, it will directly move from the bowl to the macerator. Then, the macerator will automatically grind the waste with the help of its powerful rotating blade, until it turns into a slurry mixture.

The entire operation of the macerator system is completely sanitary, and it will be pumped uphill through the pipe, and into your sewage system.

THE DIFFERENCE OF COMPACT MACERATOR TOILETS AND MACERATOR PUMPS

A macerator toilet has a built-in macerator unit. It also has a similar appearance with a regular toilet. Meanwhile, a macerator pump is an individual product that can be installed behind a toilet pan or a wall-hung toilet.

WHAT IS THE TRUSTED BRAND FOR MACERATOR PUMPS?

Saniflo is a known brand for macerator pumps that is effective in doing its job of grinding solid waste and foul water at high speed. You won’t need to worry about clogging your sewage outlet because their macerator products are working with a sharp rotating blade that automatically shreds solid waste, before pumping it out. Moreover, the macerators of Saniflo are applicable ranging from commercial use, domestic properties, to flat rentals.

The domestic Saniflo macerator can deal with solid waste from the wash hand basin, bath, and toilet, depending on the unit model you choose. Meanwhile, the commercial Saniflo macerator can handle waste from multiple showers, or toilets! 

Additionally, Saniflo has various macerators that they offer. So if you want to find the perfect type of macerator for your needs, you can take a quick view of their online website here

WHAT ARE THE BENEFITS OF HAVING A MACERATOR PUMP?

When the central sewage system is quite far from your bathroom, installing a macerator pump can give you more convenience because you won’t need to renovate your entire bathroom, and extend your existing sewage system.

With that, your effort is not the only thing that will be saved, but also your time and money! Think about it: the price of a macerator pump is lower compared to renovating and extending your existing sewage system. Additionally, macerator pumps can last up to 10 to 15 years! It’s a cost-effective buy, and you won’t have to worry about a broken toilet flush constantly.

Are you looking for plumbers offering Saniflo installations? Plumbingforce is the best in the business! Give us a call and we’ll provide you with more details.

Connect with the best local plumbers and boiler engineers near you

WHAT ARE THE DRAWBACKS OF HAVING A MACERATOR PUMP?

You will notice that once you install and use a macerator pump, your toilet will use more water when flushing. But, this minor price to pay is more tolerable than having an unhygienic toilet that you will use every day.

There is also an issue that macerator pumps create a loud noise whenever it is in the process of pumping solid waste and foul water. However, this does not indicate that the macerator is faulty. It’s just that impellers of the macerator are working so noise may be expected.

WHAT CAN HARM YOUR MACERATOR?

Macerator pumps have strong pumping ability. However, there are still waste products that may clog your toilet, allowing water to overflow. So, as much as possible, avoid throwing garbage waste in your toilet carelessly.

The mentioned products below are the wastes that can harm your macerator pumps:

  • Q-tips
  • Dental Floss
  • Latex Condoms
  • Plastic Bags
  • Plastic gloves
  • Tampons
  • Wet Wipes

IS YOUR MACERATOR BROKEN? PLUMBINGFORCE IS HERE TO SAVE THE DAY!

Once you figure out what a macerator can do, it’s practical to think that you must take care of it, and be aware of how you will fix it. However, if the job of repairing a plumbing system seems complicated for you, not to worry, Plumbingforce is available to check on your plumbing issues.

It is not new for Plumbingforce to offer maintenance, and repair towards macerators. With our plumbing engineers, we are sure to please you with our quick and efficient service.

Finding Plumbers Near You in London

Plumbing repair service

Every household in London experiences a plumbing emergency.  Whether it’s a blocked or burst pipe, a noisy boiler, or a dripping tap problem,  you need to have a reliable and professional plumber that can come to the rescue within the hour. A plumbing issue heavily affects your daily schedule. Can you imagine waking up to a house without water?

Trusted and qualified plumbers in London will ensure that the internal plumbing and the water supply pipes inside your kitchen, bathroom, shower,  and toilet are free from problems. Aside from plumbing repairs, plumbing services also include heating services and checking of the boiler and gas. Thus, knowing where to look for reliable plumbers in London for your peace of mind is a must.

Finding plumbers in London is easy these days. Thanks to the Internet, you can now search for local plumbers working near you in just a few clicks. However, the Internet also allows unqualified people to trick people into paying for costly repairs and substandard plumbing services. Knowing where to find a trusted plumber is essential to avoid costly repairs and unnecessary damages. Here, we listed a couple of questions and several things you need to check when looking for a professional plumber near your home.

  1. Understanding Pipe Responsibility
  2. Do You Need to Look for a Plumber?
  3. How to Find a Good Plumber
  4. How to Find a Plumber You Can Trust
  5. How Much is a Plumber’s Rate per Hour in London
  6. Local Plumbers Recommended For You

Find the best local plumbers in the UK!

Understanding Pipe Responsibility

First, you need to know why people hire plumbers by understanding pipe responsibility.  Two main groups who are responsible for maintaining water pipes are the water company and the homeowner. Water companies are mostly responsible for maintaining pipes in the road and public land up to the external stop tap. The pipes running inside and outside the home until the external stop tap are the homeowner’s responsibility. This means that as a homeowner, you are responsible for repairing any pipes connecting your home to the network.

If there is a problem in a public space such as a burst pipe on a pathway, the water company should be contacted as it is their work to fix them. However, if there’s a problem with the water pipes at your property, it is your job to repair them. Some minor problems such as small pipe holes in the kitchen or bathroom can be easily fixed. However, most people in London don’t have the knowledge, time, or experience in fixing major problems in water pipes, boiler, plumbing heating, etc. Thus, many people opt to hire plumbers to do the job for them.

Do You Need to Look for a Plumber?

People in London often avail the service of a plumber to repair their pipes when they have a leak. It is important to know how to check for a leak in your property’s pipeworks. Otherwise, you may end up wasting a large volume of water which may cost you higher bills. There are a couple of tests you can carry out yourself to check for a leak.

If you have a water meter, try these easy steps:

  1. Start by turning off all your taps. Turn off other appliances such as dishwashers and washing machines.
  2. Check the water meter and take note of the reading.
  3. Wait for about three hours then check the reading of the water meter again.
  4. If the latest reading is different from the original reading, this could mean that you have an internal leak.
  5. If your meter reading has not changed, turn the internal stop tap back on. Wait about 10-15 minutes.
  6. Get the reading of the water meter again.
  7. If the latest reading is different from the original reading, this could mean that you have an internal leak.

If you don’t have a water meter, try filling a litre container. If your water is filling properly, the container should be filled in about 7 seconds. Otherwise, there may be a problem with the water pressure which is indicative of a water leak.

Before you call the service of plumbers in London, we suggest checking first your home insurance policy to determine whether the policies cover the internal plumbing and pipe repairs of your property.  If you are a new tenant or you’re renting a property, determine first which one between you or your landlord is responsible for fixing the pipes in the property.

How to Find a Good Plumber

To get excellent quality service, you need to know how to choose the right plumber. Since pretty much everyone needs help with plumbing, start by asking around for recommendations. This can be a good way of searching for qualified plumbers in your area. Asking your family members or neighbours ensures that you will get reliable reviews of their plumber’s service.

If you can’t find great recommendations, the Internet is always a useful tool in finding plumbing-related services in London. The Internet is a wide source of information, so we suggest trimming your search down by phrasing your words wisely. Try being specific by providing keywords related to your plumbing problem such as “plumbing heating problem”. When searching for a local plumber, be particular with what you enter by providing your location in London.

How to Find a Plumber You Can Trust

Check customers’ reviews

When searching for a reliable emergency plumber on the internet, be sure to take time reading their latest customer reviews. Popular search engines such as Google has its own reviews system. There are also different sites that offer the latest reviews of such services. Try checking these sites for reviews. Avoid plumbing companies in London with bad reviews from.

Check the plumbing company’s website

If you come across a plumbing company’s website, check how their site looks. A reliable plumbers company like Plumbingforce would definitely keep their professional image by ensuring their website is highly presentable to their customers. 

Check their latest terms and conditions and get their contact details. Companies that provide these details are seen as transparent with their job. A credible company would also have a complete and professional-looking email address.

Connect with the best local plumbers and boiler engineers near you

Check whether the plumbing company is registered

To ensure a plumbers company’s trustworthiness, check whether it is registered with the appropriate associations.  Check the lists on trade association websites. An example of an official list is the Gas Safe Register which lists all gas safe registered companies and all qualified gas engineers who can legally work on gas appliances. 

Other relevant trade associations are the Association of Plumbing and Heating Contractors (APHC) and Chartered Institutions of Plumbing and Heating Engineering (CIPHE). Checking whether the company you will book is registered is highly recommended to ensure your safety.

Look for established plumbers in London

Letting plumbers work on your gas, boiler, or plumbing and heating system is a crucial matter. To ensure your safety and protect your peace of mind, it is ideal to choose established and trusted plumbers that work in London. Established companies in London offer quality workmanship and usually have many years experience doing their job. Reputable companies working in London have a high standard when it comes to providing quality service to their customers.

How Much is a Plumber’s Rate Per Hour in London

Aside from the reliability, you should also have an idea on what sort of budget you have.  The rates of plumbers in London may differ from one local town to another.  Thus, it is important to look and book for local plumbers that work near you.  If you are in the market and you are looking for a new boiler or new plumbing and heating supplies, it’s best to partner with Plumbingforce.

If you have a limited budget, try explaining your budget and what you want to achieve. Transparency between you and a tradesman is important in order for the business relationship to work properly.

If you simply just need a local plumber to help you fix your kitchen, boiler, shower, heating, or toilet problem, you must know the estimated rate of their jobs. The cost of their service may vary depending on the requirements you need, the type of job, and the length of time it will take.

Most plumbers working in London charge at an hourly rate which is typical £60 to £80 in London.  The typical day rate of a plumber’s work is fixed which is around £500 in London.  If you need to call a plumber for emergency purposes, the cost of work can be twice as much amounting to about £200 per hour in London. It is also helpful to have an idea about the costs of some of the common plumbing jobs. Replacement for a toilet costs around £100  to £300 while a replacement for a sink costs around £100 to £250. Meanwhile, it usually costs around £50 to £140 to fix a burst pipe.

To cover the best prices, we highly recommend getting a free quote from a plumber company. Get quotes from different companies in London and compare each quote before settling for one. Ask for a detailed quote covering all the work you want to be done. Make sure that the quote is also covering the call out charge and the cost of the parts that may be required. Note however that the cheapest quote does not guarantee the best choice. An unrealistically low quote may be a trade on the quality of the plumbers’ service.

If you want a local plumber in London that has a high standard in workmanship while also providing cheap and free quotes, Plumbingforce is the best choice for you.  Plumbingforce consists of a team of same day plumbers and gas engineers that have years of experience in working to provide service to people all over London. Plumbingforce offers a wide range of plumbing-related services including heating services, boiler and shower repairs, blocked drainage, and new gas cooker installation.

Throughout the years, Plumbingforce has been known to operate a fast same day service in London. If you want your plumbing problems to be fixed within a 24 hour period, book Plumbingforce to avail the service of our great team of plumbers. We guarantee you that our plumbers have many years experience in working and doing their job most efficiently.

If you need help with an emergency, contact us to arrange one of our great team members to attend to your property without delay. Got any questions? Call us at 0330 162 1659 and we’ll answer all your queries!

What Size Boiler Do I Need? How To Choose The Best Boiler For Your Needs

boiler

Boilers are arguably one of the most essential appliances that can be found in every household. After all, they provide us with hot water and hot air to stay warm and clean. However, when you need to replace an old boiler or purchase a new one, not many realise how important it is to find the perfect boiler in terms of size.

Any miscalculation on the size may lead to stress and more unnecessary expenses in the future. And this guide can help you prevent this from happening. Moreover, if you’re asking, “what size boiler do I need?” we can help you out! Below, we have a list of items you should consider while determining what size boiler you need exactly. We will be including a sample boiler size guide, as well as links to some boiler manufacturers’ boiler sizing calculator.

Why Do I Need To Find The Right Size?

A miscalculation on what boiler size you need can be costly. A boiler that is too small, for example, will have trouble providing enough heat for your central heating system, nor will it have enough hot water for your shower.

Alternatively, a boiler too large in size will result in a lot of wasted energy. Your boiler will be producing a lot more heat than what is needed, thus using more electricity or burning more gas. And as you already know,  

More electricity or gas used = More expensive electricity/gas bills.

Find the best local plumbers in the UK!

What Size Boiler Do I Need: How Boiler Size Is Measured

Before we go on, it is important for us to be on the same page. When we say “boiler size,” we are not talking about the physical size of the boiler, but rather the boiler’s output in kilowatts (kW) or the amount of energy the boiler puts out in the form of heat. Typically, the more heat and hot water you need, the higher the energy output you will require. However, many other things play a part in determining what size boiler is best for your home.

Factors To Consider When Deciding What Size Boiler You Need For Your Home

Here are some of the things that you should take into consideration while choosing an appropriately sized boiler for your home:

How Big Is Your Property?

The size of your property is one of the most important things to consider when you’re trying to determine what boiler size you need. To put it simply, the larger your property is, the more space you will have to fill with heat and more bathrooms and sinks you will have to fill with hot water. Hence, under “how big is your property?” you will also have to ask:

How Many Radiators Do You Have?

An average apartment or a small house will have roughly around ten radiators. That means you will have to get a boiler that can power up to ten radiators all at the same time.

Do You Have Multiple Bathrooms?

Moreover, you will also want to find out how many bathrooms your new boiler will have to supply hot water. Some boilers are not able to accommodate supplying hot water to more than one location at a time, so that is also something you will have to take note of. It would also be smart to determine if you will want hot water to be supplied to other areas in your home, like the kitchen, guest comfort room, and laundry area.

How Many People Live In Your Home?

Aside from how many rooms and radiators you will be supplying heating and hot water to, you also have to determine the demand for heating and hot water in your home.

For example, if there are only two bathrooms in your house, but four people are using each, you will have to take the fact that there are eight people in need of hot water, rather than focusing on the fact that there are only two bathrooms in your home.

What Type Of Boiler Do You Plan On Purchasing?

Before you ask yourself, “what size boiler do I need?” you should also determine what kind of boiler you plan on purchasing. Do you want a combi boiler, a standard boiler, or a system boiler? While it doesn’t seem like it, the type of boiler you purchase does play a part in determining what size boiler you need.

That is because combi boilers usually heat up water instantaneously, requiring more energy than other types of boilers. Standard boilers and system boilers, on the other hand, make use of a hot water cylinder or tank, thus storing hot water for longer periods of time. Moreover, the only difference between the two is that a standard boiler gets water from a cold water tank, while a system boiler gets water directly from the pains.

These, in turn, will affect the amount of energy (kW) consumed by each type of boiler.

To read more about the different types of boilers, click here.

Connect with the best local plumbers and boiler engineers near you

Other Factors To Keep In Mind

Aside from the factors mentioned above, here are a few things you will want to remember while determining the right size of boiler for your home.
  • Account for heat loss in your home. Aside from the demand for heating and hot water and the size of the property, the insulation and size and number of windows you have will also come into play.
  • Every type of fuel has a different rate of efficiency. That means if you are using a type of fuel that is less efficient than others, you may need to use a larger boiler size.
  • The water pressure in your home will definitely determine what size of boiler you need. This is especially important if you are using a combi boiler, as combi boilers should be big enough to accommodate the amount of water passing through it. That means the higher the flow rate, the bigger boiler you will need.

Most Common Size of Boilers

Here are the most common types of boilers out in the market:

Standard Boilers

  • 9-18 kW (below ten radiators)
  • 18-26 kW (10-15 radiators)
  • 27-40 kW (15-20 radiators)

Combi Boilers

  • 24-27 kW (below ten radiators)
  • 28-34 kW (10-15 radiators)
  • 35-42 kW (15-20 radiators)

System Boilers

  • 9-18 kW (below ten radiators)
  • 18-26 kW (10-15 radiators)
  • 27-40 kW (15-20 radiators)

Boiler Size Calculator Links

To calculate boiler size more accurately, you may use the boiler size calculator specially made by these boiler manufacturers: If you’d rather have a professional do a survey of what boiler size you need for your home, you may always contact a local gas safe engineer in your area. Better yet, book an appointment with Plumbingforce today! We can come to your property in no time!

How Do I Fix A Cold Radiator?

home water radiators

Even if you have a brand new boiler that works hard to provide heating and hot water to your home, its effectiveness is dependent on the other elements of the system. What good is hot water if your taps are broken? How can you heat your home safely if you have dirty flues? Your central heating system is only as good as its weakest link. As homeowners, you need to learn how to identify these links and address them before they make too much of an impact on your everyday life.

One of the issues you are bound to encounter is cold radiators. Picture this: you come home from a long day at work and turn your heating on. You wait for the room to warm up but get nothing. When your radiator is not working it can negatively affect your health and mood. It might be bearable during the fall, but it can become a major problem when you lose heating in the middle of winter

Common Reasons For Having A Cold Radiator

It can come in many forms, like having a partially hot and partially cold unit, a cold unit, or a completely cold system. Each one is slightly different, but assuming that your boiler has fuel, the usual suspects for a cold radiator can be anything from low water pressure, trapped air, debris, or hardware problems like pump failure and stuck valves. You can prevent these issues when your central heating system gets its annual maintenance work. 

However, if you’ve been neglecting your system, it is time to get to work.

Find the best local plumbers in the UK!

How To Fix Your Cold Radiator

You can try several methods to fix your radiator if it is cold before you call your local heating engineer:

Clean Your Radiator

The first thing you need to do is deal with your debris-filled central heating system. In most cases, poor water pressure and blockages all stem from this. Whether one radiator is cold or your whole system is – cleaning is the best way to take care of multiple problems at once.

You can try to drain your central heating system and replace the water for a fresh start. When your heating system is clean, have preventive measures in place like a magnaclean filter along with a self-administering limescale solution to keep the water free of sediment and rust. 

However, this method can only go so far. You may need to call your plumber for a power flush and get all the sludge and grime out of your system. By doing this, you remove the excess air and clear any possible blockages in one go. Even if it does not fix your cold radiators, it is generally good for your overall central heating system, so nothing is wasted if it doesn’t work.

Check Your Valves

The second step is inspecting the radiator valves and having them replaced when necessary. The thermostatic radiator valve (TRV) on your radiator is in charge of letting hot water pass in your radiator. When it is stuck, it prevents the heat from circulating and creates a cold boiler. You can check your thermostatic valve by removing the head and checking the pin. If the pin is pressed down, then you have a stuck valve. You’ll need a pair of long-nose pliers and wiggle it a bit until the pin pops up. 

If you noticed that your valves are rusty during your inspection, it is best to call a plumber and have a replacement installed. Rusty valves are a by-product of trapped air that was left inside for too long. Even if you bleed your radiator and have it cleaned, the dirty valve can still create grime and rust. Removing and replacing them is the best way to keep your system clean. 

Balance Your Radiator

The third option is to acknowledge that not all radiators are heating at the same time. If you live in a house with multiple rooms, your central heating might be taking a while to get to that one radiator. When this happens, it puts a strain on your pipes, so it is best to fix it as soon as possible. 

If this is the case, you may need to balance your central heating. Which essentially cycling new water and adjusting the lockshield valve on all the radiators and making sure they heat at the same time. You’ll need a pen, paper, a pair of pliers, and a whole lot of patience. For more detailed instructions, you can read more about it here: Heating Conundrums: How to Balance Radiators.

Connect with the best local plumbers and boiler engineers near you

Check Your Boiler

The third option is to check your boiler. If bleeding and balancing your radiators don’t work, and replacing the valve had no luck either, it probably isn’t your radiator. The problem can be between your boiler and your thermostat, or your boiler itself. Here, you take a step back and let professional heating engineers from Plumbingforce take care of your cold radiator. 

Even if you find out what is wrong, there is little you can do to fix it on your own. Might as well call a professional instead, and save time instead of DIY-ing and making the problem worse. 

What If Only Parts Of My Radiator Are Cold?

If your radiator is cold in some parts, either hot on top and cold at the bottom, or cold at the top and hot at the bottom, you can chalk it up to excess air or a dirty radiator. You can try to address this by bleeding your unit or having it cleaned. You can visit our blog, “Why Is My Radiator Hot at the Top and Cold at the Bottom” for more detailed instructions. 

Taking care of your central system takes the joint effort of you and your heating engineer. Plumbingforce can be your long term partner! Our technicians can handle just about anything you throw at them from boiler installations to maintenance and repairs. If you need to fix or replace your radiators, you can book our engineers online or call us at 0330 162 3460!