gas-saf-register logo

How To Make Cooker, Hob, and Oven Installations Safe and Smooth-Sailing

Cooker, Hob, and Oven

So, you’re looking to get a new gas cooker, and you’re not quite sure about how much work that would entail exactly. Well, people, despite how often they use gas appliances, do not realize just how much risk misusing and mismanaging gas appliances could be. Merely having them fitted or installed will require a lot of planning and a lot of research on your part, especially since accurately performing any kind of gas work is literally a matter of life and death. Something seemingly as simple as a cooker, hob, or oven installation, should be handled with the utmost care, as getting this wrong could result in gas leaks, fires and explosions, or worse, carbon monoxide poisoning. 

Don’t get it wrong, though. This isn’t some ploy to get you to change your mind about getting a new gas cooker or oven. You, however, need to know that you can’t just decide to get one and go about installing it and using it just like any electrical appliance. So, here are some ways to make sure that your quest to getting a new cooker, hob, or oven goes as safely and as smoothly as possible:

To make a booking or to find out more about our services!


  • Be prepared

In any type of home improvement project, checking for compatibility is always a priority. As technology is ever-changing and constantly developing, some appliances available in the market may be too advanced for some houses, especially older ones which have been built to only accommodate more traditional gas appliances. It is very important to make sure that your purchase is compatible with your gas line at home. Bypassing any kind of compatibility issue is a risk you would not want to take, as this would only make you more vulnerable to gas-related accidents and problems down the road. Also make sure to find out what kind of hoses, valves, or pipes you will need. The last thing you would want is to be underprepared for the actual installation. 

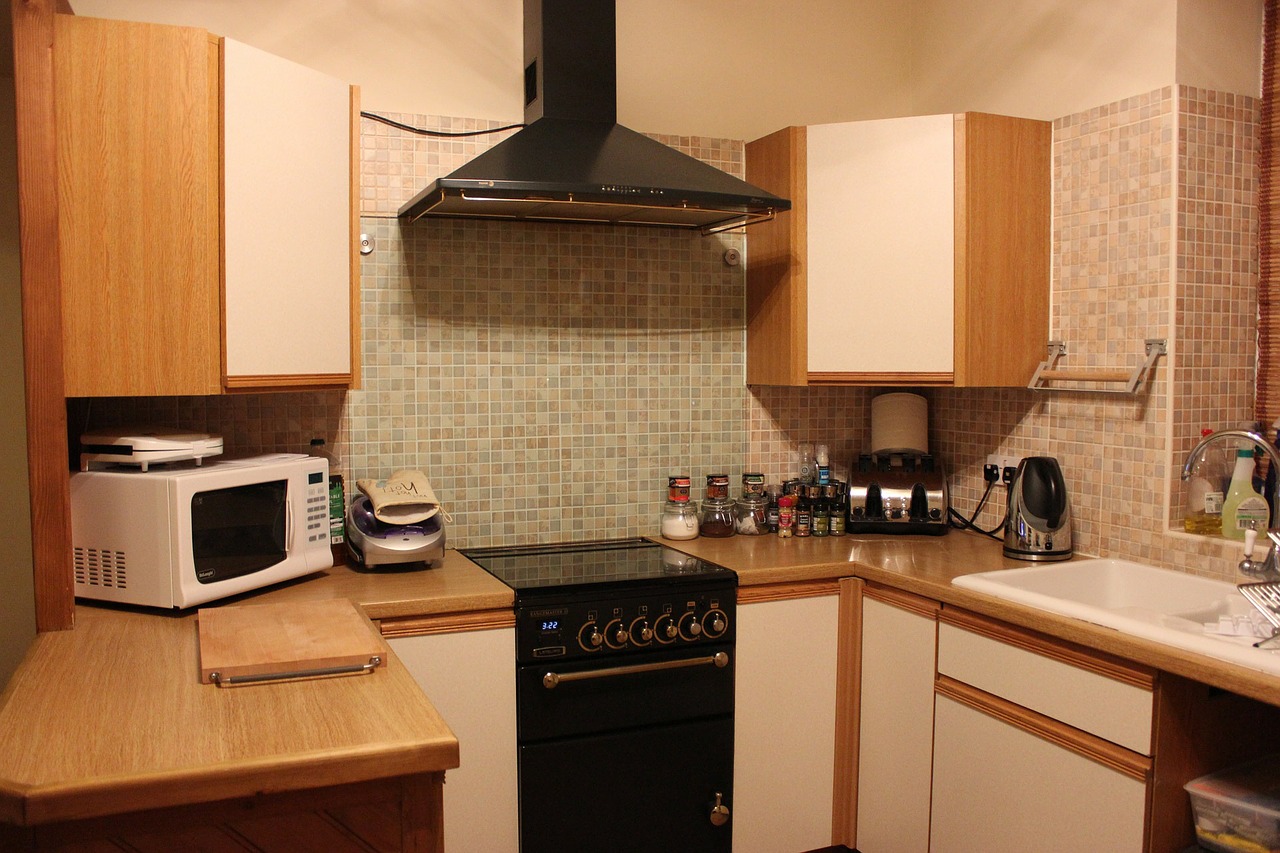
It is also best to be completely sure your cooker, oven, or hob completely fits the area where you wish to install it. How you’ll be positioning the unit is also going to be crucial because of how you’re going to connect it to the gas line. Knowing the gas appliance’s proximity to the other fixtures in your kitchen is also a must. This helps you prevent any kind of accidents when you start using your new appliance. 

Read up on gas cooker, oven, or hob installations. You will need all the information that you can get. It is best to know what to expect of the process before it actually begins. 

  • Take the chance to make safety checks

Since you’re already making some changes, it is advisable that you also take the chance to make sure your home is gas safe and is in tiptop shape. Before you get your new appliance installed, check for other faulty gas appliances as well as gas leaks and damages to the gas line in your home. 

Waiting until there is a dire need to make such necessary repairs could mean doubling your expenses in the future. Since gas leaks are virtually undetectable, the best thing you could do is take the necessary methods to prevent it. 

  • Secure the necessary permits and clearances (if applicable)

As there are a lot of safety hazards involved in gas work, it is better to make sure that you do not miss a step. Whether it be permits, clearances, or even just a small revision to your home insurance policy, do it before doing any kind of gas work. 

  • Do not DIY

Doing this on your own can be very dangerous. In fact, doing any kind of gas work on your own is not at all advisable.  Again, the installation of gas appliances needs to be done carefully and correctly. 

Oven fitters exist for a reason. The Gas Safe Register, the official governing body sees to it that these services are only provided by adequately trained and highly qualified individuals or companies. By letting experts handle your oven installation, you won’t have to worry about making a mistake that could cost you your safety and the safety of those around you. This also decreases the probability of any gas emergency from occurring in your home. Additionally, hiring a Gas Safe engineer assures you that you will be provided with exceptional and satisfactory service.

And while doing the installation yourself can help you save a little money, do not forget to consider the fact that any mistake you might commit in the process could cost you a whole lot more in the future. 

If it hasn’t been reiterated enough, your safety is of utmost importance. There may be no way of ever making sure that a gas leak, fire, or explosion will not occur, but as the old saying goes, prevention is always better than finding a cure or a solution. So, find a gas safe engineer and trust that you and your home will be in good hands! 

Gas Cookers Vs. Electric Cookers

GAS COOKERS VS ELECTRIC COOKERS

You may have decided recently to upgrade your cooker, but you’re not quite sure which direction to take. Perhaps your old model was a gas cooker, and you’re thinking about switching to electric, or vice versa. Of course, both types of cookers come with their advantages and disadvantages, which is why it’s helpful to do your research and work out which one is going to suit your lifestyle best.

In this article, we look at gas cookers vs. electric cookers what the benefits and drawbacks are for both. We want you to be properly informed so you can find the perfect cooker that’s going to fit into your budget and your kitchen.

Which is Cheaper?

One of the first questions on a lot of people’s minds, when they are thinking about upgrading their cooker in the kitchen, is: which is going to cost me less to run? Let’s think about this for a second.

First, an electric cooker. If you use an electric cooker, you’re going to use less energy when it comes to how many units you use. This doesn’t necessarily mean it’s going to end up being cheaper, though, because each unit is actually more expensive than the price of a unit of gas, so ultimately, you’re going to end up spending more.

Let’s break this down in a way that everyone can understand. Say, for example, that you spend an average of five hours per week cooking and using your cooker. If your stove is gas, this is going to cost you just 17 pounds every year. However, if your cooker is electric, the cost runs up a bit and ends up being as much as 40 pounds. This is quite a difference in cost and something to consider.

So, what about the upfront cost of each model, then? All in all, while there is a slight variation depending on the model that you’re looking at, it’s going to cost you less to purchase a gas cooker vs. an electric cooker upfront as well. 

Gas Cookers: Advantages and Disadvantages

Of course, you’ve got to consider more than just the price tag when doing your research on which cooker to buy. As we mentioned earlier, both gas and electric cookers come with their upsides and their downsides. Let’s take a look at what these are.

ADVANTAGES TO GAS COOKERS

  • Heat is Easier to Control: generally speaking, it’s going to be more efficient to heat your pots and pans when you cook with a gas cooker. You’re also going to be able to have more control over the heat as well, and whether it’s turned all the way up or a bit lower. The heat itself also tends to be a bit more evenly spread, so that the cooking process overall is going to be a bit more efficient.
  • Costs Less to Run: as we mentioned, gas in general costs less than electricity, so you’re going to end up saving money just by having gas alone. 

DISADVANTAGES TO GAS COOKERS

  • Issues with Heating in Oven: while spreading the heat evenly on the stovetop is a breeze with gas, it struggles to do the same in the oven itself. This is because gas ovens don’t have fans that can distribute the heat evenly, so be prepared for meals that may cook quicker at one end. Generally speaking, a gas oven is going to be warmer at the top than at the bottom, which some people aren’t bothered by.
  • Stovetop Can Be Slow: while gas is more efficient on the top, when it comes to a big pot of food, it could end up being slower than its electric counterpart.
  • More Difficult to Keep Clean: because gas stovetops have raised burners, you may have more trouble cleaning them than the typical ceramic stovetops that come with electric cookers.
  • Installing Can Be Tricky: because a gas cooker needs to be connected to the gas supply, whether it’s located inside or outside the house, this usually requires a professional to come in. With an electric cooker, all you need to do is make sure it’s plugged into the wall. 

Electric Cookers: Advantages and Disadvantages

ADVANTAGES TO ELECTRIC COOKERS

  • Oven Temperature: you’re more likely to get an even distribution of heat with an electric oven because the vast majority of electric ovens come with a fan that blows the heat throughout the oven evenly. Of course, this means that your food is going to get cooked more evenly, which is excellent if you have a larger family and cook lots of food in one go.
  • More Functions: a lot of the time, electric cookers come with ovens that have many different functions. This also means that you’re going to be able to use different heating options together, making electric stoves more diverse than gas cookers. For example, with an electric cooker, you can usually put the grill on at the same time as the fan.
  • Effortless Clean: because of the flatness of the cooker surface and the fact that it’s usually made of ceramic, you’re going to have a much easier time cleaning an electric cooker than a gas one.
  • Induction Cooking: this means that typically it will take less time to cook things on the stovetop because the burners take less time to get hot. Additionally, a lot of the time, electric stovetops are better at allowing your food to simmer.
  • More Advanced Grilling: generally speaking, electric cookers are more proficient at grilling food than gas cookers. While not every model is going to do such a great job, in general, they have proven to be better at this task.

DISADVANTAGES TO ELECTRIC COOKERS

  • Costs More to Run: electric cookers are going to cost you more to run on a daily basis, and as you saw before on an annual basis as well. This means that your monthly energy bill could end up being more than if you had a gas cooker.
  • Stovetop Can Stay Warm: the stovetop of an electric cooker usually stays warm for a while after you’ve turned it off. This means that if you don’t move your pot off the burner, it could end up cooking more or even getting burnt on the bottom. 

Make Sure the New One Fits

This may seem pretty obvious, but it’s going to be vital that you measure the dimensions of the space where your new washing machine is going to go before you decide on which one you’re going to purchase.

Even if you measure the height and width of your old washing machine and feel pretty confident that you know the space, when it comes to the depth washing machine models can be pretty different from one another. This is why it’s important to allow for more room than you need – it’s much better to have too much room for your new washing machine than not enough.

How to Find the Right Cooker

Once you know which cooker you prefer, it’s going to be important to base your decision on the features that come with it. If you’re happy to pay a little bit more in energy bills each year, then you may prefer the benefits of a gas cooker. However, if you want to stick to a budget, an electric cooker could be the right choice for you.

Online Booking

Please complete the enquiry form below, and send your details to our customer service team. Once you have completed this form, one of our advisors will contact you to discuss your requirements further and to arrange a suitable appointment.

Want to talk to someone?

Contact Us!

Need to speak to someone about an existing job? Give our customer care team a call!

Head Office: Plumbingforce, Bourne House, 475 Godstone RD, Whyteleafe, Surrey, CR3 0BL

Plumbingforce engineers in your area

London   East Anglia   North West   Midlands   South East   South West   Wales

How to Install a Washing Machine

How to Install a Washing Machine

Before you get too excited, please note that installing your washing machine by yourself isn’t going to be everyone’s cup of tea. However, if you can lift heavy objects with ease and want to save on the installation fee, then read on! In this article, we cover everything you need to know about installing your own washing machine.

Connecting a Washing Machine

First, let’s go through the simple steps of connecting a washing machine:

  1. Make sure that there’s nothing in your original washing machine
    Turn it off completely and take the plug out of the wall
  2. Make sure you’ve disconnected the cold water supply so that there isn’t any leakage
    Now that the cold water supply is off, you can take the pipe away completely
    Get rid of the used water hose as well
  3. Remove any connecting bolts that came with your new washing machine
    Connect your cold water hose
  4. Turn the cold water back on again
    Connect your used water hose to your new washing machine
  5. Make sure that your machine is nice and level
  6. To install a washing machine successfully, you’ll typically need a wrench, a leveller and a bucket.

What Do I Save By Doing it Myself?

How much it’s going to cost to get your washing machine installed is going to depend on the company that you bought it from. It’s important to make sure that the installation is included in the price of the washing machine before you purchase it if you want to save a bit of money. While some companies work this way, not all of them do so you’ll need to find out how much they’re going to charge to install it for you before you commit to anything.

The Washing Machine that Costs More

How could there be a washing machine out there that costs more to install than another of the same model? The answer is if it’s integrated. This means that the washing machine is going to be built into your kitchen or washroom, which means you’re going to need a cabinet maker to help with the kickboard and the doors. Of course, this is going to cost you more to install, but it’s worth the installation price to get it done correctly. You could attempt to install your integrated washing machine yourself, but it’s probably going to be more effort than it’s worth.

Make Sure the New One Fits

This may seem pretty obvious, but it’s going to be vital that you measure the dimensions of the space where your new washing machine is going to go before you decide on which one you’re going to purchase.

Even if you measure the height and width of your old washing machine and feel pretty confident that you know the space, when it comes to the depth washing machine models can be pretty different from one another. This is why it’s important to allow for more room than you need – it’s much better to have too much room for your new washing machine than not enough.

Getting Rid of Your Old Washing Machine

As we mentioned in our step by step list earlier, the first thing you’ll want to do is make sure that you haven’t left anything in your old washing machine that you’re going to need. Once you’ve done this, you can turn off the water supply and unplug it from the wall.

Once you’re sure that you’ve turned off the main water supply completely, you can now work on removing the cold water pipe. This is going to take a bit of unscrewing, but it should come away pretty easily. There may be some residual water sitting in the pipe, which is why it’s good to have a bucket handy.

There will be another hose coming out of the back of your old washing machine. This is the hose that gets rid of the water after your washing machine has used it to wash your clothes. You won’t need to unscrew this to take it off – simply give it a tug.

When you’ve done all of this, you’ll be able to move your old washing machine away, allowing room for the new one.

Installing Your New Washing Machine

  • Refer to the Manual: if you’re planning on embarking on the installation journey of your washing machine by yourself, it’s important that you keep the user manual close by so that you can refer to it frequently. It’s going to help you through the process and make things a lot less complicated.
  • Remove the Packaging: your washing machine should have arrived packaged in polystyrene. There are going to be blocks of this packaging on the top and bottom of your washing machine. If the model is particularly heavy, you may have trouble getting the bottom pieces off, but typically all you’ll need to do is lift one side of the machine at a time until you’ve removed them all.
  • Remove Carriage Bolts: when your washing machine is transported from the factory, bolts are set in place, so the drum inside doesn’t move around too much and get damaged. However, for you to start using your washing machine and install the right hoses in the back, you’ll need to remove these. All you’ll need to go is unscrew them, and they should come away easily.

Once you’ve done these things, you can attach the cold water and wastewater hoses at the back of your washing machine and connect the other ends to your washing machine taps and sink, as mentioned above. Once the hoses are connected in the right places and you’ve checked to make sure it doesn’t leak, you’ll be ready to level your washing machine.

A Tip on Leveling Your Washing Machine

There’s more to levelling your washing machine than just making sure it looks straight standing on the floor. When you use your washing machine, it’s going to be spinning at high speeds. If it’s not levelled correctly, the drum inside could vibrate against the outer shell and cause unwanted damage. To make sure your washing machine is level you can use a leveller, by placing it on top of the lid. If you don’t have one of these, you can see if it’s level by placing a hand at each corner and gently moving it to see if it rocks or stays still.

Online Booking

Please complete the enquiry form below, and send your details to our customer service team. Once you have completed this form, one of our advisors will contact you to discuss your requirements further and to arrange a suitable appointment.

Want to talk to someone?

Contact Us!

Need to speak to someone about an existing job? Give our customer care team a call!

Head Office: Plumbingforce, Bourne House, 475 Godstone RD, Whyteleafe, Surrey, CR3 0BL

Plumbingforce engineers in your area

London   East Anglia   North West   Midlands   South East   South West   Wales