gas-saf-register logo

Fixing Radiator Leaks: A Guide

radiator leaks

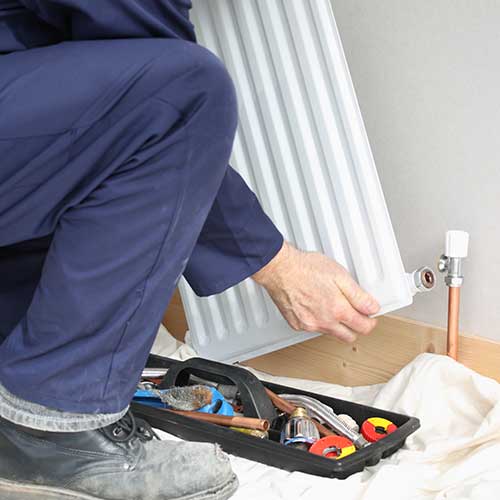
Conducting some DIY plumbing repairs within your home is a milestone every homeowner has to face. Whether it be unclogging a drain, fixing a dripping tap, or repairing a radiator leak, there will come a time in your life that you will have to get your hands dirty yourself. However, none of these tasks is easy enough to do without some kind of guidance. 

Fixing radiator leak, in particular, will require you to thoroughly read, watch, and understand numerous guides for you to be able to pull it off smoothly and without a hitch. To save you the trouble of having to go back and forth between numerous sites, we’ve prepared a short guide on what you can and should do when your radiator is leaking. 

So, You Think Radiator Is Leaking?

Is there a puddle near your radiator or a wet patch on the carpet beneath it? If so, then it’s probably leaking.  You don’t have to worry, though. Leaking radiators are a pretty normal occurrence. No need to panic and call for a radiator repair or boiler repair service immediately. Chances are, this is something you can resolve all on your own. 

To be able to stop a radiator leak from occurring, the first thing you need to do is identify where the leak is coming from. You may do this by first patting the radiator dry using an old rag or a traditional towel. Once you have patted it dry, run a kitchen towel or paper napkin all over the radiator and if you encounter moisture in any area around the radiator, then that is probably where the leak is. Remember, if the radiator is hot, make sure to keep your hands and arms protected while conducting this step. 

Is A Leaky Radiator Dangerous?

A leaky radiator is not dangerous all on its own. However, leaving it unchecked for long periods of time can lead to water damage on your furniture, flooring and eventually, the structural integrity of your home. Water damage may also cause moulds to form, which in turn, will pose many health risks for you and your family. 

Moreover, leaking radiators may also cause your central heating systems to stop working due to loss of boiler pressure. While this shouldn’t be a huge problem, heat could be a matter of life and death during winter. 

Find the best local plumbers in the UK!

What Can Cause A Radiator Leak?

There are many possible reasons as to what could be the source of the leak and why your radiator could be leaking. Here are some of the most common reasons:

A Leaky Radiator Valve

Out of the three things on this list, this is the most common culprit to leaky radiators. This is usually due to the wear and tear of your radiator’s internal workings. As the valve loosens, it will start to become less watertight, thus leading to a water leak. 

Half-open radiator valves may also cause this leak If this is the case, all you have to do is tighten the valve or turn the valve to the off position.

A Loose or Damaged Spindle 

Radiator spindles are joints that connect the radiator valve to the main body of the radiator. When it is loose or damaged, water will naturally leak out. 

Rust and Corrosion

You may also be having a radiator leak due to corrosion and rust. Over time, the insides of your radiator will develop corrosion due to its constant contact water and sometimes the lack of chemical inhibitors, which is a liquid added to the water in your central heating system in order to prevent the development of rust and corrosion. 

When corrosion develops inside your radiator, chances are, small holes will form underneath your radiator. When this happens, you will start seeing brownish puddles of water on the floor beneath it.

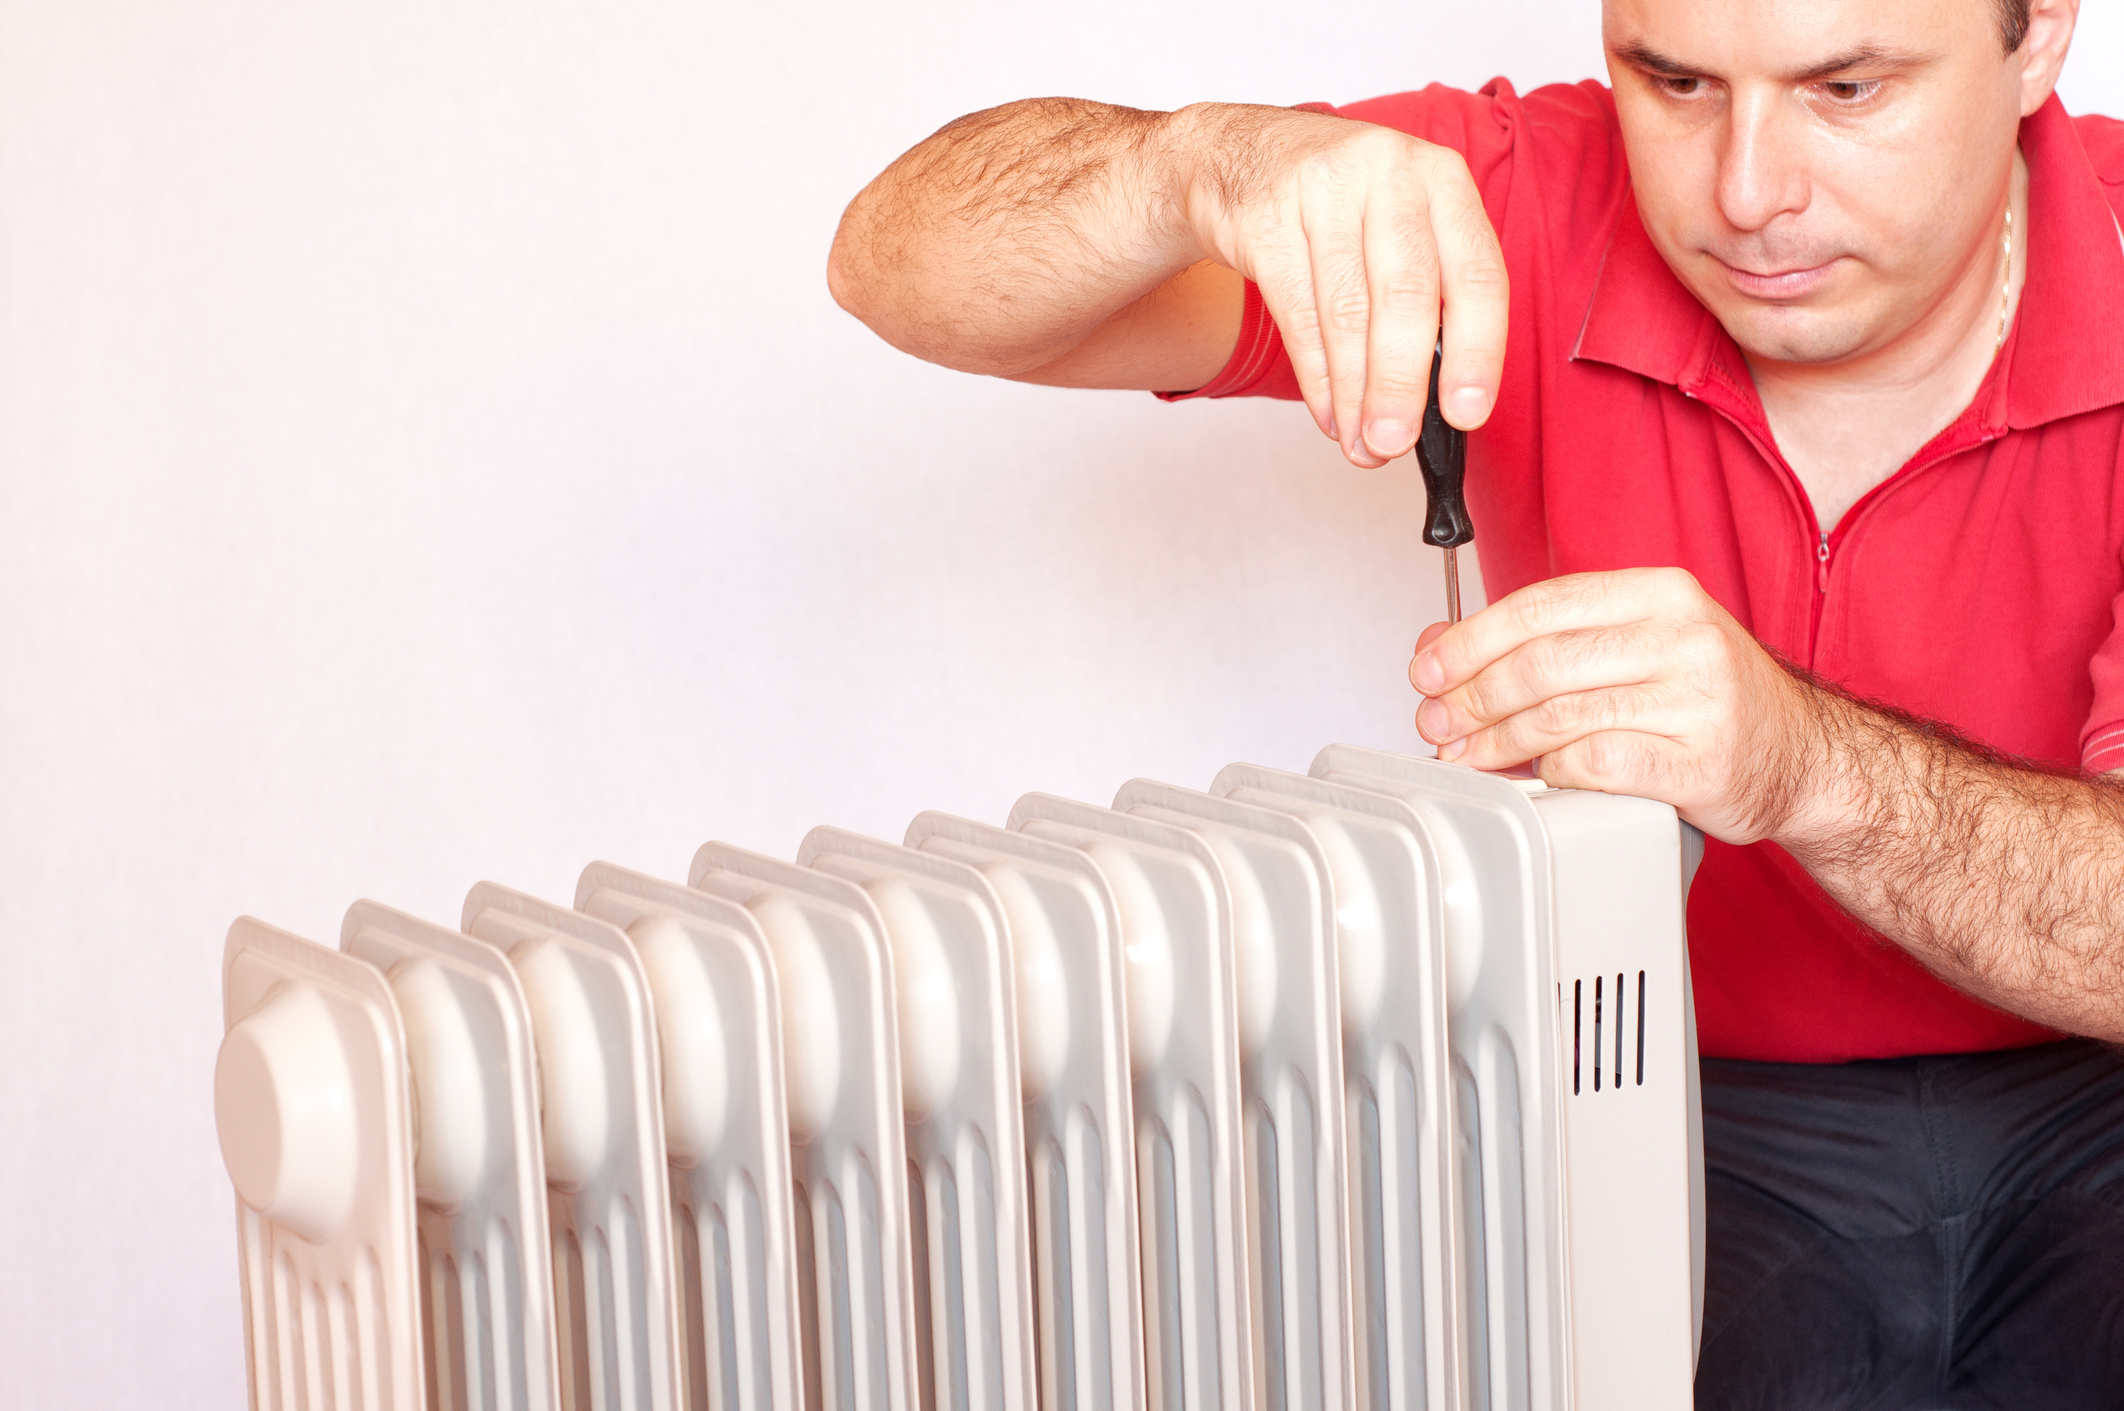
How Do I Fix A Radiator Leak?

Now that you’ve identified the most common causes of a radiator leak, you may begin making the repairs on your radiator. This guide will be divided into three parts depending on the type of leak as mentioned above. Before you begin, make sure your radiator is turned off and that you have towels and buckets ready nearby to prevent and clean up any messes that may occur. 

Fixing A Radiator With A Leaky Radiator Valve

Step 1: Drain your radiator system to below the location of the leak. 

Step 2: Turn off the supply valve where the water enters from, and the lockshield valve (the plastic capped valve). Be sure to remember how many times you turned the lockshield valve. 

Step 3: Undo the union nut with an adjustable spanner. Be ready to catch water when water drips from your radiator. 

Step 4: Open the bleed valve and let your radiator bleed

Step 5: Wrap your valve tails with PTFE tape. 

Step 6: Replace the union nut. Turn on the lockshield and supply valves. Be sure to turn the lockshield valve as many times as you did when you turned it off. 

Step 7: Close the bleed valve and check if leaks still persist.

If the situation requires you to replace your radiator valve, make sure to know exactly what kind of valve you will be needing before purchasing one. The size and fit of the valve to the radiator are very crucial to prevent further leaks from occurring. 

Once you’ve found the right valve, drain all the water from your central heating system. Unscrew the nuts connected to the water pipe as well as the valve you intend on replacing. Clean the threads at the end of the radiator before installing a new valve.

Wrap the threads with PTFE tape before attaching the new valve. Once attached, bleed your radiator and then refill the system. 

Fixing A Radiator With Loose or Damaged Spindles

If your radiator is leaking from the spindle, you may easily remedy this by tightening the gland nuts. If the leaks persist, undo the nut, add some PTFE tape around the spindle before re-tightening the nut. This should prevent any more leaks occurring. 

If the leaks continue, you would need to either replace the valve or call on a plumber to assess the damage for you. 

Fixing A Radiator With Rust and Corrosion

There is no fix for a corroding radiator, as rust and corrosion are both irreversible. If there has been too much damage by corrosion and rust, the only thing you can do is replace your radiator. 

How Do I Prevent My Radiator For Leaking In Again In The Future?

There are quite a few ways to prevent your radiator from leaking again in the future. One would be conducting regular checks on your radiator. Also, be on the lookout for unexplainable moisture or puddles on and around your radiator before the problem gets worse. 

You may also want to regularly drain your radiator to prevent the sludge from rusting away your radiator. Meanwhile, to avoid corrosion, use a chemical inhibitor, which is a liquid compound added into the water. 

If you don’t think you are confident in doing the repairs on your own, or if none of the methods above seems to work in fixing your radiator, it is best to call for the help of a professional plumber as soon as possible. 

Connect with the best local plumbers and boiler engineers near you

Addressing, Identifying and Preventing Water Leaks

fixing water leaks

The sounds “drip, drip, drip” has always been a dreadful sound for property owners, homeowners and renters alike. That is because aside from it an annoying sound that can keep you up all night, it is also the sound of your money quite literally going down the drain. 

Water leaks, unfortunately, are very common in households all over the world. A fact that the Association of British Insurers confirmed when they disclosed that one in every four building and content insurance claims are for “release of water” cases, which basically insurance-speak for leaky pipes or burst pipes. 

Sometimes, it makes itself known with persistent dripping sounds, some moisture here, or even a puddle there. However, more often than we realize, water leaks like these sneak up on us and only makes itself known with a flood in our kitchen or a ceiling that gave in after a pipe burst.  

Either way, though, such leaks are an extreme inconvenience that we must all, at one point, face. What you can do, though, is take the steps to help minimize the damage that a water leak may cause on your home and your wallet. 

And so, to save you the headache (and the heartache) of having to worry about spending lots of money on house and plumbing repairs, as well as an expensive meter reading, we’ve come up with a comprehensive guide to help you take on the challenge of a water leak in your new home.

Find the best local plumbers in the UK!

What Happens When You Have A Leak In Your Home?

Leaks in your home should be a cause of alarm for a multitude of reasons. Paying your bill which is alarmingly and significantly higher than your usual water bill is only the beginning of your issues.

Aside from expensive water bills, water leaks can be the beginning of many problems in your home. For example, unchecked water leaks can cause tons of physical damage to your home. You may also encounter damaged furniture and appliances due to the moisture, or worse, flooding caused by the leak. If the leak is subtle, undetected, and unchecked for months, it can affect more than just the visible parts of your home but compromise its structural integrity as well. Property managers, from all over the world, agree that a house flood can exponentially decrease the value of a house when you try to sell it. Potential buyers are easily turned off from a property if they find out that it has experienced a flood. This is because the damage seeps through the floorboards and opens up a lot of unfortunate possibilities such as mould growth.

Moreover, such water leaks may also have the potential to ruin your home’s market value forever. This is because while you may have been able to “fix” the leak, its effects will remain. Lastly, such leaks can and will cause mould and fungal growth if not properly addressed. This, in turn, may pose a handful of health risks for you and the rest of your household.  Humans exposed to mould may experience nasal congestion, difficulty breathing, coughing and sneezing fits, and a compromised immune system. Furthermore, mould can eventually grow within them, thus opening them up to worse health complications. Meanwhile, infants exposed to mould develop an increased likelihood of developing asthma.

Aside from the hazards stated above, sewage leaks are also toxic to humans and pets. 

Signs There Is A Leak In Your Home

Stopping or fixing a leak, however, is only possible when you know that there is a leak in the first place. Here are some telltale signs for a leak that you should be on the lookout for:

Cracks On Your Walls

Leaks, no matter how minimal, may have an effect on the foundation of your home and compromise its structure. When leaks persist and affect the same spot on the ground underneath your home, it may eventually cause your house to shift ever so slightly. While you may not feel this happen, it will cause some stress on your walls. 

The Sound of Running Water

Make sure you’re not hearing the sound of any faucet, shower, toilet valve or spigot running. Once everything is shut off, check your water meter reading. Do not use the water for a few hours, and then check your water meter reading again. If you see a change, then chances are you do have a leak in your home. 

Damp or Wet Floors

If you find unexplainable damp patches on your carpet or puddles of water on your floor, then you probably have a sewer leak. Such leaks are extremely persistent and pose a handful of health hazards for you and your family. 

Unusually Expensive Water Bill Costs

If your monthly water bill comes out more costly than usual for no explainable reason, then you are more than likely to be sporting a leak in your home. 

Foul Odours

If you’re smelling funky and couldn’t find its source, then chances are you’re smelling the mould and mildew that are slowly developing within your home. 

Where Am I Most Likely To Find A Leak In My Home?

If you think you’ve got a link, but are not entirely sure on where the source of the leak could be, then here are some areas of your home where a leak could be possibly located. 

  • Water tank
  • Toilets
  • Showerheads
  • Pipework
  • Appliances i.e. Washing Machines, Refrigerators, Radiators
  • Boilers

Connect with the best local plumbers and boiler engineers near you

What Do I Do When There’s A Leak?

If you experience sewer flooding, burst pipes, or even just notice a small water leak within the boundary of your property, the very first thing you should do is turn off your water mains. This will not only help you save water which would have otherwise been wasted due to the leaks on your supply. 

Once you have done that, try to identify or locate the source of the leak. Check your appliances, supply pipes, and any water pipe you can think of. If you cannot find the source of the leak, then it is best to call in a registered or approved plumber, preferably the one who is responsible for your pipework. If this is not possible, then any emergency plumber will do. 

Do not attempt to fix leaks on your own, as this may only cause more problems for you in the long run.  

Looking Out For and Preventing Catastrophic Leaks In Your Home

While it is important for you to know when a leak is present in your home and what to do when there is one, it also wouldn’t hurt for you to be vigilant in order to stay ahead of the leak. Here are some steps you could take in order to be constantly and actively on the lookout for possible leaks within your property. 

  • Before paying your bill, dedicate some time for reading it. Understanding your bill is vital, as it helps you make sure that everything is in perfect order. You may ask your local water resources management centre to give you monthly statements based on your monthly reading in order to properly check your water usage and consumption rates. 
  • Take note of the water pressure when you use the sink or take a shower. Low pressure could also mean a leak somewhere along your water pipe. If the case is isolated to tap or showerhead, though, then it could be a small clog.
  • Monitor when your boiler or water heater comes on. If you notice it running almost constantly, then you probably have a leak somewhere along your water pipes. 
  • You may also call for a plumber to conduct routine maintenance checks on your plumbing system to ensure that there are no leaks and that everything is in perfect order. Approved plumbers may opt to check for leaks using thermal imaging and acoustic listening devices to complete the task more efficiently. 

Final Thoughts

While you do not necessarily have the option of completely preparing your home for a catastrophic water leak, there are many steps you can take to prepare yourself for it. Moreover, by taking these steps, you can help minimize the damage and costs that could result from a water leak. 

It is also important to remember that you should not attempt to fix leaks in your property yourself. Always seek out the help of a professional plumber to ensure any issues from worsening or escalating. 

A First Time For Everything: How to Unblock a Toilet

Unblock a Toilet

Learning how to unblock a toilet is a helpful life skill that can save you in a pinch. Whether it is your toilet at home, at work, or a friend’s house, letting someone else deal with your backed up waste is considered embarrassing. It becomes more about your poop and less about the toilet. Not all toilet clogs are not due to the density or size of your waste. There might be an existing blockage like toilet paper, sanitary pads, tampons, and the occasional whatever-my-child-tried-to-flush. Never fear! There is more than one way to unblock a toilet. Before we go into the steps of how to unblock the toilet, let us consider what happens when they are left alone.

Will a toilet eventually unclog itself?

Toilet blockages are a case to case basis. If you are living alone or with other adults and the likelihood of unexpected items in the drain is low, you can try to wait it out. Gravity plays a significant role when it comes to the drainage. There is a chance that the toilet will unclog itself with enough time. If you notice that it is decreasing slowly and you have another toilet in the home you can leave it overnight and reassess the next day. Sometimes the blockages fix themselves.

How to Unblock Your Toilet (DIY)

A proactive approach is fixing the blockage yourself. There are different levels of effort, depending on the severity of the blockage and the materials you have on hand. Before trying any of these methods, prep yourself and your bathroom for possible messes. There might be splashes on your bathroom floor and your clothes. Equip yourself with old clothes that you don’t often wear and can easily toss into the wash after you unblock your toilet. Wear a pair of rubber gloves meant for toilet cleaning. If you do not have a couple of rubber gloves, find the next best thing you have on hand from latex gloves to plastic bags. To streamline your bathroom cleaning process, cover the floor near the toilet bowl with newspaper, scrap paper, towels, or old clothes to absorb any excess water.

Tip: If your toilet is overflowing, do not attempt to flush the toilet again. Take the lid off the tank and press down on the toilet flapper, the flapper is what prevents the water from entering the toilet bowl. When it does not stay down, look for an object to weigh it down. By stopping the additional water, you can calmly decide the next step to take.

Find the best local plumbers in the UK!

No-Plunger or Auger Methods

A blocked toilet can happen any time, and if you find yourself in a new place without any of the proper tools, there are things you can try to help the blockage along. These methods take up more time compared to unblocking a toilet with tools. There is no instant gratification; patience is required. 

Dish Soap and Hot Water

Heat some water, bring it up to a boil and let it cool or mix in a little cold water. Trying to find the right temperature that can help break down the blockage, but not too much because it could damage the porcelain toilet bowl. You can opt to add the hot water first and see how the blockage is moving then add a bit of dish soap. Or mix the dish soap with the hot water and pour the mixture down the toilet bowl. The dish soap helps loosen the blockage and provides a nice slip to help things along.

Baking Soda and Vinegar

Another DIY drain cleaner is using baking soda and vinegar. The general idea is to use the chemical reaction to help breakdown waste. It will fizz and bubble a lot, but don’t be afraid. It is a familiar and safe cleaning agent that has been in countless school science projects.

There are different ways you can go about it. You can create the mixture first in a separate container, or pour the baking soda first and slowly add the vinegar. The ratio of baking soda to vinegar varies as well. You eyeball the amount, but if you want to go by the numbers a 1:1 or 1:2 parts baking soda to vinegar should do the trick. You can also add a bit of hot water along with your DIY drain cleaner. There is no fixed time, but leave it for a couple of hours. If you can manage to wait overnight, do so. Checkback in the morning with a test flush and see if it unblocked the toilet.

Improvised Tools

If you are willing to sacrifice a wire coat hanger, a mop, or a toilet brush–you can create an improvised toilet plunger or auger. For the mop or toilet brush, cover the end with a plastic bag and make sure it is secure. Tie it off with a rubber band or a duct tape. Use it the same way you would with a plunger, push it down with short thrusts then lift.

For the wire coat hanger, you can create an auger/ toilet snake. Break the coat hanger and try to come up with a long thin strand with a hook on end. Run it through the drain and try to feel for the blockage. You can opt to pull the blockage out or break it down. To break the blockage, twist the wire, use the hook to break solid pieces that need help. If the obstruction is not human waste, it’s best to pull it out and collect it. There is no good in pushing the blockage further down the drain and have a similar problem at a later date. Even without the right tools, you never have to wonder about how to unblock your toilet.

Connect with the best local plumbers and boiler engineers near you

Plunger

For conventional methods, the plunger is the first thing that comes to mind! It is best to invest in a good quality plugger in the shape of a ball or with a rubber flange. Tap your plunger on the floor, if it is stiff pour hot water to soften up the rubber. A flexible plunger is easier to use and provides better results. Give deep and shallow pushes, then release. Repeat until you have unblocked the toilet.

Auger/ Toilet Snake

An auger, not an improvised coat hanger, is easier to use. Before you use it, make sure the plastic/ rubber is intact, if the metal is exposed, it could scratch your toilet bowl. You can cover it with duct tape when you are in a pinch. Run it through the drain and twist the handle to break down the blockage.

When do you call a plumber?

Three cases could push you to call a plumber. The first is that you have tried all available DIY methods. If it cannot be taken care of by the auger/ toilet snake, the block is probably too far gone. Your toilet might need to be taken apart, and a professional is best suited for the job.

The second is even before you tried DIY methods; you noticed the water is backing up through other drains in the house. If your initial attempt to flush affects your sink and shower, then stop the overflow and contact a registered plumber in your area. Your toilet affects other drains is a sign that there is a problem with the main lines.

The last case is when you don’t want to or have the time to address the issue yourself. While getting a plumber can be expensive, they can take care of the range of problems that come with it. Never stare at a blocked toilet in fear! Work the problem slowly but surely.

My Shower Is Leaking, What Do I Do?!

Shower fix

A leaking shower head or shower faucet can induce a lot of emotions. That “drip, drip, drip” can make you feel annoyed, frustrated, and angry all at the same time. That sound can keep you up at night, costing you precious sleep. Worse, you can count those drops as literal money going down the drain.  

Moreover, leaks in your shower system could cost you more than just an expensive water bill, as leaks on the hot water side would also mean additional costs on your energy bill due to the power used up by your central heating system or water heater for producing hot water. 

Now, you wander onto this page, probably after searching for an easy shower fix, looking for ways to get rid of the leaks in your bathroom suite. And so, help you with your dilemma, we’ve come up with a guide that can help you get your shower in perfect order, quickly and easily!

Why Is My Shower Leaking?

Before I give you some DIY advice on how to fix your shower like, it would be best for you to have some idea on why shower leaks occur in the first place. 

A leaking shower head, for example, could be something as superficial as damage due to wear and tear or even mineral deposit accumulated over the years. However, in some instances, this could mean a much bigger problem behind your shower walls. The problem could also be in your shower valves, as a worn faucet washer, cartridge or diverter can allow water to leak through to the showerhead. 

What Happens When You Leave Shower Leaks Unchecked?

It is also important for you to realize just exactly why it is important for such leaks to be resolved. 

Generally, the area within shower enclosures is supposed to be less prone to water damage. However, when leaks within the area persist and continue to drip water onto your tiles, grout, etc., then it will cost more problems in the long run. Such problems are:

To make a booking or to find out more about our services!

Loose tiles 

Water will eventually penetrate the area behind your bathroom tiles. When this happens, the grout and adhesive behind each floor tile or wall tile will eventually lose its grip. This will result in loose and free falling tiles within your shower enclosure. While this in itself is easily repairable, broken tiles may cause injuries to you and your family.

Stains and Mould

Water stains can be very unsightly, especially on the walls, the flooring, and even your shower doors in your bathroom. Additionally, if your bathroom is on the second floor, such shower leaks may cause stains, or worse, mould on the ceiling below it. 

It is important to prevent such moulds from developing, as these could pose a lot of potential health risks for you and the people in your household. 

Metal Damage

Persistent water leaks may lead to the development of rust on metal. This could affect your shower arms, faucet handles, bath taps, and many more. This could also cause damage to the structural integrity of shower enclosures, which would obviously mean more damage in the long run. 

How To Fix A Shower Leak

Now that you’re familiar with the possible causes and consequences of a shower leak, you can begin attempting to fix the leaks in your shower yourself. This guide will be divided into two parts, the first on fixing a dripping showerhead, and the second, on fixing a dripping shower valve. 

For both parts, though, the first step you must take is shutting off your water supply. Doing so will not only help limit the mess that your project may cause but also make the job much easier for you. You may also want to clear out bathroom accessories and bathroom furniture to give you more room to move around and work. 

Pro Tip #1: While your water supply is already turned off, you may still encounter some water left in the pipes. Have a towel handy to clean off any excess water you may encounter. 

Fixing a Dripping Shower Head

  1. Remove or unscrew the showerhead from the shower wall or exposed shower pipe. This can usually be done with your hands, but if it is too tight for you to unscrew by hand, you may try using a wrench or pliers. 
  2. Inside the shower head, you will find the O-Ring or Rubber Washer. This piece of rubber is what contains water from dripping or leaking. If the O-Ring looks damaged or brittle, then you may want to replace it. 

Pro-tip #2: To make sure you get the same size replacement, you may want to take out the old o-ring before buying one to replace it. 

  1. Since you’ve already got the showerhead off, you may want to consider cleaning it as well. Take the opportunity to clear it of all kinds of debris. Be on the lookout for mineral deposit or sediments brought about by hard water. Such kinds of debris affect the pressure of the water released by the showerhead, and may very well cause leaks in your showerhead. 

To clean your shower head, bring water and three parts of white vinegar to a boil. Remove all loose parts attached to the showerhead and submerged the body in the solution for about 20-30 minutes. Scrub, wash and rinse.

  1. Whether you’ve replaced the O-Ring or kept the old one, the next thing you should do is wrap the threads at the tip of the pipe stem with tape. By sealing these, you will be preventing the threads from seizing. 
  2. Reattach the showerhead. Screw it back on by hand. Make sure you do not screw it on too tightly, or you might break the showerhead or the pipe. 
  3. Turn the water supply back on and turn on the shower. Let it run for a few seconds and then turn it off. After a few minutes, check for any leaks or drips. 

At this point, your showerhead should no longer be leaking. If the issue persists, you may want to check if the problem is with the shower valve. 

Fixing A Dripping Shower Valve

  1. Detach the shower valve or shower faucet handle using a screwdriver to have clear access to the internal components of your shower valve. Locate the shower stem. To do this, you may also have to remove metal plates called escutcheons. 
  2. Once you have access to the shower stem, make sure to locate all the washers within the component. Replace each of them regardless of their condition. Also, make sure to locate and replace the seat washer.
  3. Since you’ve already got the valve disassembled, you may want to clean it and its pipes as well. Use the same solution and method used for the showerhead.
  4. Reassemble and replace each component of the shower valve in reverse order. 
  5. Turn the water supply back on and turn on the shower. Let it run for a few seconds and then turn it off. After a few minutes, check for any leaks or drips. At this point, your showerhead should no longer be leaking. 

What Do I Do When My Shower Is Still Leaking?

If at this point you are still experiencing leaks in your shower, you may want to consider replacing your shower valve or calling on a professional plumber to figure out the problem and fix it for you. 

Meanwhile, if you are unsure about fixing the leaky shower yourself, you may also contact a local professional plumber to do it for you.

Pro Tip #3: If you’re calling a plumber, might as well ask them to check on your kitchen sink, water supply, bath taps, and drainage systems, among many others, as this will save you some time and some money on preventable plumbing repairs in the long run.

4 Common Toilet Problems You Can DIY

toilet problems

“Start with the bathroom.” 

One of the tips seasoned home buyers would often share with the beginners is to check the kitchen and the bathroom. Several factors that add or subtract to a real estate’s appeal are whether or not the craftsmanship is up-to-date, the faucets are running, and the walls are mould-free.

When taking care of your home, these two areas also need special attention, especially when the plumbing needs work. While pipework and other complex systems need professionals to take care of the problem, toilet repair is a skill that homeowners need to learn. Some toilet problems are quite easy to fix! Calling plumbers for a minor issue like a broken faucet or faulty valve can cost you a lot of money, which is why you need to make sure that you know how to repair small problems. If you’re attempting to fix your toilet, here are three things you need to do before fixing a toilet.

Before tackling the remedies, it’s crucial to find out how a toilet works. That way, you can quickly identify when your toilet is acting out of ordinary. 

To make a booking or to find out more about our services!
Take a tour of your bathroom and lift the lid to check inside the tank. The tank holds large amounts of water for when you flush the toilet. Two parts make this whole contraption possible: the flush valve and the refill valve. As their names suggest, these valves help flush the water into the bowl and refill the tank with new water, respectively. The refill valves have four different variations:

Refill Valves

Float cup fill valve

  • a modern design that is usually made out of plastic

Floatless fill valve

  • a modern design that cannot be installed in older water tanks

Diaphragm-type ballcock

  • an older style that used to be made of brass but has plastic counterparts

Plunger-type ballcock

  • the oldest type that is typically made of brass
When people flush toilets, the handle or button pulls a lever that lifts the ballcock or refill valve. The lever allows the stored water in the tank to flow through the flush valve and out into the toilet bowl. Because the water comes in large volumes, it pushes the wastewater into the home drainage system and, eventually, the sewer lines. Once the tank is emptied, whatever the model may be, the refill valve opens the water supply valve. As the tank fills up, either a floating ball or cup rises with the water level. Floatless fill valves, however, shut off the water supply automatically when the water pressure reaches a certain level. Even if the names are hard to remember, watching the whole system work from your water tank helps. Now, let us use this knowledge when tackling common toilet scenarios that you may encounter. Don’t worry; these are easy to remedy: This first step is extremely vital to the success of your DIY repair. By making sure the water supply is turned off, you are preventing any kind of further damage that may be caused by the leaking water. Aside from the damage, this can cause to your walls, ceiling, and carpet, you could also end up paying for the removal of damaged furniture together with the cost of replacing it. Additionally, turning off the water supply will also help prevent you from making too much of a mess during the repair.

The Toilet Won’t Flush/Handle Is Broken

One of the most straightforward fixes to make is a broken toilet handle. Test the handle once or twice and check if the lever lifts quickly or not. As this can be a sign that your handle may be too tight or loose, you can adjust the nut counterclockwise to tighten it or clockwise to loosen. Sometimes, the lever might have gotten disconnected from the handle. In this case, simply reconnect the lever.

The Toilet Won’t Stop Flushing Water

Commonly called “phantom flushes” by plumbers, you will know this is happening in your toilet tank refills water on its own without prompting. Once you see that water is trickling into your bowl, this means that the flapper or toilet flusher covering your flush valve is faulty. To remedy this, drain the toilet tank of its water and check the flapper. If it’s damaged, make sure to replace it with a new one. You’ll immediately see the results with your month’s water bill

The Toilet Tank Won’t Stop Refilling

In cases where the flapper valve is working well, and you hear long hissing sounds coming from the tank, it’s time to check the refill valve. Because this hissing sound is usually caused by water coming into your toilet tank through the supply valve, letting this issue prolong may cause overflowing and other messier problems for your household, even a flood. Removing the lid of the tank, check these three things: the float, the refill tube, and the ballcock. Check first if the float is stuck to the side of the tank. After that, make sure that the refill tube is only extending about 1/4″ below the overflow tube. These two tubes work together to supply the tank’s water and keep the toilet tank from overflowing. Finally, check if the ballcock automatically shuts off the water after flushing the toilet. Once you find the cause of the problem, make sure to adjust or replace any of the items. You may also choose to bend the arm that holds the float down to shut off the water supply. This “fine-tunes” your float ball to shut off the water at a specific level.

The Toilet Is Clogged/Toilet Not Flushing

One of the homeowners’ worst nightmares, clogs are the most common toilet dilemma. Purchasing a force-cup plunger is a better investment than the standard ones most houses have. Insert the bulb down the drain and pump the lodged object through. Without pulling the bulb out, inspect whether the drain is clear. If the toilet remains clogged after a few repetitions, use a closet auger. Make sure not to scratch the sides of the bowl as you twist and push the rotor downward. Even the best toilets encounter these problems. By learning how to DIY these solutions and repairing your toilet, you will not only save yourself money, but you will also learn new household tricks. If these toilet issues continue, however, you may want to call for a professional to help you out. You can check here for the qualities you must look out for in an emergency plumber. You may either find a one via community listings, ask for a recommendation from your neighbour, or give us a call, and we will be on our way.

SIX SIMPLE STEPS TO DRAIN YOUR CENTRAL HEATING SYSTEM RADIATOR

radiator_plumber

When owning a central heating system, one must also understand that cleaning the machine is vital for it to last long. To save money, you don’t have to hire a plumber or get a radiator draining tray kit, here are some DIY tips on how to drain radiator fluids without having to drain the whole system!

Now, to ensure that your radiators continuously work effectively, we offer you six easy steps to drain your heating system:

Gentle reminders!

  • Before completely draining your central heating system, always make sure that you switch the system of the boiler off and wait until the pipes heading to the radiator cools down entirely.
  • Let your radiator cool before draining it for restoration or replacement.
  • For a combi-boiler, turn it off and exhaust the fluids once it is cool enough. But if you have a conventional heating system, isolate the water first then access the header tank before turning off the boiler.
To make a booking or to find out more about our services!

STEP ONE: LOCATE THE RADIATOR, THEN DRAIN

What you need: (2) folded towels and (2) buckets or basin

  • Look for the pipes on either end of the radiator—The end with the regulator collects the hot water from the boiler, while the other end with the lockshield valve, transmits it back again.
  • Position the folded towels under the regulator and lockshield controllers. To catch the excretion from the loosened pipes, set two buckets on top of each towel.
  • For the radiator sludge collected, we advise you not dispose of it anywhere near your garden or flower bed as the chemicals from the inhibitor may kill your plants.

STEP TWO: SEPARATE RADIATOR AND HEATING SYSTEM

What you need: Pliers or adjustable spanner

  • The radiator and the heating system must be separated by closing the two valves.
  • For the regulator, rotate it in a clockwise direction.
  • For the lockshield, remove the small-cap to access the valve itself and set it in a container for safe-keeping. Then use the pliers to tighten and close the lockshield by going clockwise.

STEP THREE: OPEN THE BLEED VALVES

What you need: An instrument that will open the bleed valves

  • Check the set spanner to make sure the faces are all square. Don’t use an adjustable spanner for it may glide and impair the radiator or even injure your hands.
  • The wrench or spanner must fit both union nuts tightly. Check if there are points where your grip might collide with something if the spanner slips. Use a tool that will open the radiator bleed valve in two turns.

STEP FOUR: UNDO THE UNION NUTS

What you need: bucket or basin from before and absorbent cloth

  • Undo and loosen the union nut on the regulator side.
  • Check if the bucket or basin is still situated in its place under the union nut, and have someone on standby with an absorbent towel.
  • Fit the spanner onto the union nut on the regulator side of the radiator and let someone steady the pipe for you. At the same time, twist the nut carefully counter-clockwise a quarter turn until the water pours into the bucket or basin.
  • Don’t pressure yourself by speeding the process of draining the radiator; let it be.
  • Tighten the union before it gets full and remove the fluids before you continue. If the water flows unwillingly, open the radiator bleed valve slightly to give the partial vacuum a gap.
  • Let the fluid flow until your radiator is empty.

This is usually where most how-to guides end. However, after you bleed your radiators following these steps, chances are there will still be some fluids left over from the process. To completely rid your radiator of sludge, you may want to consider the following steps:

STEP FIVE: ENTIRELY REMOVE COUPLINGS FROM THE UNIONS

What you need: Adhesive tape

  • Unbolt the nuts from the radiator on the side of the regulator then gently extract the supply pipe a bit far.
  • Conceal the pipe thread with adhesive tape to secure it from any collisions.
  • Remove the nut carefully on the lockshield side of the radiator. Beware of any excess fluids coming out.
  • Cautiously put the drain pipe away and shield the pipe thread the same way you did the regulator end.

STEP SIX: DISLODGE THE RADIATOR AND EXHAUST THE REMAINING WATER 

What you need: bucket or basin 

  • Simultaneously, shield the holes where you removed the pipes with one hand and use the other to drag the radiator upwards away from the wall bracket.
  • Drain the last of the radiator water into the bucket or basin. Once finished, you may close the bleed valves and start reassembling your central heating radiator.

To get you fully prepared for this DIY task, check out this basic DIY video below:

While bleeding your radiators seem like an easy task you can totally do yourself after reading a couple of DIY tips, it is still best that you hire a professional to do the job for you. It does not only assure you that your radiator and pipe fittings remain safe and in one piece, but also ensures your safety and the safety of everyone else in your household. 

How To Change A Tap Washer: A Guide

faucet

There is nothing more frustrating than hearing “drip, drip, drip” from your kitchen sink or bathroom tap nonstop. And, as much as you’d want to ignore it in hopes of it going away, leaving your faucet to continue dripping and leaking all over your sink will not make that dripping sound stop. Look, a dripping faucet usually means that there is something wrong with your tap washer. And luckily for you, replacing the washer is not as difficult as it seems. “But, I don’t know how to change a tap washer!” you might say. Well then, you’ve come to the right place! Today, I’m going to be giving you a series of steps you can follow to get your leaky tap fixed and running in perfect order. 

To make a booking or to find out more about our services!

But, before we begin, don’t forget to check for the following:

  • What type of tap you are using 

One thing you should know is that there are different types of taps out there, and knowing which kind is extremely vital. This guide is for traditional taps which use rubber washer, and not modern taps which use ceramic discs. 

  • You have all the equipment you will need

For this particular project, you’ll be needing a flathead screwdriver, an adjustable spanner or wrench, a piece of cloth, and of course, the spare washer. Rubber washers are available at almost any hardware store and even online

  • Your water supply is turned off

Before you begin any type of plumbing work, whether it be on kitchen sinks, a shower head, any kind of bathroom furniture, and water taps, you will have to make sure that you cut off the flow of water to your sink. Otherwise, you will be spraying water everywhere, and nobody wants that! You may do this by turning the valve that is located under your sink. If your sink does not have an isolation valve that directly cuts it off from the water supply, you will have to turn off your water main. Additionally, if you’re replacing the washer on the hot water tap, make sure to turn off the boiler, too. 

  • Your sink is plugged

Replacing washers involves a lot of screws and small parts from the inside of your leaky tap. So, to make sure that nothing falls down the drain, make sure to plug your sink. To make sure the surface of your sink is protected from any potential damage while making the replacement, you may want to cover your sink basin with a cloth or old towel. 

Once you’ve got all that checked and done, you may now begin the repair! Here are some easy steps to help you out:

Pro-tip: Whatever you take apart, you will put back together later. So, do not forget how the components are ordered before disassembling the tap. You may want to lay all of your tap’s components and screws in the order in which you have removed them. This will make reassembling the tap much easier and faster. 

Step 1: Remove the tap head

Removing the tap head, tap handle, or the top of the tap, can be easily done by undoing the screw holding it in place, and then prying it open using your flathead screwdriver. This will expose the inner workings of your tap, or more specifically, your tap’s valve. 

Step 2: Undo the valve

Remove the valve with your adjustable spanner. If you find that your tap valve is stiff and difficult to remove, you may either hold on to the tap spout for leverage or wrap a piece of cloth around it before undoing it with your wrench. 

Step 3: Replace the tap washer

Once you have removed the valve, you will find your tap washer. It would usually be held in place by a screw or a nut. Undo that, and then remove the tap washer. You may either pry it off using the screwdriver or spanner. If neither works, consider lathering some oil around it. Try again. Once you have removed it from the rest of the tap, feel free to examine it for any kind of damage. Chances are, you will see some cracks that represent its wear and tear. 

It is also important to note that your replacement washer should be compatible with your tap. To make sure that you get the correct kind, you may opt to disassemble your tap before getting a replacement, Otherwise, be sure to refer to a professional or read through a DIY forum to get an idea on how your tap washer could look. 

Once you’ve got this all sorted out, all you have to do is reassemble the tap!

Step 4: Reassemble the tap

Screw the valve back into place. Make sure not to screw it back on too tightly, or might damage the tap. After this, fasten the tap head or tap handle back on. Ta-da! You’re done! You’ve successfully changed a tap washer! Now, you may turn the water supply on and observe for any more leaks. 

Alongside this guide, you may want to consider watching DIY Videos on changing tap washers like this one:

How do I prevent this from happening again?

Unfortunately, preventing leaking taps is almost impossible when you’re using a traditional tap with a rubber washer, as rubber tap washers naturally go through wear and tear over time. If you want to reduce the frequency of having to make DIY repairs on your tap, though, you may consider switching over to a modern tap which makes use of ceramic discs instead. Ceramic discs are much durable, meaning you wouldn’t have to change them as often as you would a rubber tap washer. 

What if my tap continues leaking?

If your DIY project does not stop your tap from leaking, you may want to check the valve as well, When your valve is faulty, chances are, the tap seat and the washer wouldn’t be able to function properly, no matter what. 

If this does not work, you may want to leave it to a professional or consider replacing your tap altogether. 

You’ve Got A Dripping Tap? Here’s How You Can Fix It!

Dripping tap

Drip… Drip… Drip… Drip… 

Annoying, right? 

Well, far more than it being a huge annoyance, a dripping tap or a leaky tap can cost you hundreds of pounds quite literally down the drain! Leaking taps like these are one of the most common causes of unexpected high water consumption in the UK, costing each household an average of 25 litres of wasted water daily, according to research by Opinium for Direct Line Home Insurance

Some would immediately google “how to fix a dripping tap,” for DIY or home guides. Meanwhile, a good percentage of UK households would, unfortunately, not attempt to fix their leaky or dripping taps because they consider tap repairs an unnecessary expense, or just aren’t too bothered by it to get it fixed as soon as possible. However, an unchecked or unresolved tap leak could cause further damage such as mineral deposits/stains, drain clogs, overflows, and water damage throughout the home. Furthermore, repairs for these kinds of damages will cost far more money than fixing the original leak in the first place. 

At this point, you would either call a plumber to start working on that annoying leak, or get out your handy tools and start fixing the leak yourself. If you fall in the latter category and think you’re up to the task of getting this task done by yourself, feel free to use this short step-by-step guide to walk you through the process:

To make a booking or to find out more about our services!

Turn off the water supply

This first step is extremely vital to the success of your DIY repair. By making sure the water supply is turned off, you are preventing any kind of further damage that may be caused by the leaking water. Additionally, this prevents you from making too much of a mess during the repair. 

Take apart the faucet

Before you do this, make sure that the sink is plugged. This prevents any small parts of the tap from getting lost down the drain. Once you have that secured, use a screwdriver to begin taking apart the tap by removing the tap handle and unscrewing the tap mechanism. Be sure to place the parts you have unscrewed in order to make the reconstruction much easier. 

Identify the problem

While taking apart your tap, you will be able to see which parts are corroded, damaged, defective, or covered with mineral deposits. Once you’ve figured out which parts need replacing, make sure that the new component fits perfectly into the tap. Otherwise, this will only cause further damage. You may want to take a photo of the damaged component, or better yet, take the component itself when you go to the hardware store to make sure that you are getting the replacement component in the correct size.

Here are the commonly damaged components you should be on the lookout for: 

  • Ceramic disc
  • Rubber washer
  • O-ring

Fixing a leaky tap as demonstrated by HowToLou, a YouTube channel dedicated to DIY demonstrations: 

Reassemble

Once you’ve gotten all the parts replaced and ready to go, you may start putting the tap back together. Make sure to do it carefully, and in the correct order. Tighten all screws to make sure everything is in working perfectly. Turn on the water supply and check for any more leaks. Ideally, for a traditional tap, the order should be as follows: washer/o-ring, stem or cartridge, packing nut, screw, and tap head or handle.

If you would rather call for a plumber to help you with the tap repairs, here are some things you should remember:

Find someone you can trust

Whether it’s by checking for a license, asking for their qualifications, or looking for job recommendations from their previous customers, it is important that you get to know the person you are dealing with. You are letting them into your home after all. 

Working with a plumber you can trust also means you will also be able to ask them questions freely whenever the need arises. You wouldn’t have to worry about them misleading you or taking advantage of you when you make it seem like they do not know anything about plumbing. 

Take the chance to make other necessary repairs 

Plumbing issues are sometimes hard to detect. If you’ve already got a plumber around, and you’ve got some time and maybe some cash to spare, take the chance to get your house’s plumbing work inspected. You will then know if your plumber has to fix leaks, do some work on the kitchen sink, or help you get both your hot and cold water running.

Be aware of all the costs before having the job done

Nobody likes surprises, that is a fact. So, be sure to confirm with your plumber just exactly how much repairing a leaky tap will cost, and whatever project he may find during the inspection. You wouldn’t want to have any monetary issues anywhere during the whole process. 

Make sure your house is prepared

Although a dripping tap is hardly considered major plumbing work, it is important that you are prepared for a professional to come into your home, just as you would for any other kind of home maintenance. Do not leave hanging around anything that may hinder the repairs.

How to unblock a clogged sink

There’s nothing more frustrating than having clogged toilets and blocked sinks. You’ll have dirty water floating about, a boatload of unwashed dishes lined up, and if you’re really unlucky, an unpleasant smell wafting about your kitchen that even white vinegar couldn’t mask. It is also important to note that sink unblocking should be done as soon as possible as these may cause further damage to your drainage system as a whole. Furthermore, damaged drainage systems may cause leaks into the walls and flooring of your home, possibly damaging the structural integrity of your property. 

Chances are, you will want to get this all over with immediately. Sadly, it’s not as easy as snapping your fingers and calling out, “unblock sink!” for this to happen. Now, you’re probably thinking, “I should just call a plumber.” However, before you do that and risk making an unnecessary expense, try and see if the problem is simple enough for you to work on and solve on your own. 

Calling a professional for the slightest of troubles can cost you hundreds, or even thousands, of pounds. Going DIY on some plumbing projects can be beneficial to your wallet. 

Here’s a list of techniques and cleaning hack that you can use not to get your sink up and running, but also to avoid spending thousands of pounds on something that could have been totally unavoidable:

Use A Drain Plunger

A drain plunger can be quite tricky if not done right, but if done properly, this technique is probably the quickest and easiest way to get rid of those blockages. Just make sure to clear the plughole of any debris, and keep the area between the plughole and the mouth of the plunger airtight. Gently pump the plunger until the blockage is dislodged. 

Pour Some Hot Water

Remove as much standing water from the blocked sinks as you can before pouring the boiling hot water onto the sink’s drain. The clog should start moving pretty quickly. You will notice this when the boiling water starts flowing down the drain. If the boiling water stands, let it cool, remove from the sink, and then try again. Usually, blocked sinks are caused by grease and fat poured down the drain which solidifies when cooled down. 

Get Experimental With Some Baking Soda and Vinegar 

If you think the clog isn’t so bad, try pouring some vinegar into your drain followed by some baking soda. The combination of these two items should cause a chemical reaction or fizzing that can help move the blockages out of the way. 

Baking Soda and Vinegar is a great drain unblocker. Drain cleaners and industrial-strength limescale remover can be too harsh on your pipes. It may cause a bit of damage that can even worsen the problem. It’s best to use a mild cleaning product that will do the job but won’t affect the integrity of your pipes.

Clean Out Your P-Trap

The P-trap is part of the drain line found under your sink. Because of its naturally bent shape, it usually houses a lot of debris. You will simply have to disassemble this drain line, with a basin big enough to catch the drain water ready, and scoop out all foreign objects out of the P-trap. Once satisfied, you may replace the drain line and check if the water is flowing freely into the pipes.

For a comprehensive demonstration on how to clean out your P-Trap, refer to this video by HowToWith GEO, a YouTube channel dedicated to making how-to videos for viewers needing assistance in completing their projects.

Use a plumber’s snake

This cleaning hack will need some expertise and precision that people who have unblocked the sink before can do easily. The plumber’s snake will require you to disassemble your drain pipe further. Here, you will have to remove the trap arm in order to reach deeper into the drain line which runs through the wall. This is where you will insert the snake, guiding it inwards until you feel resistance to break the clog. After pulling out the debris, you may reassemble the drain pipes and run some water to check if the gunk has been completely cleared. Repeat the process until water starts flowing into the drain hole freely. 

Wire Hanger

Straightened out wire hangers work quite similarly to a plumber’s snake. However, this will have a limited range compared to the aforementioned tool, as it is only a DIY alternative. Nevertheless, this will work for superficial clogs and minor blockages

  • To avoid sink blockages and drainage system damages, the Hull City Council advises its residents to do the following:
  • Do not get rid of food waste (even just a bit of food can accumulate to a major problem), cool fat or oils, and other solid matter through the drainage system. 
  • Likewise, do not put paper products such as nappies, female toiletries, and the like into the drainage system
  • Add degreasing agents like vinegar, lemon juice, cornstarch, borax, baking soda, and castile soap into drains to prevent clogging or build up in the drainage system

Tips On Taking Care Of Your Plumbing

plumbing

Owning a house can be tricky. There are hundreds of things that you have to take into consideration. Unless you’re a trust fund baby, money, when owning a house, will always be an issue. Every month, you need to take care of your house mortgage, car loans, electric bills, gas bills, etc. It will never end. On top of that, there is the maintenance and upkeep of the property. You have to worry about plumbing, lawn and garden aesthetics, lighting, security, mould, etc.

Plumbing, for example, when left unchecked can wreak serious havoc on your property. Flooding caused by a burst pipe, for instance, will not only ruin your floorboards and possessions but can also drastically lower the overall market value of your property. Your plumbing, when maintained improperly can cause serious damages. Make it a habit to regularly inspect your piping system such as your copper piping, plastic pipe, kitchen taps, bathroom taps, compression fittings, to ensure that everything works perfectly.

A house’s internal plumbing system is one of the fixtures of a real estate property that is often taken for granted. A new homeowner can honestly go for years without encountering any plumbing problems. However, once the problem starts, it’s a huge one. This is because wear and tear can accumulate over the years. Your copper tubes may already have micro leaks since year one but it only presented a problem in year four. By this time, there is already irreparable damage and the costs are far higher than you would’ve expected. Even your pipes need regular maintenance to avoid any major problems that would require a plumber to come to your house with his power tools to fix the issue. 

It is of utmost importance that your plumbing runs smoothly. If not, this can cause severe repercussions such as a sky-high water bill, rotting, mould growth, damage to walls, floor tiles and floorboards, flooding, and even weaken the structural integrity of your house.

While it is understandable that you want to save money by DIY-ing small plumbing repairs with your own plumbing tools and plumbing supplies. A few hand tools, a wrench, a plunger, a sewer snake and your knowledge of plumbing from browsing YouTube videos and WikiHow articles just will not do when it comes to major damages. It would be better to hire someone instead of taking on a task that requires the expertise of a professional plumber. You might do more damage to your pipe and tubes.

Having said this. The best thing to do is still prevention. Why pay a plumber to fix your central heating system, line guttering, and pipe insulation when you can take steps to avoid them in the first place? A few tips to reduce the wear and tear of your plumbing system will keep the plumber away for another day.

Here, I have outlined some of the best tips and tricks on how to take care of your plumbing. 

Prevent Clogs

Clogs are perhaps one of the most common plumbing problems that you will encounter. A clog happens when there is foreign material that’s blocking the natural pathway of water (your pipe and tubes). This is, more often than not, caused by food scraps, tissue papers, sanitary napkins, and human hair. Proper waste disposal must be maintained.

Avoid clogs by throwing these in a trashcan instead of down the drain. For food scraps, make sure that you’ve scraped all the food off of the plates before you do the dishes. After doing the dishes, let your tap run for a few seconds to help rinse debris down the drain reducing the chance of buildup. Tissue paper and sanitary napkins can go straight to the bin. Make it a habit to rid your shower drains of your hair on a regular basis. Installing a screen will also catch foreign materials and stop them from going straight down your pipe and tubes.

Pipe Insulation

Frozen pipes can cause a major headache. If your pipe and tubes have insufficient pipe insulation, the water inside can accumulate and freeze. Gradually, this could result in a major build-up. Extreme cold can also turn your plastic pipe and copper tubes brittle and prone to leaks or bursting. Because there is a blockage on your pipe and tubes, the pressure builds up which usually leads to your plumbing system breaking down. During winter, make sure that you prepare your pipes with the right pipe insulation materials.

NEVER use a propane torch to melt your pipes as this could pile up to more damage to your pipes, or in extreme cases, a fire.

Avoid Pouring Foreign Liquids Down Your Drain

If it’s not soap or water then it shouldn’t pass through your drains. It has become common for homeowners to just pour their liquid grease down the drain along with the rest of their food scraps. Liquid grease, when it cools down even for the slightest bit, solidifies. Just think of your pipes as arteries. When a person eats too much oil, the chances of arteries getting blocked is higher. This is because the pathway is blocked by solidified grease. If you have a blocked pipe, try to pour hot water to melt down the fat. This habit of yours can cause pressure buildup and end up with you having a burst pipe.

On the other hand, you may think that using commercial drain cleaners regularly is taking care of your pipes, right? Right?

Wrong.

Commercial drain cleaners that advertise themselves as industrial-strength clog removers can cause your pipes a lot of harm in the long run. Drain cleaners have harsh chemicals that can cause your pipe and fittings to go thin and brittle which could result in leaks or bursting. 

Look For Leaks

Did you know that the United States Environmental Protection Agency estimates that the average household’s leaks account to almost 10, 000 gallons of water wasted every year? This is because 10 % of American homes have leaks that waste over 90 gallons of water or more on a daily basis.

Everything may be working out fine for you but in reality, leaks start off as micro leaks with the tiniest amounts of water wasted that doesn’t affect the water meters. By ignoring them, not only are you weakening the structural integrity of your pipes but you are also wasting water and spiking up your water bills. It can even be from loose pipe fittings. 

Do a regular bi-monthly inspection of your home plumbing. Look for leaks along pipes, faucets, pipe valves, showerheads, radiator valves, toilet flappers, and pipe fittings. A musty smell, puddles of water, and mould growth are some sure giveaways that there is a leak nearby.  Take care of them immediately by buying pipe sealant. However, if there is already a crack or that the damage is too bad, sealant will not work and a professional must be called immediately.

Don’t Crank Your Water Heater Too High

Hot water can easily shorten the lifespan of your plumbing. While hot water is essential for daily chores such as washing dishes and taking a nice hot bath, you really don’t need to crank it up that high. Adjust the temperature of your water heater to keep it from damaging the pipes. Be aware also that sediments gather at the bottom of your hot water tank over time which shortens its lifespan due to rust and corrosion. If your water supply has high mineral content, hard water can form from the accumulation of minerals. Rid your water tank of residue once in a while.

Adjust Your Water Pressure

Yes. I get it. You’re impatient and want to finish the dishes immediately by blasting the plates with powerful bursts of water. However, one thing you should know is that high water pressure causes great stress on your pipes and may cause leaks. A pressure reducer can prevent your pipe from bursting due to pressure buildup. This also saves you from paying too much on your water bill.