gas-saf-register logo

Do I Need A Gas Safety Certificate As A Landlord?

Gas Safety Certificate

If you decide to become a landlord, it is your responsibility to provide your tenants accommodation that is fit for living. The standard of the property should adhere to the Landlord and Tenant Act 1985, wherein it has to be structurally sound and in good repair, with natural lighting and facilities for hygiene. To make it appropriate for the colder months, the property will also need enough insulation and water and electrical supply. This means the landlord has four main responsibilities when caring for his or her tenants:

Build or furnish a property that is free of health hazards 

If you want to place a fireplace or a wood-burning stove in any of the rooms, you need to ensure to fit a carbon monoxide alarm. Using the right, high-quality materials for the place can also hinder any damages that are detrimental to your tenants’ health. This also means regularly scheduling inspections done by professionals.

Ensure that there are fire safety tools in place

In relation to the previous point, it is also helpful to have your walls made of fireproof material (or check if it is up to the standards of the 1988 Fire Safety Regulations). Because it’s best to prepare for any calamities, natural or manmade, the best way to appreciate your property’s value is by keeping its build sturdy. Always have a fire extinguisher, fire blankets and fire alarm in places where fires are more likely to start (e.g. kitchen area, fireplace, boiler room, etc). You must also ensure that the furniture meets the same standards, checking the manufacturer’s label if they are fire-safe.

To make a booking or to find out more about our services!

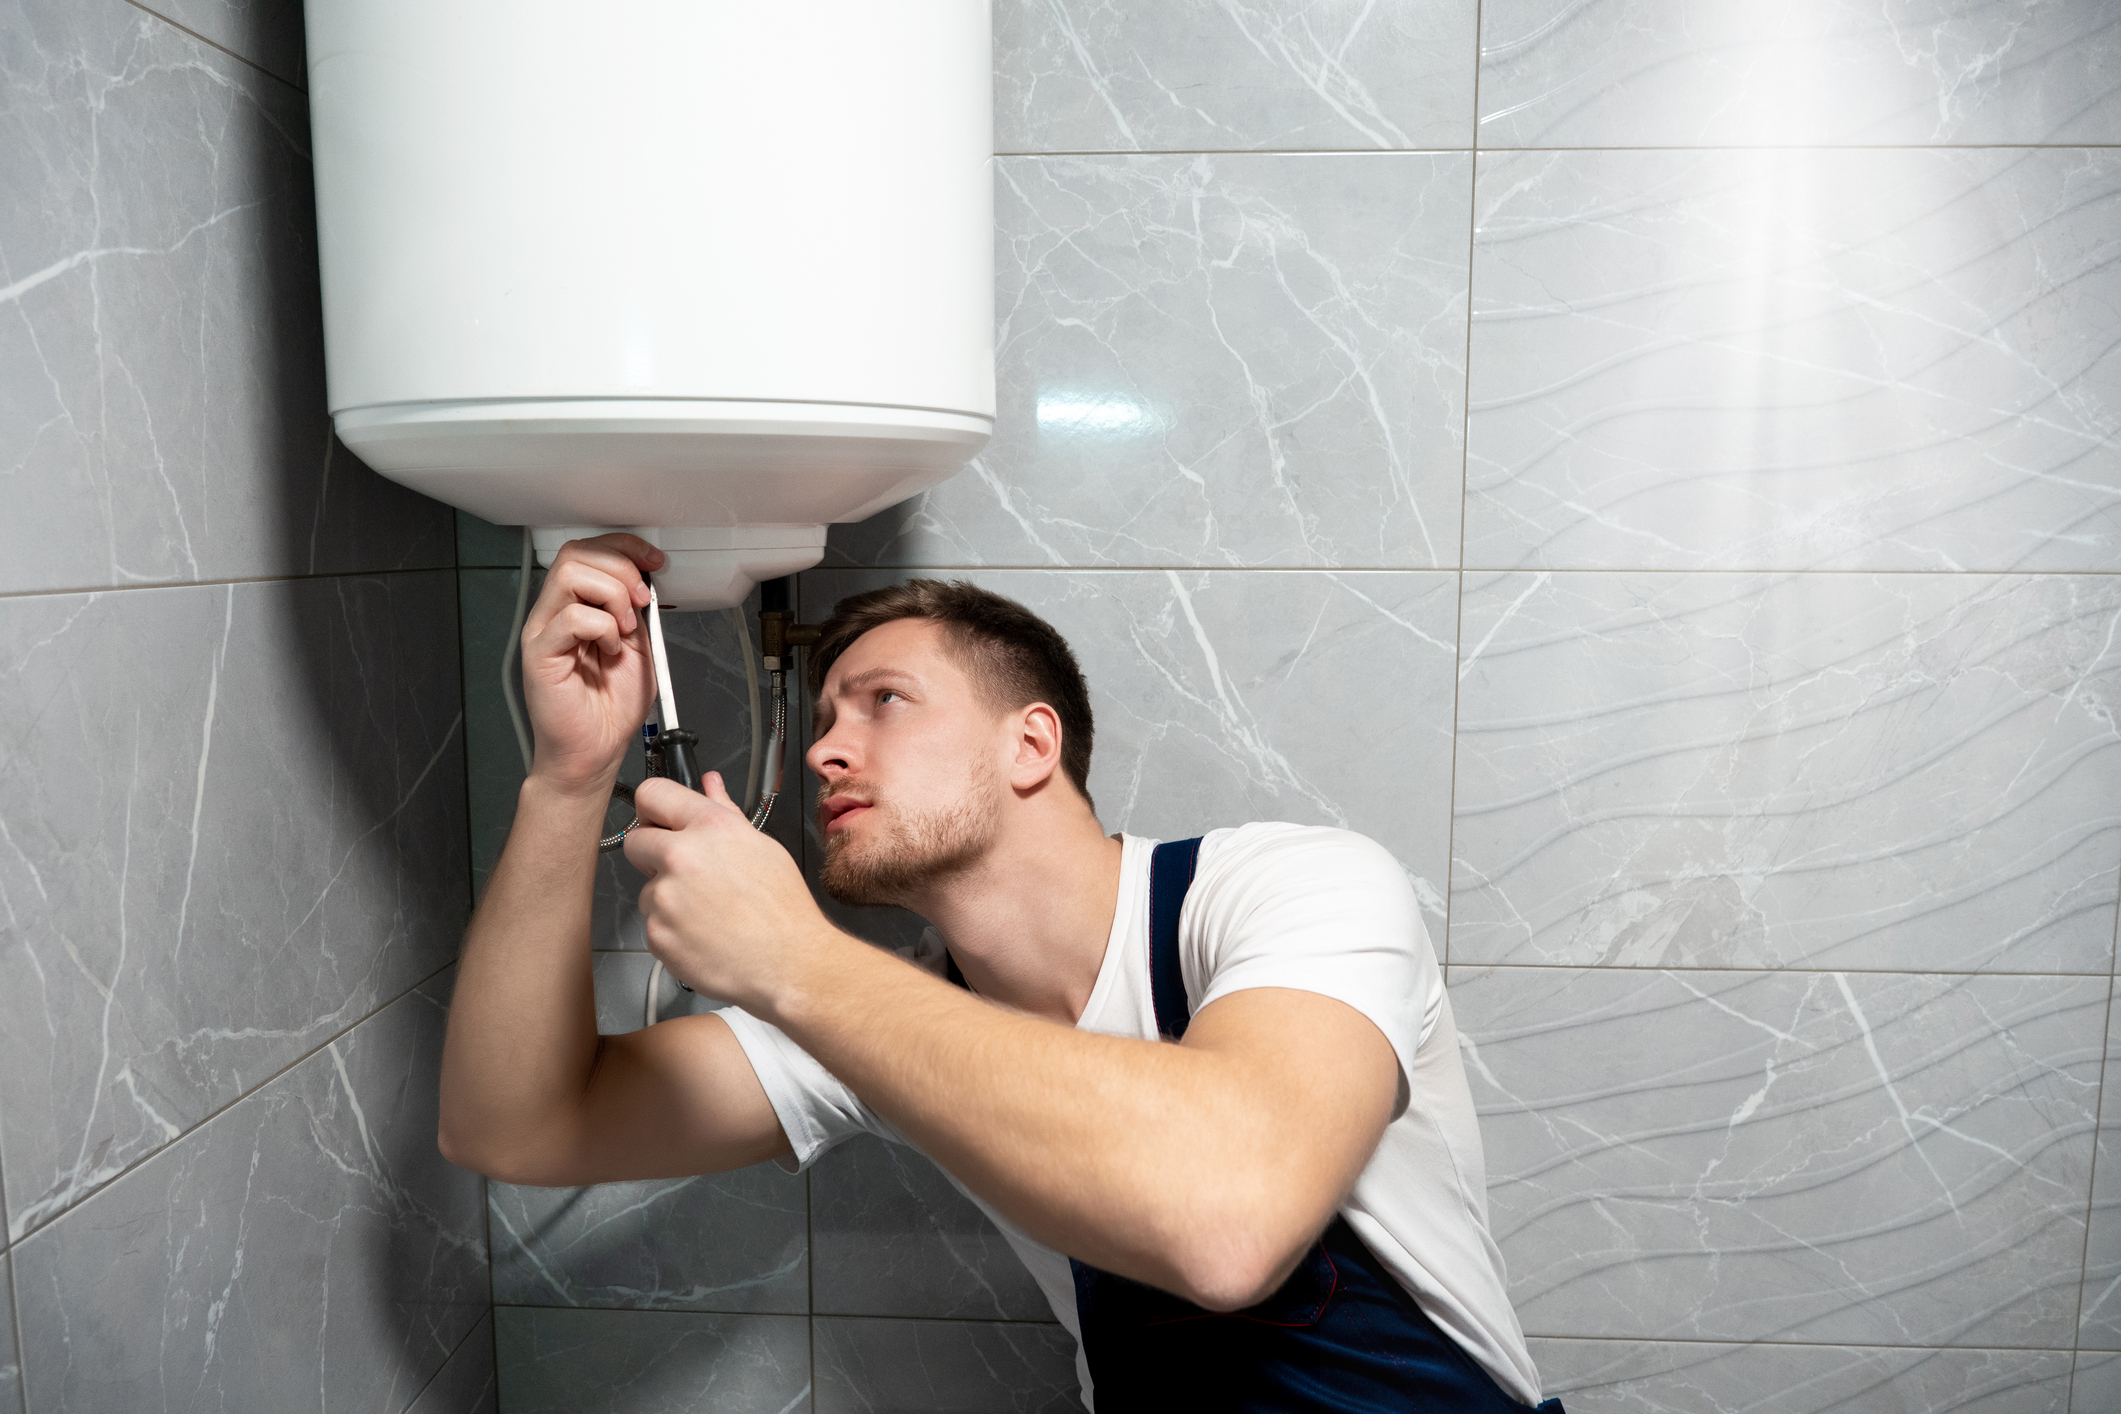
Carry out repairs once faults and defects are detected 

Once the place is furnished, it is also the landlord’s responsibility to keep it in top shape. Of course, this will also depend on how quickly your tenant can report these faults may they be moulds, infestation or short circuits.

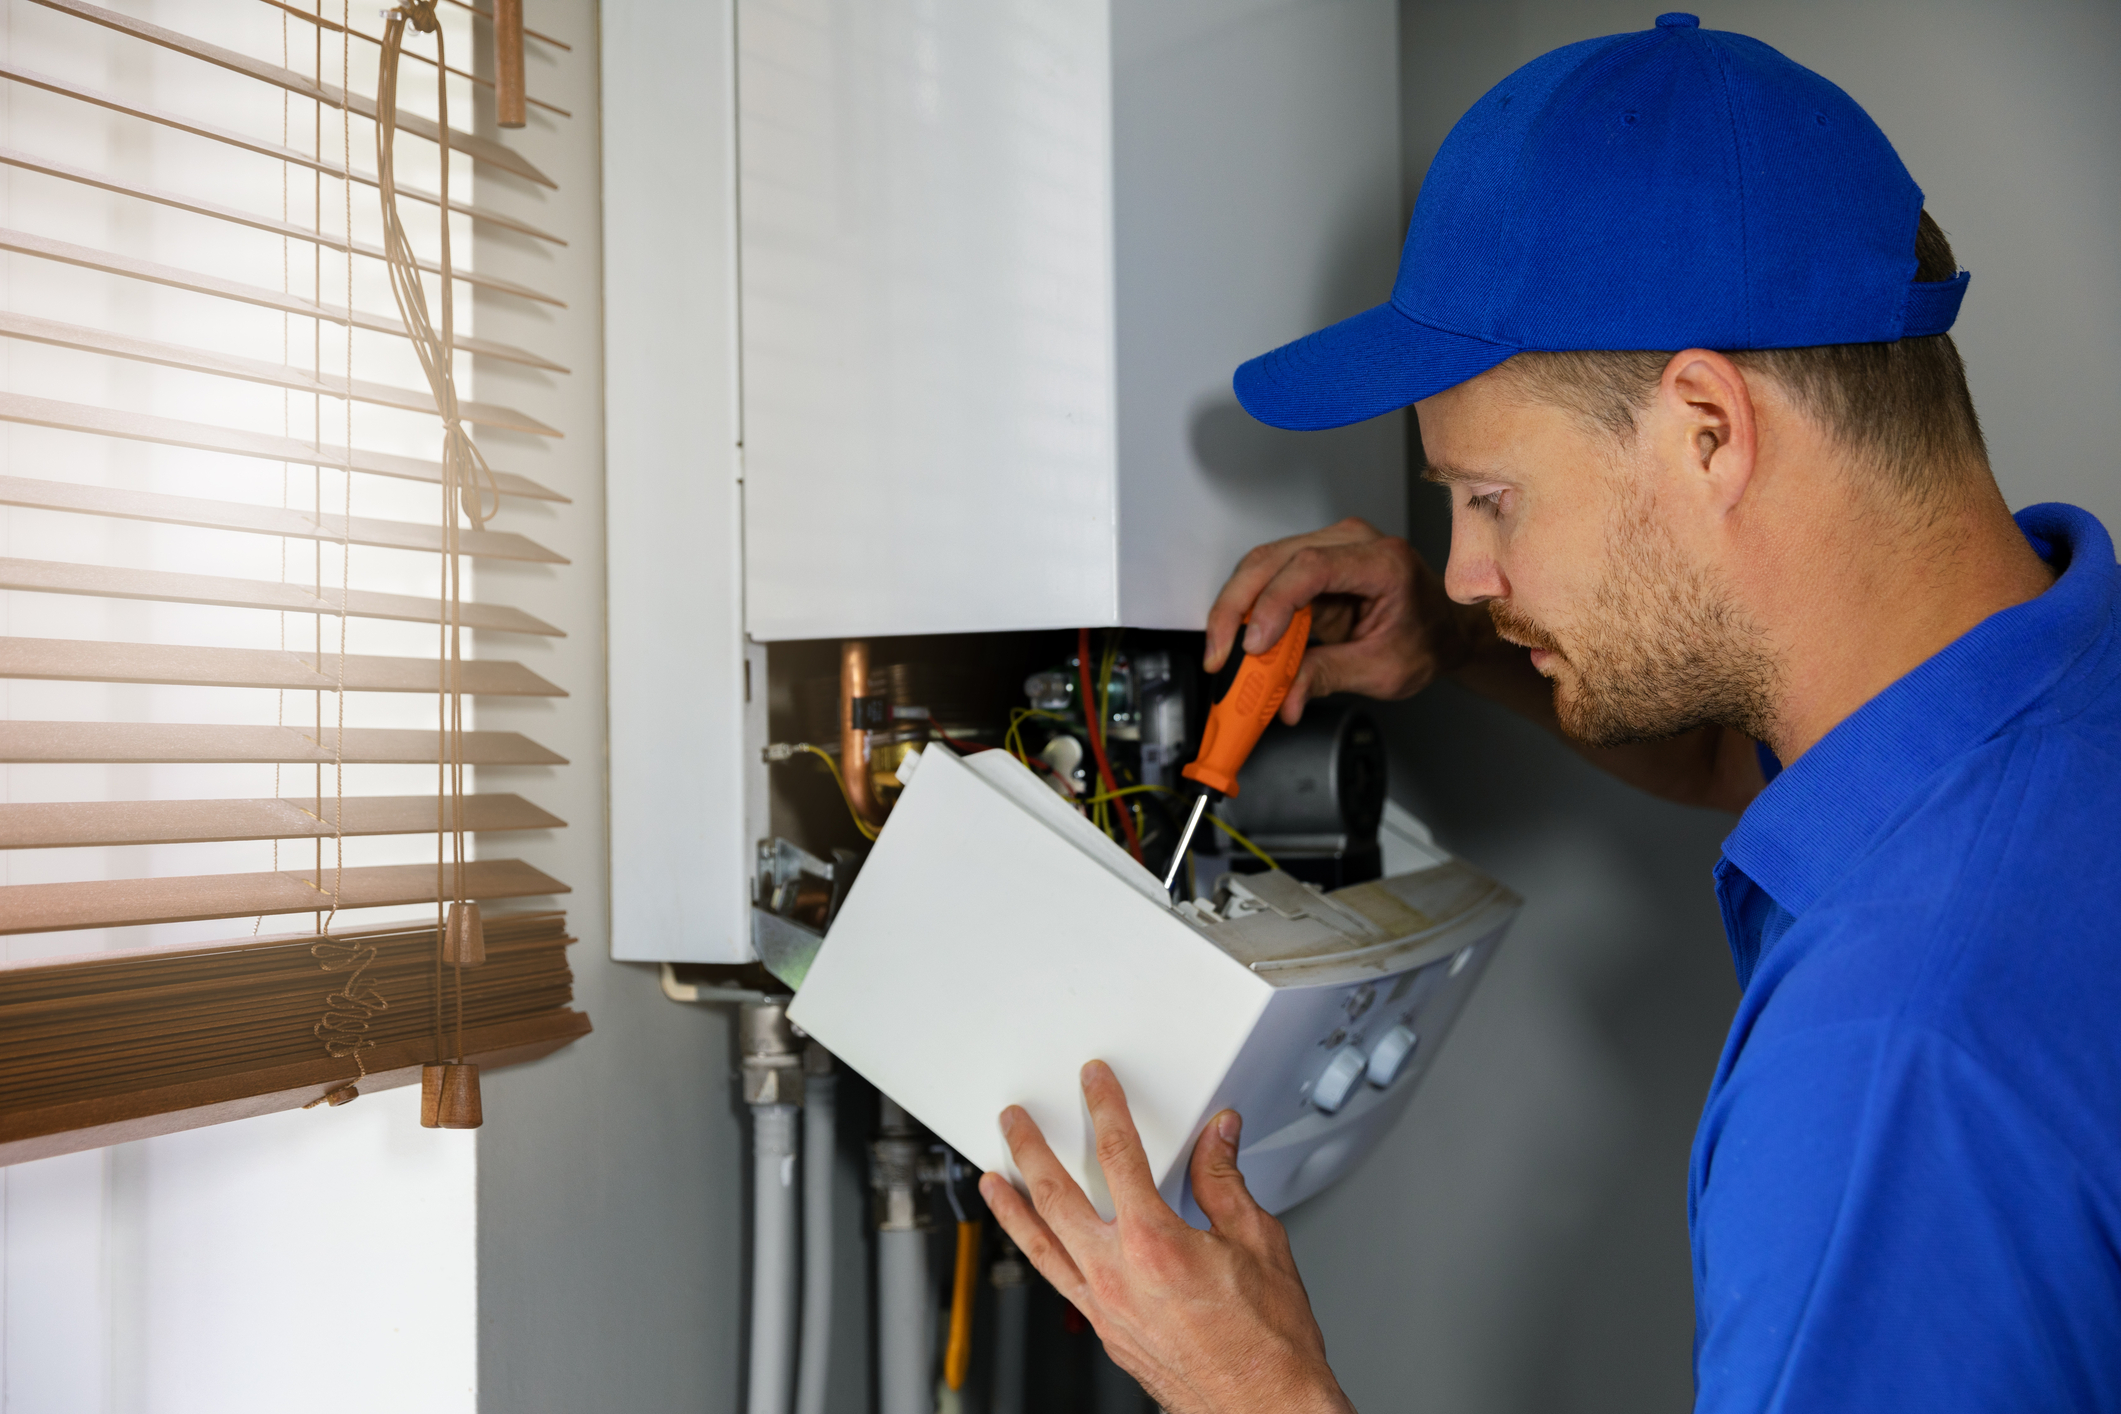
Install and test if gas and electrical appliances work according to industry standards 

According to the 1994 Electrical Equipment Regulations, all of your electrical equipment needs to be regularly tested by a professional, ensuring that wirings are concealed and plugs are BS1363 compliant. Meanwhile, fire-guards need to be BS3248 compliant, and fire extinguishers need to be BS6575 compliant.

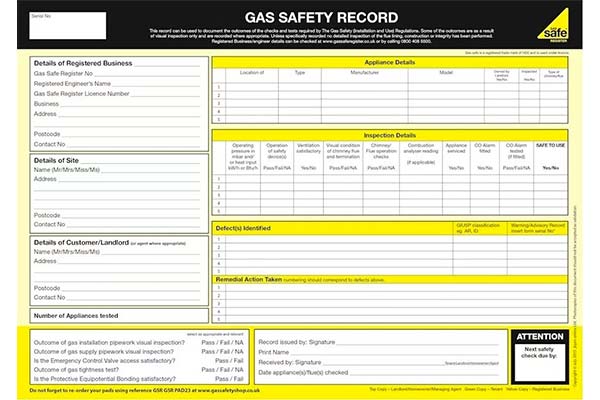
If the gas appliances are your own and not the tenant’s, you are required to have a Gas Safe engineer check if they are safe and in good working order. The 1994 Gas Safety Regulations also require a landlord Gas Safety Certificate that is valid for one year. Make sure to keep a record of these safety checks and give your certificate within the 28 days that a potential tenant agrees to the tenancy contract.

Gas Safety: The Most Important Certificate Of All

While you have a lot of legal obligations to your tenant, procuring a Gas Safety Certificate is the first and most important step when keeping your property in the market and winning a potential tenant’s trust. Widely known as the CORGI Proforma or CP12, this takes note of the dates that all of the gas appliances in your property have been checked by a Gas Safe registered engineer. These people are the only ones qualified and certified to ensure the safety and the efficiency of your appliances. You can find the official list on Gas Safe’s website. 

If your tenant owns the gas appliances, it is still your duty to have the flues and fittings regularly checked. While these may be time-consuming on your end, a whiff of gas in a home can turn into something more dangerous had it not been prevented. Here are some risks landlords may encounter is the compliance system is ignored or bypassed:

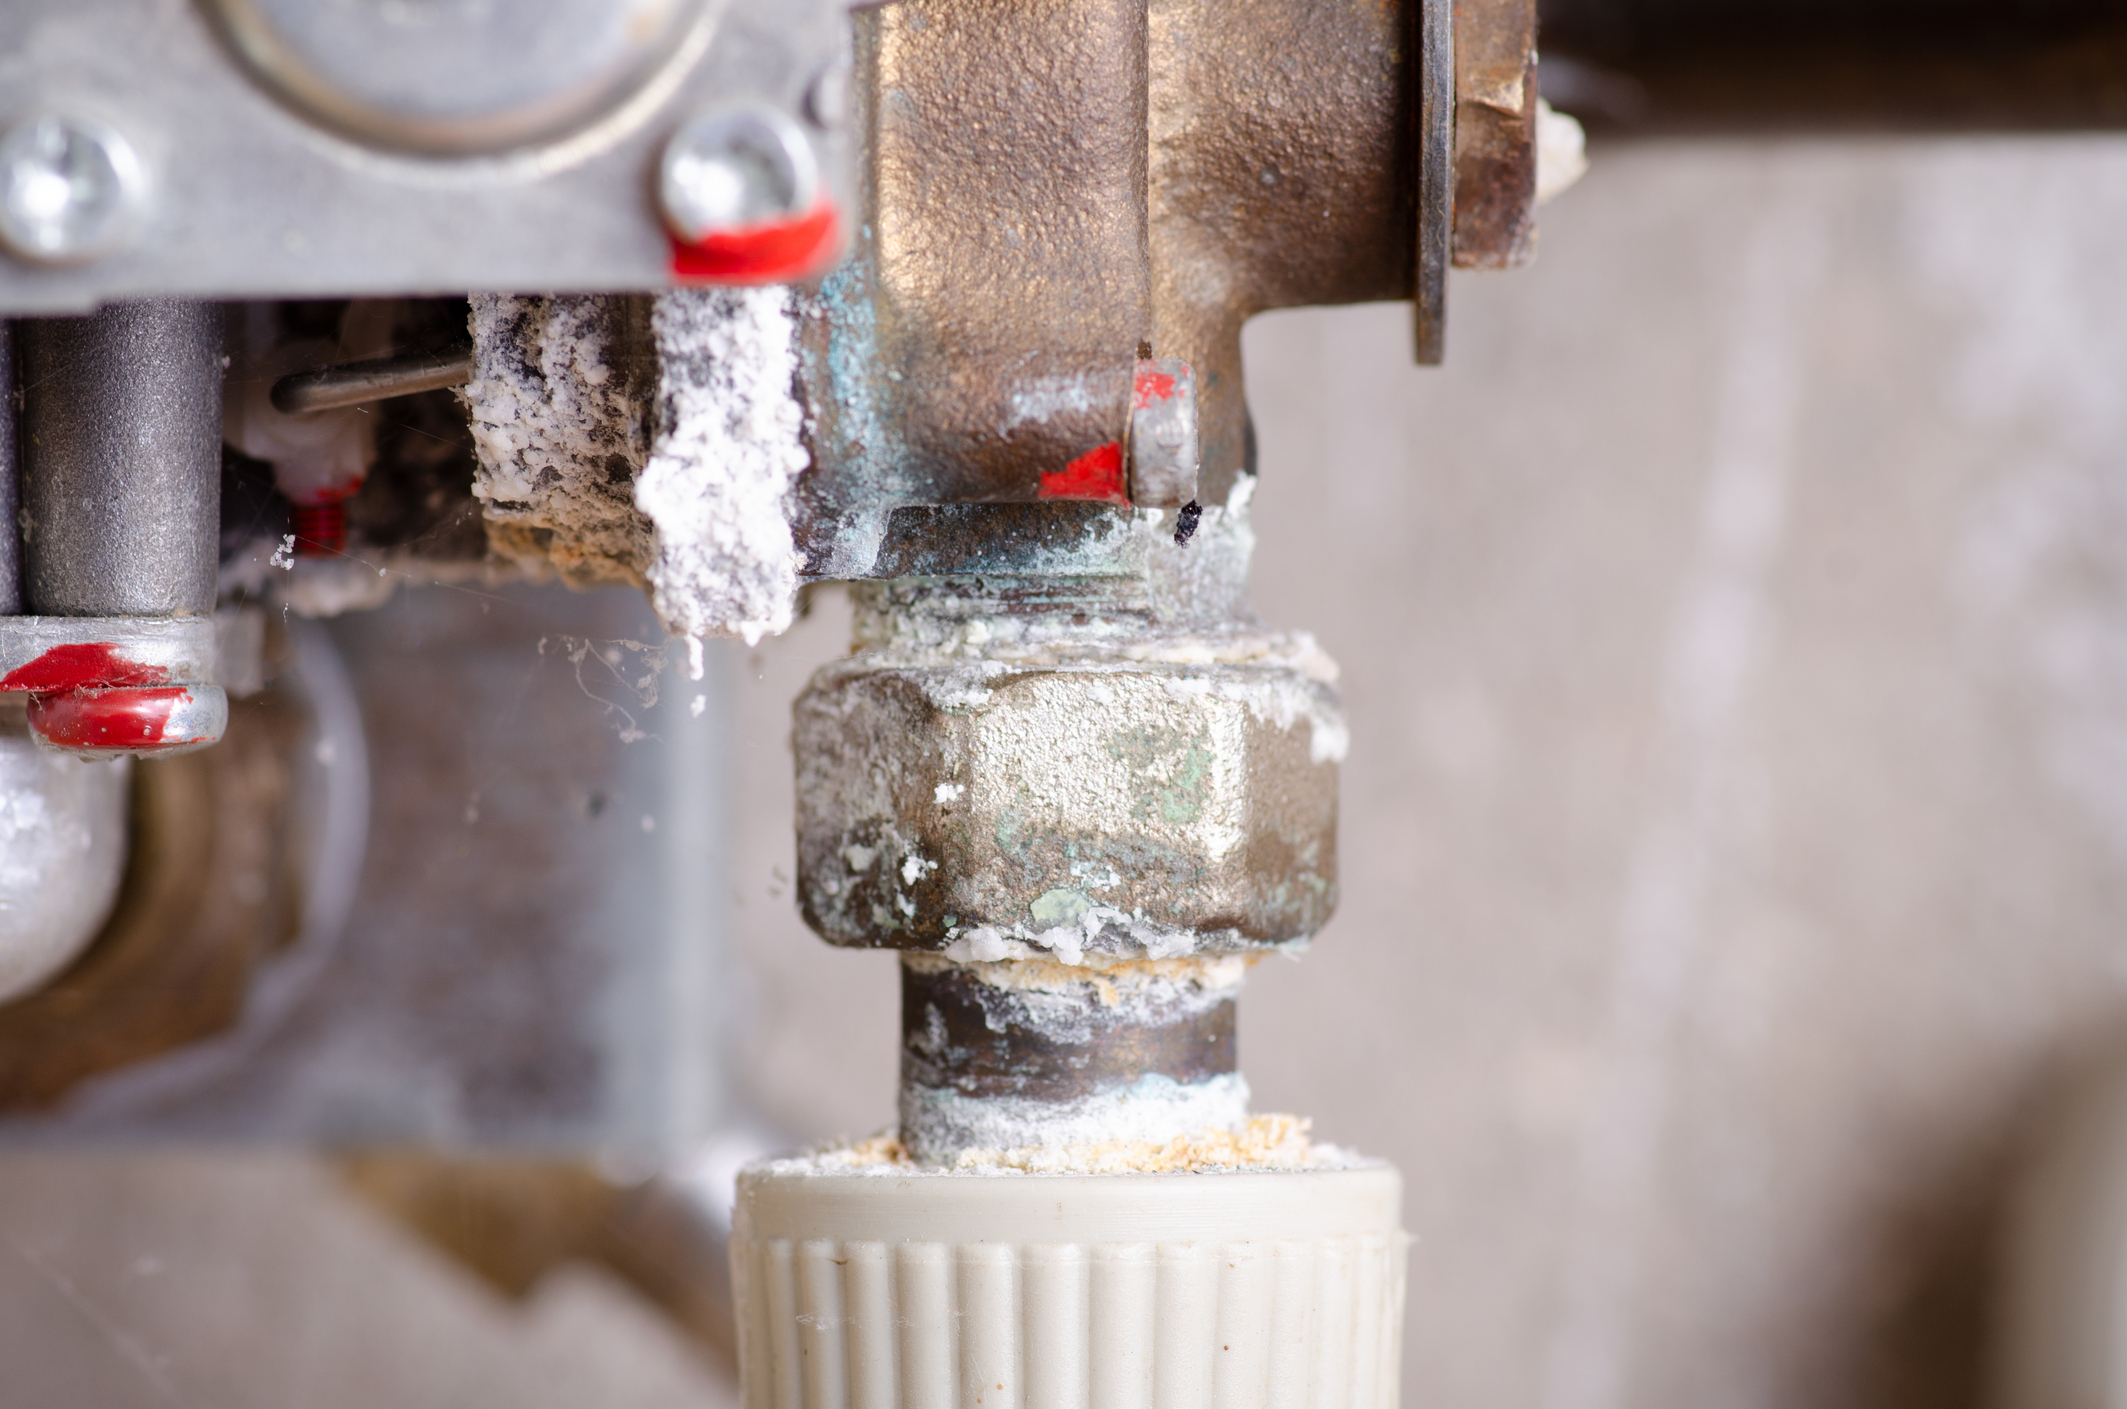
Gas leaks: The first sign of a faulty stove, fireplace or pipeline is the smell of gas that lasts for longer than normal. While it may not be poisonous, these things can quickly escalate into fires or explosions if not handled immediately. If your appliances are not being regularly maintained or checked, the metal will start to rust through and pipes will start to have a green discolouration.

Fires and explosions: Because of continued neglect or a sudden action, the gas can explode into flame really quickly. Once exposed to a sudden spark, the fire can spread throughout the building and cause great damage to your property and to the lives of your tenants.

Carbon Monoxide Poisoning: If your kitchen is not well-ventilated and your LPG gas burns incompletely, your tenants may report experiencing sleepiness and lethargy. Before they get sick and report your unit to authorities, it will be better to install a detector in the kitchen and have your appliances regularly checked instead.

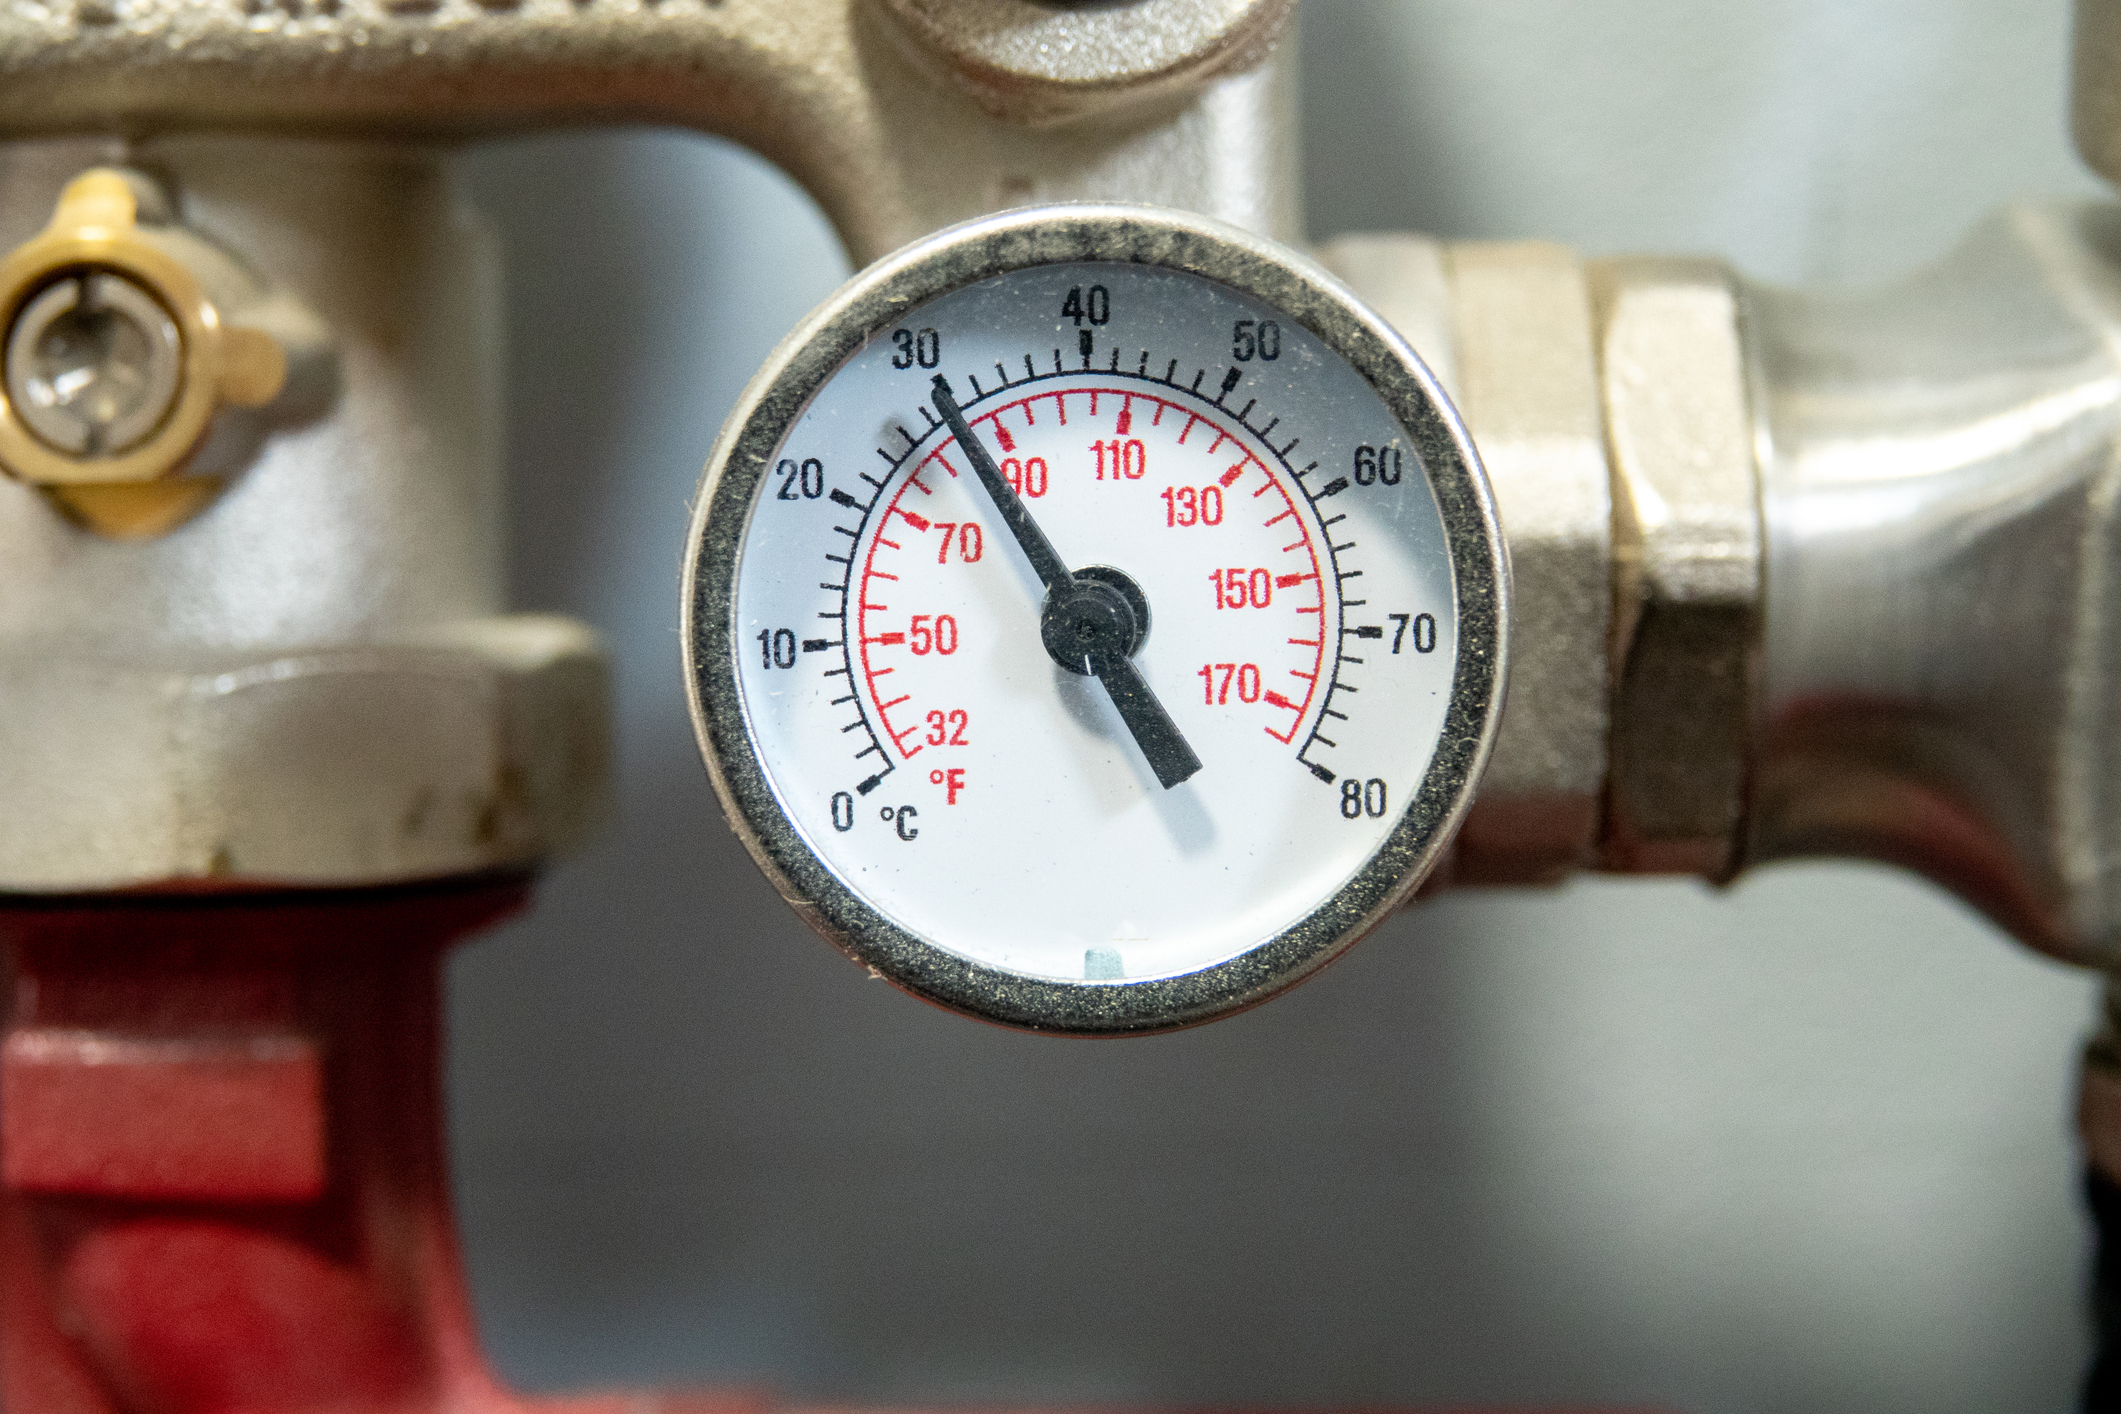
When a gas engineer arrives at your property, the inspection normally starts with checking the density of your appliances and verifying the standing and working gas pressure. Afterwards, the engineer also checks the manufacturer’s nameplate for a burner or gas pressure and assesses if your appliance is placed in a room with enough ventilation. A smoke flow test will also be conducted to ensure that there are no combustion products anywhere near your appliances. Once the safety devices are checked, engineers also look if the gas appliance has been misused in any way. 

Normally, if your gas appliance is damaged or dysfunctional, the engineer will carry out repairs. Because of this, you may incur additional charges before you can get your certificate. That said, we recommend properly cleaning and maintaining your gas appliances to avoid higher rates. If you notice potential damage, we also advise calling professionals immediately. With the previous risks that we explained, dealing with gas problems can be tricky and dangerous if handled with inexperienced hands.

Once you have your property checked, you will receive your compliance certificate within ten to fifteen working days. If you are due for a yearly maintenance check for your appliances, our Gas Safe registered engineers are available to provide gas and plumbings services throughout London. Simply contact us here and we can schedule our visit to your property immediately.

Boiler Maintenance Tips: What You Can Do Without Calling an Engineer

boiler breakdowns

Boilers are the heavy-duty heroes that keep our homes warm during the cold seasons. Prevent boiler breakdowns during the snap by staying on top of their problems. As a homeowner, landlord, or tenant, there are things you can do to help maintain your boiler. 

What is boiler maintenance?

Boiler maintenance is the work you do to ensure that it has no hiccups that could lead to a broken machine. It is a combination of inspection, cleaning, and small repair tricks to keep your boiler functioning and fuel-efficient. Since boilers vary from type and brand, read through and see what applies to the one you have in your home. Before we begin, we have to consider what work is safe for us to DIY versus what isn’t.

The line between you and a Gas Safe engineer

  While you can pick up tricks from the boiler maintenance work previously done on your boiler, it is essential to note that it is illegal to do gas work. You are not protected when boiler issues arise when you do it yourself. Warranties require regular boiler service from the professionals in the Gas Safe Register or the OFTEC else they become invalid. When you do the job yourself, you are accepting the risk that comes with misdiagnosing or aggravating the problem. When you spot a problem during your visual inspection or tricks don’t work, please call a Gas Safe engineer in your area. 

Who are Gas Safe and OFTEC? 

In case you are not aware, Gas Safe or the Gas Safe Register and OFTEC are the regulating bodies for gas and oil work respectively. They conduct tests and inspections to check the company and trade workers in the industry. They issue IDs to every engineer and plumber registered with them. You can run ID numbers through their website to confirm. Any complaints of work done or suspicion of illegal boiler maintenance work should be reported to them. 

To make a booking or to find out more about our services!

What happens when you do work meant for Gas Safe engineers?

When you do gas fittings or repairs without being a Gas Safe engineer, you are always in the position of ruining your boiler. Your boiler can last for 15 years or more with proper maintenance. Shoddy work leads to an expensive repair or replacement that could have been avoided. You could also miss vital signs of boiler failure, which ranges from a broken boiler, a gas leak, and possible fire, among other things.

How do you maintain a boiler?

Before problems occur, make it a habit to check on your boiler regularly. Keep the manual on hand and highlight important manufacturer notes. 

Personal Inspections

Keep your boiler well-ventilated, avoid cluttering the area with old clothes, coats, or other miscellaneous items. When living with other people, you may have to check every month–case they forget. 

All air vents and flues must be free of obstruction. They are the passageway of the air; any kind of blockage could affect your boiler performance. If you do not have a flue access panel, have one installed.

Check if your boiler flame is blue. If the fire is orange or red it is an indicator of improper combustion or build-up of dirt and debris which may lead to carbon monoxide (CO) leak. You may need to contact a British gas boiler service.

Inspect the water/boiler pressure. The proper range should be indicated in your manual. If you do not have a manual on hand, the ideal pressure is within the first two levels. If they are not on the correct level, you can adjust it. Turn on the taps on either side of the system to fill the loop, or consult your manual. It is safe to do this yourself.

Check your radiator, if you find that the top is hot, but the bottom is cold it is a sign of dirt building up inside. To fix this call an engineer for a power flush If the radiator is not hot at all, you may need a valve replacement.  

Last but not least, visually inspect your external pipe for any leak or dripping. One of Gas Safe’s testimony was of a family that did not spot the dripping of the boiler because a dresser blocked the water damage. Their broken boiler had been in bad shape for a while, regularly releasing CO. Keep an eye out for any leaks and contact an engineer to have these issues addressed.

Boiler Maintenance Tips

After your inspection, there are things you can do at home without calling an engineer: 

When you notice the nights are getting colder as winter approaches, lag your pipes. For conventional, condensing, and system boilers, check the pipes in your loft. They should all be insulated. If you find any gaps around the pipe, joint, or taps cover it with pipe lagging. You can find DIY lagging kits at the hardware store. Fit your tank with an insulated cover, if it does not have one yet. Frozen pipes are tricky to deal with and deal with losing central heating and hot water.

Electric boilers don’t have pilot lights, but if you have an older model, check them. If your pilot light is out and you cannot generate a spark when you release the spark generator button, you may need to replace the universal thermocouple. Find a spare and replace it by undoing the nuts holding it in place and remove it from its tube then replace. Not all work to bring back the pilot light can be done by yourself. Do not work with the jets and consult an engineer. 

When you live in areas with hard-water, reduce/ descale your system. Scale builds up inside the heat exchanger. Fit a self-dosing phosphate scale inhibitor on the supply pipe between the feed and expansion tank to the boiler. It comes with a cartridge that needs to be replaced annually.

  If your boiler doesn’t work, try troubleshooting it by turning it off and on a couple of times. If the switch is stuck, this is a short-term solution, and you may need to have the switch professionally replaced. Another reason for your boiler turning off is the system that kicks in when it overheats, which occurs when the pressure drops. You can add water in the system (as mentioned earlier) and reset. 

How often should a boiler be serviced?

A lot of things are going on inside the boiler. Boilers are serviced once a year, ideally. Since the state of your furnace varies, sometimes not a lot of work is necessary if it is new. You can apply the steps listed above to maintain it yourself. However, if you spot any problems or would rather have a professional do it, please contact your local boiler service. Prices vary so consult your homeowner’s cover and check if boiler services are included. Annual boiler services are also provided, for a fee you can be covered the entire year and have access to boiler maintenance and repair when needed.

There is a lot you can do to stay on top of boiler problems without calling an engineer. However, this means putting the time in and regularly consulting your manual. Even if you do everything right, you may come across issues that are beyond your capabilities. Stay vigilant and stay safe!  

Before the Boiler Breaks: When and Where Should I Get My Boiler Serviced

boiler breakdowns

In 2017, 18% of the UK faced winter with boiler breakdowns and had to dip into half of their savings to repair or replace their boilers. In 2019, 12% of homeowners prioritised renovations over boiler issues, and 24% of British citizens have never had their boilers serviced. The numbers may not be overwhelmingly high, but the fact that they are in the double digits and two years have passed without proper boiler knowledge is appalling.

Boilers are essential especially in countries where three out of the four seasons are unusually cold, especially in households who are temperature sensitive or have existing conditions that are aggravated by the cold. Before your boiler breaks, look into long term boiler maintenance. Anticipate the chill and avoid spending winters in houses with no centralised heating or hot water.

What is the average lifespan of a boiler?

While boilers are used almost on a day to day basis, we often neglect it. They are machines that are built to last, installed out of sight, and any hiccups seem to be only comprehended by an engineer. They aren’t like cars whose problems are easy to spot and experience. They aren’t like personal computers where we are taught to diagnose underlying issues. Without proper boiler service, the problems can accumulate and next thing you know it – you come home to a cold house in the middle of peak service season. The average lifespan of a boiler is 10-15 years. Top-rated boiler models are in the upper bracket of that range at 12-15 years. In homes with the top boiler brands and with regular service they can outlive the average at 20 years or more.

To make a booking or to find out more about our services!

How often should a boiler be serviced?

No matter what you consult, the answer is the same: annually. Your boiler should be inspected and serviced every year. As heavy-duty as boilers are, they are frequently used, and they become less efficient over time.  Boilers should be repaired before efficiency issues surface. The high fuel cost and the risk of carbon monoxide poisoning are two-pronged issues that can be avoided if they were taken care of early.

In the case of boilers with a warranty, how often should they be serviced?

If you have an active warranty with your boiler brand, it should be the same: annually. It is important to note that long-term warranties, the type that goes from 5-12 years, require a yearly boiler service to maintain validity. Without proper boiler maintenance, it is difficult to identify who is at fault. It protects you as well, so you can get a relatively worry-free replacement. When you purchase a new boiler, don’t forget to have the warranty registered within 30 days or it becomes invalid. Check the fine print!

What is done in a boiler service?

The hesitation in having boilers serviced probably stems from a lack of awareness of what is done when you ask for it. Your boiler service may vary depending on the brand and the manufacturer’s instructions, but generally, boiler service does seven things:

–       Check boiler controls

–       Check gas pressure and flow

–       Check safety devices

–       Check your boiler seals

–       Check the main internal components

–       Inspect the water and gas pipework

–       Inspect the flue and combustion releases

Carbon monoxide (CO) detectors are not required as a household feature in the UK, though they are highly encouraged. A possible source of CO emission comes from your boiler. Since they are colourless and odourless, it is not easy to detect. The Gas Safe engineers aim to identify corrosion and leaks, clean boiler parts when necessary.

Where should I have my boiler serviced?

Seek out a reputable company. Boiler service needs to come from engineers who are registered with the appropriate authorising body: Gas Safe Register (GSR) for gas boilers that deal with propane and LPG and the Oil Firing Technical Association (OFTEC) for oil-based furnaces. On top of working with a reputable company when the engineer comes, be sure to ask for their ID. When it comes to heating, you want to ensure that you have the professional you need. 

How much does it cost to service a boiler?

Similar to the purchase of your boiler, the service price may vary. Take note that the cost of the service and value of the materials/ fitting are separate and that these prices may inflate depending on your location. A conventional boiler may cost between £ 50-80, and high-efficiency boilers like the condensing and combi are between £80-160.

Can the cost be lower?

Yes! Boiler services may go down during the non-peak seasons, so late spring to the whole of summer. If you have availed of a service plan, boiler cover plan or have added your boiler to your homeowner’s insurance; these fees can come at a discounted price depending on your service provider.

You can also try to avail of the ECO’s initiative for affordable heating. You may be able to get a free boiler replacement or reduce the cost of repairing/replacing your boiler.

When should I have my boiler serviced?

As essential as it is for health and safety, consider your budget and try to set aside money to have it done during seasons when it is cheap. If you have a newly installed boiler, you can probably get away with holding on boiler service, but only when it is not financially feasible. When your boiler is five years older, and above, it becomes more urgent that you follow it up annually.

Is boiler maintenance worth it?

Boiler maintenance is worth it. It may seem like an unnecessary expense, but when it comes to public health and safety, you know what should be first. Besides keeping an eye out for potential issues, boiler service addresses problems as they come. By having steady efficiency, you can keep your heating bills low in the long-term. Yearly service means your warranty stays valid and breakdowns don’t have to eat up 50% of your savings to repair or replace. Call us for a quote!


My Shower Is Leaking, What Do I Do?!

Shower fix

A leaking shower head or shower faucet can induce a lot of emotions. That “drip, drip, drip” can make you feel annoyed, frustrated, and angry all at the same time. That sound can keep you up at night, costing you precious sleep. Worse, you can count those drops as literal money going down the drain.  

Moreover, leaks in your shower system could cost you more than just an expensive water bill, as leaks on the hot water side would also mean additional costs on your energy bill due to the power used up by your central heating system or water heater for producing hot water. 

Now, you wander onto this page, probably after searching for an easy shower fix, looking for ways to get rid of the leaks in your bathroom suite. And so, help you with your dilemma, we’ve come up with a guide that can help you get your shower in perfect order, quickly and easily!

Why Is My Shower Leaking?

Before I give you some DIY advice on how to fix your shower like, it would be best for you to have some idea on why shower leaks occur in the first place. 

A leaking shower head, for example, could be something as superficial as damage due to wear and tear or even mineral deposit accumulated over the years. However, in some instances, this could mean a much bigger problem behind your shower walls. The problem could also be in your shower valves, as a worn faucet washer, cartridge or diverter can allow water to leak through to the showerhead. 

What Happens When You Leave Shower Leaks Unchecked?

It is also important for you to realize just exactly why it is important for such leaks to be resolved. 

Generally, the area within shower enclosures is supposed to be less prone to water damage. However, when leaks within the area persist and continue to drip water onto your tiles, grout, etc., then it will cost more problems in the long run. Such problems are:

To make a booking or to find out more about our services!

Loose tiles 

Water will eventually penetrate the area behind your bathroom tiles. When this happens, the grout and adhesive behind each floor tile or wall tile will eventually lose its grip. This will result in loose and free falling tiles within your shower enclosure. While this in itself is easily repairable, broken tiles may cause injuries to you and your family.

Stains and Mould

Water stains can be very unsightly, especially on the walls, the flooring, and even your shower doors in your bathroom. Additionally, if your bathroom is on the second floor, such shower leaks may cause stains, or worse, mould on the ceiling below it. 

It is important to prevent such moulds from developing, as these could pose a lot of potential health risks for you and the people in your household. 

Metal Damage

Persistent water leaks may lead to the development of rust on metal. This could affect your shower arms, faucet handles, bath taps, and many more. This could also cause damage to the structural integrity of shower enclosures, which would obviously mean more damage in the long run. 

How To Fix A Shower Leak

Now that you’re familiar with the possible causes and consequences of a shower leak, you can begin attempting to fix the leaks in your shower yourself. This guide will be divided into two parts, the first on fixing a dripping showerhead, and the second, on fixing a dripping shower valve. 

For both parts, though, the first step you must take is shutting off your water supply. Doing so will not only help limit the mess that your project may cause but also make the job much easier for you. You may also want to clear out bathroom accessories and bathroom furniture to give you more room to move around and work. 

Pro Tip #1: While your water supply is already turned off, you may still encounter some water left in the pipes. Have a towel handy to clean off any excess water you may encounter. 

Fixing a Dripping Shower Head

  1. Remove or unscrew the showerhead from the shower wall or exposed shower pipe. This can usually be done with your hands, but if it is too tight for you to unscrew by hand, you may try using a wrench or pliers. 
  2. Inside the shower head, you will find the O-Ring or Rubber Washer. This piece of rubber is what contains water from dripping or leaking. If the O-Ring looks damaged or brittle, then you may want to replace it. 

Pro-tip #2: To make sure you get the same size replacement, you may want to take out the old o-ring before buying one to replace it. 

  1. Since you’ve already got the showerhead off, you may want to consider cleaning it as well. Take the opportunity to clear it of all kinds of debris. Be on the lookout for mineral deposit or sediments brought about by hard water. Such kinds of debris affect the pressure of the water released by the showerhead, and may very well cause leaks in your showerhead. 

To clean your shower head, bring water and three parts of white vinegar to a boil. Remove all loose parts attached to the showerhead and submerged the body in the solution for about 20-30 minutes. Scrub, wash and rinse.

  1. Whether you’ve replaced the O-Ring or kept the old one, the next thing you should do is wrap the threads at the tip of the pipe stem with tape. By sealing these, you will be preventing the threads from seizing. 
  2. Reattach the showerhead. Screw it back on by hand. Make sure you do not screw it on too tightly, or you might break the showerhead or the pipe. 
  3. Turn the water supply back on and turn on the shower. Let it run for a few seconds and then turn it off. After a few minutes, check for any leaks or drips. 

At this point, your showerhead should no longer be leaking. If the issue persists, you may want to check if the problem is with the shower valve. 

Fixing A Dripping Shower Valve

  1. Detach the shower valve or shower faucet handle using a screwdriver to have clear access to the internal components of your shower valve. Locate the shower stem. To do this, you may also have to remove metal plates called escutcheons. 
  2. Once you have access to the shower stem, make sure to locate all the washers within the component. Replace each of them regardless of their condition. Also, make sure to locate and replace the seat washer.
  3. Since you’ve already got the valve disassembled, you may want to clean it and its pipes as well. Use the same solution and method used for the showerhead.
  4. Reassemble and replace each component of the shower valve in reverse order. 
  5. Turn the water supply back on and turn on the shower. Let it run for a few seconds and then turn it off. After a few minutes, check for any leaks or drips. At this point, your showerhead should no longer be leaking. 

What Do I Do When My Shower Is Still Leaking?

If at this point you are still experiencing leaks in your shower, you may want to consider replacing your shower valve or calling on a professional plumber to figure out the problem and fix it for you. 

Meanwhile, if you are unsure about fixing the leaky shower yourself, you may also contact a local professional plumber to do it for you.

Pro Tip #3: If you’re calling a plumber, might as well ask them to check on your kitchen sink, water supply, bath taps, and drainage systems, among many others, as this will save you some time and some money on preventable plumbing repairs in the long run.

New Boiler, No Problem: Things You Should Consider Before Buying a New Replacement Boiler

boiler

The UK has warm summers and generally mild winters compared to most of continental Europe, but this does not mean people can get on without having a proper centralized heating system for their homes. A reliable boiler is necessary to ensure that you live a healthy, comfortable, and budget-friendly life. It is especially important for those who have existing health conditions such as circulatory and respiratory problems as well as other issues that come with age. 

Boilers generally have a pretty long lifespan, with proper models lasting up to 15 years from regular wear and tear and up to 20 for models that are regularly maintained. When you find your model on its last leg, it could be difficult to navigate the new models that have come out since the one you have. Here is everything you need to know before you purchase your new boiler

What Are The Different Types of Boilers? 

You can have your pick of the lot. There are a variety of brands, systems, and fuel sources that can be a lot to take in at first. Each one has its ups and downs, it is best to be informed about the basics so you can ask the right questions when it comes down to a quote for a new boiler. 

To make a booking or to find out more about our services!

Combination/ Combi Boiler

A combi boiler is a compact system that acts as the main central heating and the hot water unit. It is fairly straight-forward with no cold water or hot water storage or an expansion tank, this frees up a lot of space on the property without the tanks and the additional pipework.  It takes the water straight from the mains and is heated immediately ready for use. Having a combi as your new boiler can change the way you go about your day.

Pros of a Combi Boiler

-A perfect fit for small homes -Energy efficient -Hot water on-demand -Has strong water pressure since it comes straight from the mains -Cheaper installation fees are given the lack of pipework -No issues with frozen pipes in the winter

Cons of a Combi Boiler

-Can only handle one task ask at a time (so no hot showers with washing dishes)  -Decrease in water pressure when there is more than one person using the water. -With more moving parts, there is a greater chance of it needing repairs. -No backup immersion heater in case of a breakdown. -When issues arise, they must be addressed immediately or suffer from the lack of warmth.

Condensing Boiler

A condensing boiler is 25% more efficient than non-condensing models, which brings it up to 90-99% efficiency. It burns the fuel and makes use of waste gas produced by the heating process to pre-heat water. Majority of homes in the UK since 2005 have been using condensing boilers, with the only exception being in special cases. If you previously had a condensing boiler, buying a new upgrade could be the choice for you.

Pros of the Condensing Boiler

-It is highly rated by Seasonal Efficiency of Domestic Boilers in the UK (SEDBUK). -It is fuel-efficient. -It saves cost on fuel. -It has a small carbon footprint.

Cons of the Condensing Boiler

-They have a complex system therefore it is difficult to repair.  -Repairs and maintenance are more expensive than non-condensing boilers.

Conventional/ Regular/ Heat Only Boilers

The conventional boiler is often directly contrasted with the combi. It requires an expansion tank, a feed, and a cold water storage tank. The expansion tank and feed are often installed in lofts, and you have to actively heat the water in your storage tank with a switch then it is distributed throughout the house when needed. 

Pros of the Conventional Boiler

-It is best suited for a large home with active hot water usage. -Best for places with more than one bathroom. -Manages to hold its own in areas with low water pressure since it makes use of a tank. -It is compatible with alternative sources of energy such as solar panels.

Cons of the Conventional Boiler

-It is expensive to run in small homes, especially when you live alone. -It is not the most energy-efficient. -Heat is lost from the hot water cylinder, so temperatures may vary. -You have to be aware of how much hot water is available. -Long wait time after you finish what you have in your hot water tank.

System/ Closed Vent Boilers

A system boiler takes the best of both worlds from the combi and the conventional boilers.  It takes its water from the mains and the central and water heating is done in a single unit just like the combi. However, it also has a hot water storage tank build-in to the unit and is compatible with solar heating systems just like the conventional.

Pros of the System Boiler

– Does not take as much space as the conventional boilers. -Ideal for large homes, especially those with more than one bathroom. -Simple instalment with not many moving parts.  – It can hold its own in areas with low water pressure since there is a tank.

Cons of the System Boiler

-It is not the most budget-friendly instalment. -It is not the most efficient boiler on the market. -There is heat loss when stored in the hot water cylinder. -You have to be aware of how much hot water is in your tanks. -There is a waiting time after you consume all the hot water. 

What is your living situation?

Boilers can cater to a variety of needs. After you understand the basic types of boilers, it’s a matter of matching the new boiler to the home. Take note of the physical space, its members, and budget–both the short-term and the long-term.

Renters

When it comes to a rental, a new boiler is one of the things that have to be answered by the landlord. Before looking into a replacement, discuss the steps you will take together. If you are staying in the rental long-term, you can be a bit more vocal about what you think would best for space since you are occupying it. Generally, a combi or system boiler might be best-given space constraints. Most UK homes have been decreasing in size, and steps have to be taken to be more economical. There are new boilers on the market that can help rentals upgrade and perhaps increase living space.

Homeowners

When you own a home there is so much more freedom, you can select a boiler that best suits your needs and budget without having to compromise. There are two main things you have to pay attention to: the house and the home. When you own private property, you have the luxury of making use of that loft space for the expansion tank or properly store a new system boiler without much issue. For homes with more than one bathroom, multiple dependents (especially children and elderly), and with minimal technical know-how, the conventional boiler or the system boiler is ideal. Look into worcester-bosch, they are known for their system and conventional boilers. For homes who have strong environmental values, no pertinent health issues, and with members often on the go: a combi or condensing boiler could be the best fit. If you found yourself happy with the previous type you had, your new boiler can simply be an upgraded version, familiarity is key for long term maintenance.

What is your budget?

At the end of the day, finding a new replacement is a number-crunching game. A new boiler can range from 500-1,500 pounds depending on how straight forward the installation is. Will you be replacing your boiler with a new unit that is similar in the same place? Will you relocate your new boiler? Will you add extra tank, cylinders, or pipes? Will you switch from one boiler type to another? These questions all affect the price of your new boiler installation. Get a quote from your local boiler provider. 

Price Ranges

The average price age of boilers are range from £ 500-2,500. The lower ends of each boiler type ranges from £ 400-1,500 pounds with the conventional and combi boilers being the most affordable. The higher end of each boiler type on the other hand goes from £1,500-13,000 pounds with the conventional boiler still being the most affordable for top-range models. The combi boiler ranges from £ 610-1,500; the condensing boiler ranges from £500 to £1,700; the conventional boiler ranges from £1,500-2,500; and the system boiler ranges from £580-1,600. Top-rated conventional and system boilers can go well above the range. Take note that these prices are for the boilers alone, this does not include the installation fee. The more expensive models are from top brands, they are large in size, and they come with a long warranty (around 5 to 10 years). Cheaper models are for small homes and their warranties are significantly lower (around 2 to 5 years. 

Free Boiler/ Grants

There have been efforts to reduce carbon emissions and fuel poverty, in line with this, the Energy Company Obligation (ECO) has been formed. They provide grants for homes to be heated efficiently. There are free boiler replacements  as well as grants that can help accommodate your new boiler. You can apply by filling out a survey to see if you are eligible and talk to credit brokers about how you can avail. As of now, new boilers are limited to private homeowners only. 

Work With Reputable Companies

When looking for a proper quote for your new boiler, look for reputable companies that are authorized and regulated by the Gas Safety Register (GSR) and the Financial Conduct Authority (FCA) Some boilers work with propane and LGUs as fuel and in those cases it is important to be gas safe. The GSR regularly does inspections and keeps unauthorized gas workers to a bare minimum. Improper work can cause gas leaks and fires. All boiler companies have to be registered in England under the GSR so keep an eye out. Besides a GSR approval, look for businesses that work with the Financial Conduct Authority. The FCA’s main work is to ensure that they protect consumers and promote competition. Being an authorised installer of a prominent brand can also be a way of understanding the training done in the company. If you have your eye on a model like Worcester Borsch, look for authorised installers, they are old hat at working these machines. Besides these labels, ask around! Consult reviews and listen to word of mouth. Other people’s experience is a valuable resource in finding a replacement boiler.

You Have A Leaking Boiler? Here’s What You Should Do!

Leaking Boiler

A leaking boiler is no joke. In fact, it’s so serious, you can’t just choose to ignore it, because doing so would pose you and the rest of your household with some potential risks. Such leaks can lead to the rusting of your boiler’s external and internal component, or worse the short-circuiting of the electrical components inside your boiler. That is why it is crucial that you get the problem fixed as quickly as possible when you notice that your boiler has started to leak. It is, however, important to note that repairing a leaking boiler is not some DIY job, but instead one for gas safe registered engineers

The following tips are not for you to perform the repair job on your own, but rather some tips on how to determine the presence of a boiler leak, what you should do in the event of one, and the risks of ignoring a leaking boiler. 

Signs of Boiler Leakages

For you to know that your boiler is leaking, you should be on the lookout for the following signs. 

To make a booking or to find out more about our services!

Water and water damage

To put it simply, it is not a good sign when your boiler is leaking water. Water is the telltale sign of a leaking boiler system. If you notice water dripping or a pool of leak water or moisture around and underneath your boiler, then your boiler probably is leaking.

Additionally, if there is water damage anywhere around your boiler, you’ve probably got a boiler leak longer than you realize. 

Slow heating process

A boiler working in perfect order would power up the heat on your tap or central heating systems almost instantly. If this is not the case, then your boiler may be damaged or leaking.

Low water pressure

This one is exceptionally easy to spot on combi boilers and system boilers that have a pressure gauge. Boiler pressure dropping is another sign that something is wrong with your boiler system. In cases like these, you may want to start trying to locate the leak, but again, do not attempt to repair the boiler yourself. Just knowing where the leak is can help your engineer diagnose and repair your boiler.

Common Causes of a Boiler Leak

While trying to stop the leak yourself is not advisable, it would be smart of you to know what exactly caused it. Here are some of the usual causes of a leak in your boiler:

System Damage/Corrosion

The most common cause of a boiler leak is damage in the pipework and overall system. Over time, the combination of the water and the metallic debris within the system will naturally corrode your pipes and your boiler’s components, eventually making gaps that are big enough for water to escape. 

If the corrosion is isolated in one part of your boiler system, then a gas safe engineer would be able to replace the component without any issues. However, if the damage is extensive, then you may have to replace your boiler. 

Pressure Issues

While low water and boiler pressure is also a sign of a leaking boiler, too much boiler pressure can also be a culprit to the leak. If your boiler is leaking from the boiler pressure valve, then it’s best to check if your boiler pressure is too high. To determine, simply check the pressure gauge and make sure that it is in the green or safe zone. If it is, then you may use the pressure relief valve to ease some of the pressure on your boiler, thus preventing further damage to your home and your appliances.

Although bleeding your boiler ideally is something you can do on your own, limescale and other obstructions in your system are often involved. That is why, to be cautious, this is something that you may want to pass on to a gas safe registered engineer.

Temperature Probe Problems

If the leak is coming from your boiler’s temperature valve, then there is a probable issue in the temperature probe. For such problems, you may refer to a gas safe engineer. 

Internal Seal Damage

A boiler’s whole system is sealed, that’s how it works. However, the wear and tear eventually cause the rubber seals inside your boiler to harden or even break. While this is usually more common in old boilers, it can also happen to new boilers that have been running overpressure. This, in turn, can cause water to leak out of your boiler. To find out if this is the case, you may open the boiler cover and take a peek at the inside of your boiler. However, you must remember not to touch anything. 

Damaged Heat Exchanger

Unfortunately, this is not something you can identify for yourself. Additionally, most of the time, when your boiler has issues with the heat exchanger, it is almost often beyond economical repair. The heat exchanger is the most expensive part of a boiler, and trying to salvage your boiler by getting this fixed would probably just be a pinch cheaper than getting a new boiler altogether. 

If a gas engineer diagnoses your boiler with heat exchanger damage, you may want to start getting a quote online for a boiler replacement. 

Installation Faults

If your boiler is leaking at the pipe fittings, then chances are there has been an installation fault. If this is the case, you will want to call for a gas engineer to look over your entire boiler system to make sure there are no loose joints, poorly sealed pipe fittings, etc. 

Is A Leaking Boiler Dangerous?

If left unchecked, yes. It could cause electrical components to short circuit. This, in turn, could affect the power supply in your entire home. Additionally, it can be a health hazard if there is extensive water damage caused by a boiler leak. Water damage in your home can cause the growth of mould and fungi, which both have dangerous effects on one’s health. When exposed to moulds and fungi, one could experience a blocked nose, coughing, sneezing, difficulty breathing, and asthma. It may also cause structural damage, which will pose many physical risks to anyone in your home.

How Do I Prevent Potential Boiler Leaks In The Future?

Boiler leaks occur, and there’s no preventing that. However, to minimize the chances of it ever happening in your home, you may want to consider the following:

  • Look into buying big name boiler brands.
  • Get your boiler periodically checked. Once or twice a year should do the trick.
  • If you need your boiler serviced by gas safe registered engineers 

What If My Boiler Is Not Leaking Water, But Gas?

If this is the case, then you must know that this poses a much bigger risk than just water leaks. Unfortunately, for such cases, you almost always can’t tell if it’s happening. This is because natural gas is odourless, despite gas manufacturers usually adding in some chemicals for gas to give off the faint smell of sulfur or rotten eggs. However, you don’t have to worry, as there are other ways to tell if there is a gas leak in your home

If you suspect your boiler has a gas leak, make sure to switch off your gas supply, open all your doors and windows, vacate the premises, and call the National Grid Gas hotline at 0800 111 999. Make sure all electronics are turned off and that there are no naked flames in your property’s immediate vicinity.

Final Thoughts

While we have already stressed it enough, do not attempt to replace or repair your boiler on your own. Yes, DIY-ing this would save you a few hundred bucks, but what good would that be when there’s a much bigger risk of you aggravating the problem instead of providing a solution? Gas safe engineers exist for a reason, so leave it to the professionals to get it done!

The DIY Guide On Pressurising A Boiler

repressurise boiler

It might take a while getting used to not having hot water available in your piping system, but it entirely becomes a pain when winter comes, and you’re left with only cold water to deal with. This may lead to chattering teeth after a good shower and general discomfort among the members of the household. So, you check for a problem and realise that your boiler pressure has been going down. I imagine the first thing you did before anything else is google “repressurise boiler,” and that’s what has brought you here today. So here’s our little gift for you, a short how-to on how to get that pressure working back to its best form. 

Checking the boiler if the water pressure is low

To assess if pressure really is the problem, start by checking the gauge for water pressure in the boiler’s facade. To make sure that you are looking at the right gauge (because different makes and models tend to display this differently), check the user instructions provided when you bought the boiler. 

A digital gauge will either show only 1 bar (reading here is quantised as bars) or an alarming sign such as a flashing reading or a pressure warning. Hydraulic gauges, on the other hand, show only red sections or zones both on the left and right side of the display dial. An indicator needle lying on the far right red zone indicates that the water pressure is high, while if the needle is on the far left red zone, it means that the water pressure is low. 

How to find out your boiler’s correct water pressure

The best possible pressure to reflect on your gauge would be something between 1 and 2 bars. For reference, a cold radiator will show only 1 bar. If the pressure reads 2.75 bars or higher, it is indicative of dangerously high pressure, and anything lower than 1 bar is considered low pressure. It’s quite dangerous to have your boiler keep such a high pressure as this may be signs that the boiler’s pressure release system is broken or there’s too much water in the heating system. For such cases, always consult professionals so as not to endanger your entire household.

To make a booking or to find out more about our services!

A few instances that may be the cause of your low water pressure

There are only two common mishaps that occur in your boiler for it to have low pressure:

You just conducted radiator bleeding – For case 1, it usually occurs after water from the central heating system is let go. By bleeding radiators, you release water from your central heating system. Sometimes, this could cause low boiler pressure. Fortunately, this could be easily remedied by when you repressurise the system. 

Your heating system has a leak – For case 2, there might be a hard-to-find leak somewhere in your central heating system that’s the cause of boilers losing pressure. If you check the pipes, the boiler, or the radiator, you may notice damp spots around. These are usually small hence the slow drop in pressure on your boiler, as you may have noticed. 

Also, please do not attempt to check for a leak inside the boiler – it’s too dangerous. Please leave the job to a Gas Safe registered plumber or heating engineer instead. If you may have found any leaks, do not hesitate to contact an engineer to have it fixed to save you time and money. 

A Step-by-step guide on repressurising a boiler

There are two ways to increase the pressure on your boiler, depending on its the make and model. So make sure to check your boiler’s user manual before proceeding. You may opt to search for yours online if you seem to have misplaced your copy. You may also opt for something visual; manufacturers usually put up videos of a DIY fix that can be found through a quick google search.

FIX 1: To repressurise your boiler with a filling loop

  1. Switch off the boiler and leave it to cool.
  2. When cool to the touch, check on the filling loop or filling hose to see if both ends of it are correctly connected to the boiler.
  3. Open the two valves on your boiler and wait to have cold water from your mains fill it.
  4. Leave the valves open for a while. When the pressure hits 1.5 bars, close both valves subsequently.
  5. Try powering on your boiler again. In some cases, electric boilers have reset buttons so you may also opt for that.
  6. Check the pressure gauges to see if you have successfully topped up the pressure. Watch the pressure rise. 
  7. Once the pressure on your boiler has reached the optimum level, take out the filling loop or filling hose from the system and make sure the water caught in it doesn’t spill.
  8. Dry out the filling loop and store is a safe place until needed again.

FIX 2: To repressurise your boiler with a repressure key

  1. Switch off the boiler and leave it to cool.
  2. Underneath the boiler, look for a concealed tray that houses the key and its slot.
  3. Insert the key and make sure it lines up on the unlock position or the “open padlock” engraving on the slot.
  4. Give it a push and turn it to the locked position or the  “closed padlock” engraving.
  5. Make water flow into the boiler by turning the white square nut in a clockwise direction. 
  6. Let the water in until it reaches a pressure of 1.5 bars. After this turn, the nut in a clockwise direction again to stop the water from coming in. 
  7. Push and turn the key back to the unlock position or “open padlock” engraving. Some water may fall off the boiler; it’s normal.
  8. Power on the boiler again. Again, check the pressure gauges to see if you have topped up the pressure. If the pressure reads an ideal level, then your boiler is up to the task of once again heating your home!

How many times should I repressurise my boiler?

You may conduct this every time you find the pressure is low. However, repressurising the boiler should only be done once a week at the maximum. If you seem to be conducting this too often or too regularly, might as well outsource for help as water damage, as well as further damage to your boiler, are both bigger problems to resolve.

To avoid this from happening, do consider having annual boiler checks just to see if your boiler is in tiptop shape! If you doubt you could do all this by yourself, it would always be best to have a Gas Safe engineer do this for you instead. After all, boiler repairs cost less than having to purchase a new one and pay for boiler installation services when you cause irreparable damage to your boiler. So, don’t hesitate to call a professional today!

Tips to Help You Fix a Leaking Radiator

Leaking Boiler

From the pre-historic hearths and Korean Ondol to the Franklin Stove and British steam heating systems, indoor heating has been a prominent feature in different countries. For as long as autumn and winter left people yearning for warmth, heaters were a necessity. When Stephen Gold, Franz Sans Galli, and other manufacturers invented their own models of the radiator, it would be a mainstay in houses for the longest time. Today, these contraptions come in different designs and models but with one commonality. 

All radiators have a copper pipe that is bent back and forth until it forms a metal circuit along the side of your house. Through convection, hot water will move through these pipes and provide warmth. There are three ways radiators can do that:

To make a booking or to find out more about our services!

Dual Fuel Radiators

As the name suggests, this radiator has the option to connect to either the central heating or the main electricity. When the power starts, the heated towel rail can either heat up with the rest of your radiator system or operate on its own via electricity.

Electric Radiators

These types of radiators are deemed energy-efficient as it does not need gas to operate. They have a container filled with thermo-fluid that heats up once the machine is plugged to the nearest power outlet.

Central Heating Radiators

The most common out of the three, central heating radiators are connected to a boiler that heats up the water.

From these, there are different types the market offers:

K1 Radiators

Also called single panel radiators or Type 11, these are the most basic and most affordable out of the four. This feature only has one panel mounted onto the wall and works best in medium or small rooms.

P+ Radiators

K1’s counterpart, this has double panels that are stacked on top of each other with the convector in between. Once they are mounted onto the wall, they are noticeably thicker than the previous radiator. This offers better heating, perfect for rooms on the corners of your house. Being a newer model, they are also called Type 21. 

K2 Radiators

As an upgrade to P+, K2 or Type 22 radiators not only have two panels but also two convectors between them. Because of the added power, this can warm up a large room without needing to be larger in size.

K3 Radiators

These radiators are more heavy-duty, having three panels and three convectors. Perfect for rooms with more space, its panels are more spread out to provide even heating.

Once you have chosen the design that works best with your home and has it set up, maintaining its quality can save you a lot of money. Because radiators have hot water passing through its pipes, leaks are common problems households have had to face for many years. 

A leaking radiator can cause multiple problems. While a leak itself is not dangerous, getting too close to a radiator with hot water spewing from it can cause burns on our skin. If your radiator is leaking and the water seeps into your carpet or the flooring and is left unattended, this can lead to expensive water damage. 

Stay cost and energy-efficient by keeping your radiator clean and leak-free. Simply follow these steps:

Identify where the leak is coming from

Before going anywhere near your radiator, it’s best to place towels around it and prepare a bucket beside you. Having water pour all over the room might be the worst-case scenario but it’s important to prepare for anything that could happen. Another precautionary measure is to wear protective gear around your hands and arms.

When you have all of that in place, get an old towel and pat your radiator and its panels completely dry. Afterwards, get some toilet paper and find the leak by placing it on different parts of the machine. They will come from either of the three: the body of the radiator, the controls (e.g. the bleed point and thermostatic valve), or the pipes that connect the boiler and the radiator.

Repair what can be salvaged and replace what cannot

One of the easiest parts to repair on a leaking radiator is the radiator dashboard. First, take a look at the bleed point. This is meant to release air that has settled inside the radiator. If you find that there is a leaking radiator valve or the bleed valve is moist, try to turn it clockwise. If the screw tightens, that means the valve loosened. 

If the bleed valve isn’t tightening, the cause of the radiator leak is probably at the thermostatic valve. This integral part of the heating system dictates the temperature of the room by controlling how much water will enter the radiator. It slows the water down, stops it, and allows it to flow again when the radiator cools. If you find it leaking, this is most likely caused by the wax inside the knob. When this object expands or contracts according to the temperature, it acts as a sign for more water to flow through. In time, it may wear out and cause leaks when it is partly open. Notice if the leak stops once you fully close the valve.

Since repairing the thermostatic valve needs some expertise, we don’t recommend doing this without prior knowledge and experience. However, if you know your tools, you may try to take your dashboard apart.

First, drain the leaking valve. Next, close the supply and lock valve, noting how many turns it takes. After you undo the union nut and open the bleed valve, make sure to catch all the water that escapes. Take some PTFE tape and wrap it around the valve tip. Afterwards, you can assemble everything back, wait for your radiator to refill, and check if the leak is still there.

If the leak is coming from the body of the radiator, then placing a sealant on it can act as a temporary solution. These holes are caused by black sludge collecting inside that will later create patches of rust. As these parts are irreparable, it is best to seal the hole until a plumbing engineer sees to it.

A leaky radiator is an issue that you do not want to get stuck with. It is also expensive to buy a new radiator, costing you up to thousands of pounds. Before this happens, give us a call so that we can provide maintenance service like draining the insides of your radiator. Not only will this increase the longevity of your machine but also keep it from draining your wallet of money.

4 Common Toilet Problems You Can DIY

toilet problems

“Start with the bathroom.” 

One of the tips seasoned home buyers would often share with the beginners is to check the kitchen and the bathroom. Several factors that add or subtract to a real estate’s appeal are whether or not the craftsmanship is up-to-date, the faucets are running, and the walls are mould-free.

When taking care of your home, these two areas also need special attention, especially when the plumbing needs work. While pipework and other complex systems need professionals to take care of the problem, toilet repair is a skill that homeowners need to learn. Some toilet problems are quite easy to fix! Calling plumbers for a minor issue like a broken faucet or faulty valve can cost you a lot of money, which is why you need to make sure that you know how to repair small problems. If you’re attempting to fix your toilet, here are three things you need to do before fixing a toilet.

Before tackling the remedies, it’s crucial to find out how a toilet works. That way, you can quickly identify when your toilet is acting out of ordinary. 

To make a booking or to find out more about our services!
Take a tour of your bathroom and lift the lid to check inside the tank. The tank holds large amounts of water for when you flush the toilet. Two parts make this whole contraption possible: the flush valve and the refill valve. As their names suggest, these valves help flush the water into the bowl and refill the tank with new water, respectively. The refill valves have four different variations:

Refill Valves

Float cup fill valve

  • a modern design that is usually made out of plastic

Floatless fill valve

  • a modern design that cannot be installed in older water tanks

Diaphragm-type ballcock

  • an older style that used to be made of brass but has plastic counterparts

Plunger-type ballcock

  • the oldest type that is typically made of brass
When people flush toilets, the handle or button pulls a lever that lifts the ballcock or refill valve. The lever allows the stored water in the tank to flow through the flush valve and out into the toilet bowl. Because the water comes in large volumes, it pushes the wastewater into the home drainage system and, eventually, the sewer lines. Once the tank is emptied, whatever the model may be, the refill valve opens the water supply valve. As the tank fills up, either a floating ball or cup rises with the water level. Floatless fill valves, however, shut off the water supply automatically when the water pressure reaches a certain level. Even if the names are hard to remember, watching the whole system work from your water tank helps. Now, let us use this knowledge when tackling common toilet scenarios that you may encounter. Don’t worry; these are easy to remedy: This first step is extremely vital to the success of your DIY repair. By making sure the water supply is turned off, you are preventing any kind of further damage that may be caused by the leaking water. Aside from the damage, this can cause to your walls, ceiling, and carpet, you could also end up paying for the removal of damaged furniture together with the cost of replacing it. Additionally, turning off the water supply will also help prevent you from making too much of a mess during the repair.

The Toilet Won’t Flush/Handle Is Broken

One of the most straightforward fixes to make is a broken toilet handle. Test the handle once or twice and check if the lever lifts quickly or not. As this can be a sign that your handle may be too tight or loose, you can adjust the nut counterclockwise to tighten it or clockwise to loosen. Sometimes, the lever might have gotten disconnected from the handle. In this case, simply reconnect the lever.

The Toilet Won’t Stop Flushing Water

Commonly called “phantom flushes” by plumbers, you will know this is happening in your toilet tank refills water on its own without prompting. Once you see that water is trickling into your bowl, this means that the flapper or toilet flusher covering your flush valve is faulty. To remedy this, drain the toilet tank of its water and check the flapper. If it’s damaged, make sure to replace it with a new one. You’ll immediately see the results with your month’s water bill

The Toilet Tank Won’t Stop Refilling

In cases where the flapper valve is working well, and you hear long hissing sounds coming from the tank, it’s time to check the refill valve. Because this hissing sound is usually caused by water coming into your toilet tank through the supply valve, letting this issue prolong may cause overflowing and other messier problems for your household, even a flood. Removing the lid of the tank, check these three things: the float, the refill tube, and the ballcock. Check first if the float is stuck to the side of the tank. After that, make sure that the refill tube is only extending about 1/4″ below the overflow tube. These two tubes work together to supply the tank’s water and keep the toilet tank from overflowing. Finally, check if the ballcock automatically shuts off the water after flushing the toilet. Once you find the cause of the problem, make sure to adjust or replace any of the items. You may also choose to bend the arm that holds the float down to shut off the water supply. This “fine-tunes” your float ball to shut off the water at a specific level.

The Toilet Is Clogged/Toilet Not Flushing

One of the homeowners’ worst nightmares, clogs are the most common toilet dilemma. Purchasing a force-cup plunger is a better investment than the standard ones most houses have. Insert the bulb down the drain and pump the lodged object through. Without pulling the bulb out, inspect whether the drain is clear. If the toilet remains clogged after a few repetitions, use a closet auger. Make sure not to scratch the sides of the bowl as you twist and push the rotor downward. Even the best toilets encounter these problems. By learning how to DIY these solutions and repairing your toilet, you will not only save yourself money, but you will also learn new household tricks. If these toilet issues continue, however, you may want to call for a professional to help you out. You can check here for the qualities you must look out for in an emergency plumber. You may either find a one via community listings, ask for a recommendation from your neighbour, or give us a call, and we will be on our way.

SIX SIMPLE STEPS TO DRAIN YOUR CENTRAL HEATING SYSTEM RADIATOR

radiator_plumber

When owning a central heating system, one must also understand that cleaning the machine is vital for it to last long. To save money, you don’t have to hire a plumber or get a radiator draining tray kit, here are some DIY tips on how to drain radiator fluids without having to drain the whole system!

Now, to ensure that your radiators continuously work effectively, we offer you six easy steps to drain your heating system:

Gentle reminders!

  • Before completely draining your central heating system, always make sure that you switch the system of the boiler off and wait until the pipes heading to the radiator cools down entirely.
  • Let your radiator cool before draining it for restoration or replacement.
  • For a combi-boiler, turn it off and exhaust the fluids once it is cool enough. But if you have a conventional heating system, isolate the water first then access the header tank before turning off the boiler.
To make a booking or to find out more about our services!

STEP ONE: LOCATE THE RADIATOR, THEN DRAIN

What you need: (2) folded towels and (2) buckets or basin

  • Look for the pipes on either end of the radiator—The end with the regulator collects the hot water from the boiler, while the other end with the lockshield valve, transmits it back again.
  • Position the folded towels under the regulator and lockshield controllers. To catch the excretion from the loosened pipes, set two buckets on top of each towel.
  • For the radiator sludge collected, we advise you not dispose of it anywhere near your garden or flower bed as the chemicals from the inhibitor may kill your plants.

STEP TWO: SEPARATE RADIATOR AND HEATING SYSTEM

What you need: Pliers or adjustable spanner

  • The radiator and the heating system must be separated by closing the two valves.
  • For the regulator, rotate it in a clockwise direction.
  • For the lockshield, remove the small-cap to access the valve itself and set it in a container for safe-keeping. Then use the pliers to tighten and close the lockshield by going clockwise.

STEP THREE: OPEN THE BLEED VALVES

What you need: An instrument that will open the bleed valves

  • Check the set spanner to make sure the faces are all square. Don’t use an adjustable spanner for it may glide and impair the radiator or even injure your hands.
  • The wrench or spanner must fit both union nuts tightly. Check if there are points where your grip might collide with something if the spanner slips. Use a tool that will open the radiator bleed valve in two turns.

STEP FOUR: UNDO THE UNION NUTS

What you need: bucket or basin from before and absorbent cloth

  • Undo and loosen the union nut on the regulator side.
  • Check if the bucket or basin is still situated in its place under the union nut, and have someone on standby with an absorbent towel.
  • Fit the spanner onto the union nut on the regulator side of the radiator and let someone steady the pipe for you. At the same time, twist the nut carefully counter-clockwise a quarter turn until the water pours into the bucket or basin.
  • Don’t pressure yourself by speeding the process of draining the radiator; let it be.
  • Tighten the union before it gets full and remove the fluids before you continue. If the water flows unwillingly, open the radiator bleed valve slightly to give the partial vacuum a gap.
  • Let the fluid flow until your radiator is empty.

This is usually where most how-to guides end. However, after you bleed your radiators following these steps, chances are there will still be some fluids left over from the process. To completely rid your radiator of sludge, you may want to consider the following steps:

STEP FIVE: ENTIRELY REMOVE COUPLINGS FROM THE UNIONS

What you need: Adhesive tape

  • Unbolt the nuts from the radiator on the side of the regulator then gently extract the supply pipe a bit far.
  • Conceal the pipe thread with adhesive tape to secure it from any collisions.
  • Remove the nut carefully on the lockshield side of the radiator. Beware of any excess fluids coming out.
  • Cautiously put the drain pipe away and shield the pipe thread the same way you did the regulator end.

STEP SIX: DISLODGE THE RADIATOR AND EXHAUST THE REMAINING WATER 

What you need: bucket or basin 

  • Simultaneously, shield the holes where you removed the pipes with one hand and use the other to drag the radiator upwards away from the wall bracket.
  • Drain the last of the radiator water into the bucket or basin. Once finished, you may close the bleed valves and start reassembling your central heating radiator.

To get you fully prepared for this DIY task, check out this basic DIY video below:

While bleeding your radiators seem like an easy task you can totally do yourself after reading a couple of DIY tips, it is still best that you hire a professional to do the job for you. It does not only assure you that your radiator and pipe fittings remain safe and in one piece, but also ensures your safety and the safety of everyone else in your household.