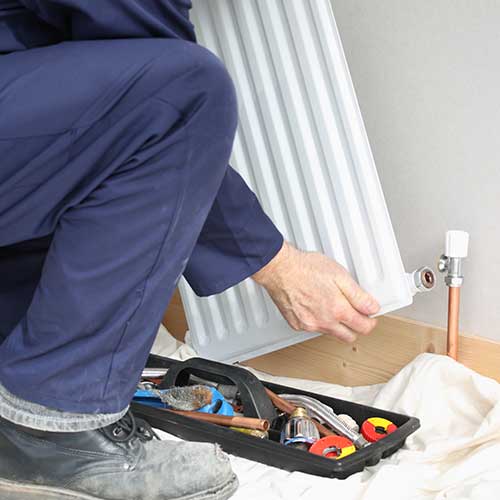
When owning a central heating system, one must also understand that cleaning the machine is vital for it to last long. To save money, you don’t have to hire a plumber or get a radiator draining tray kit, here are some DIY tips on how to drain radiator fluids without having to drain the whole system!
Now, to ensure that your radiators continuously work effectively, we offer you six easy steps to drain your heating system:
Gentle reminders!
- Before completely draining your central heating system, always make sure that you switch the system of the boiler off and wait until the pipes heading to the radiator cools down entirely.
- Let your radiator cool before draining it for restoration or replacement.
- For a combi-boiler, turn it off and exhaust the fluids once it is cool enough. But if you have a conventional heating system, isolate the water first then access the header tank before turning off the boiler.
STEP ONE: LOCATE THE RADIATOR, THEN DRAIN
What you need: (2) folded towels and (2) buckets or basin
- Look for the pipes on either end of the radiator—The end with the regulator collects the hot water from the boiler, while the other end with the lockshield valve, transmits it back again.
- Position the folded towels under the regulator and lockshield controllers. To catch the excretion from the loosened pipes, set two buckets on top of each towel.
- For the radiator sludge collected, we advise you not dispose of it anywhere near your garden or flower bed as the chemicals from the inhibitor may kill your plants.
STEP TWO: SEPARATE RADIATOR AND HEATING SYSTEM
What you need: Pliers or adjustable spanner
- The radiator and the heating system must be separated by closing the two valves.
- For the regulator, rotate it in a clockwise direction.
- For the lockshield, remove the small-cap to access the valve itself and set it in a container for safe-keeping. Then use the pliers to tighten and close the lockshield by going clockwise.
STEP THREE: OPEN THE BLEED VALVES
What you need: An instrument that will open the bleed valves
- Check the set spanner to make sure the faces are all square. Don’t use an adjustable spanner for it may glide and impair the radiator or even injure your hands.
- The wrench or spanner must fit both union nuts tightly. Check if there are points where your grip might collide with something if the spanner slips. Use a tool that will open the radiator bleed valve in two turns.
STEP FOUR: UNDO THE UNION NUTS
What you need: bucket or basin from before and absorbent cloth
- Undo and loosen the union nut on the regulator side.
- Check if the bucket or basin is still situated in its place under the union nut, and have someone on standby with an absorbent towel.
- Fit the spanner onto the union nut on the regulator side of the radiator and let someone steady the pipe for you. At the same time, twist the nut carefully counter-clockwise a quarter turn until the water pours into the bucket or basin.
- Don’t pressure yourself by speeding the process of draining the radiator; let it be.
- Tighten the union before it gets full and remove the fluids before you continue. If the water flows unwillingly, open the radiator bleed valve slightly to give the partial vacuum a gap.
- Let the fluid flow until your radiator is empty.
This is usually where most how-to guides end. However, after you bleed your radiators following these steps, chances are there will still be some fluids left over from the process. To completely rid your radiator of sludge, you may want to consider the following steps:
STEP FIVE: ENTIRELY REMOVE COUPLINGS FROM THE UNIONS
What you need: Adhesive tape
- Unbolt the nuts from the radiator on the side of the regulator then gently extract the supply pipe a bit far.
- Conceal the pipe thread with adhesive tape to secure it from any collisions.
- Remove the nut carefully on the lockshield side of the radiator. Beware of any excess fluids coming out.
- Cautiously put the drain pipe away and shield the pipe thread the same way you did the regulator end.
STEP SIX: DISLODGE THE RADIATOR AND EXHAUST THE REMAINING WATER
What you need: bucket or basin
- Simultaneously, shield the holes where you removed the pipes with one hand and use the other to drag the radiator upwards away from the wall bracket.
- Drain the last of the radiator water into the bucket or basin. Once finished, you may close the bleed valves and start reassembling your central heating radiator.
To get you fully prepared for this DIY task, check out this basic DIY video below:
While bleeding your radiators seem like an easy task you can totally do yourself after reading a couple of DIY tips, it is still best that you hire a professional to do the job for you. It does not only assure you that your radiator and pipe fittings remain safe and in one piece, but also ensures your safety and the safety of everyone else in your household.


